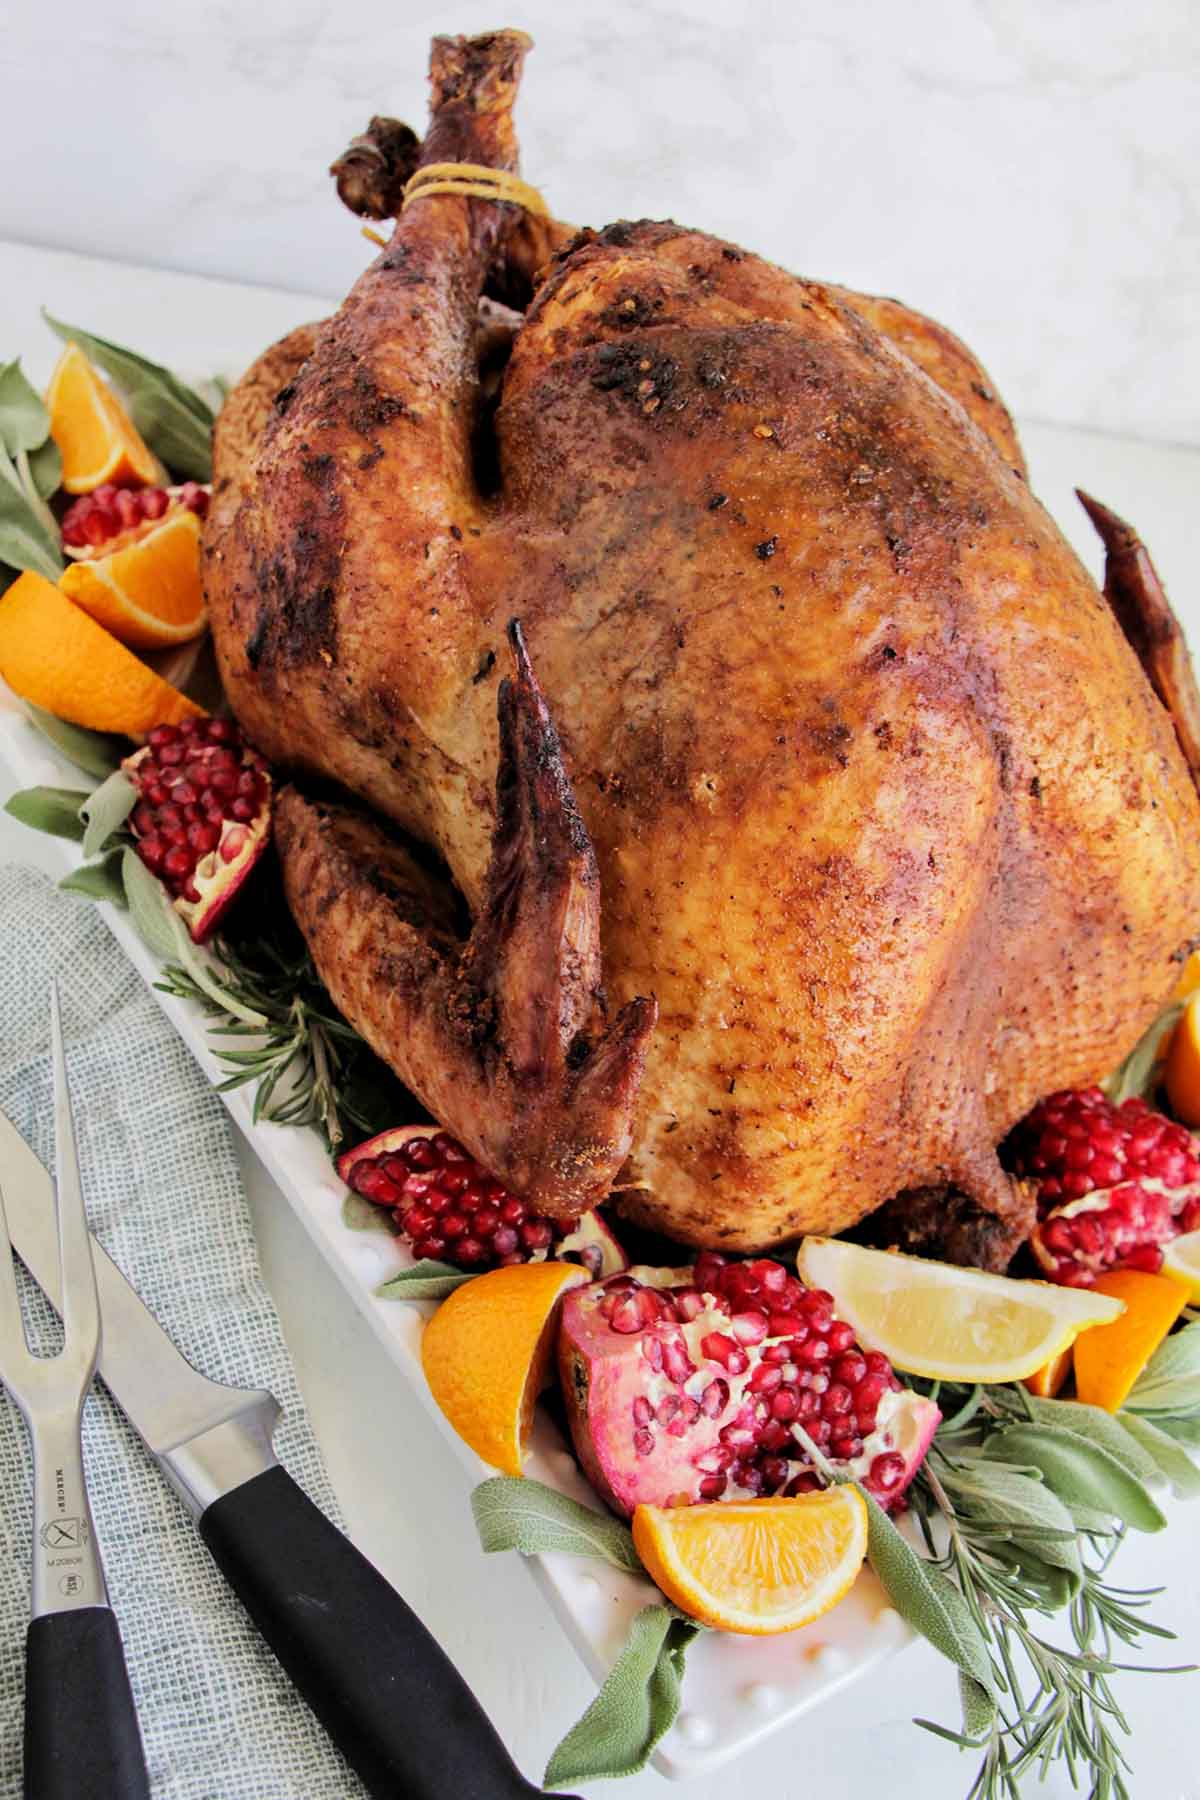
Learn how to cook a turkey from start to finish with the help of this beginner's guide. You'll learn how to brine, season, and roast the perfect Thanksgiving turkey.
Want To Save This Article?
Enter your email below and we'll send it straight to your inbox. Plus, you'll receive new weekly recipe inspiration.
Cooking a Thanksgiving turkey can be...well, intimidating! But don't worry, I'm going to walk you through the whole process from buying your turkey to brining, cooking, and carving it.
Even if this is your first time cooking a turkey, there's no need to stress! I've got pictures and a step-by-step guide that will make you feel like a professional.
If you have any questions or an emergency pre-Thanksgiving turkey disaster, throw it in the comments below, and I'll be sure to help you out.
Jump to:
Don't forget to grab a copy of my Thanksgiving timeline to help you stay organized and stress-free.
Purchasing A Turkey
Fresh vs. Frozen
Before we get started, you'll need to purchase a turkey. There are two common options when it comes to buying a turkey: Frozen and Fresh
Frozen turkey is a great option if you're looking for something affordable and easy to find at your local grocery store. This type of turkey is flash-frozen so you can purchase it weeks in advance.
Fresh turkey is ideal if you're interested in high-quality meat (organic or free-range turkeys) and you don't want to worry about the process of thawing the turkey. Typically, you're going to pay a little more for fresh turkey, and you'll need to reserve your turkey in advance.

How Much Turkey To Buy
A general rule of thumb is to plan for 1 to 2 pounds of turkey per person.
- For Small Gatherings (6 - 8 people): 6 - 12 pound turkey
- For Medium Gatherings (10 - 12 people): 10 - 18 pound turkey
- For Larger Gatherings (14 - 16 people): Two 14 - 16 pound turkeys (this is easier to cook than one large bird)
If you’re a fan of leftovers or want to send guests home with extra, aim closer to 1.5 - 2 pounds per person.
When Do I Purchase My Turkey?
It's ideal to start looking for a turkey (whether fresh or frozen) 1 month before Thanksgiving. This will ensure you find a bird that has the quality standards you're looking for.
Plus, you won't be left with a huge turkey (that's a pain to cook), or worse yet, unable to find a turkey at all.
Check with your grocery store about pre-ordering if fresh turkeys are in high demand in your area. You can reserve a bird early, then pick it up a few days before Thanksgiving.
As for frozen turkeys, many people buy them as soon as they go on sale, typically around early November. Just be sure to account for enough time to thaw it before cooking.
Thawing A Turkey
If you choose to purchase a frozen turkey, then the first step is to thaw the turkey before cooking.
This is an important step to ensure that the bird cooks evenly and is cooked to the appropriate temperature (more on that later).
Always pay close attention while thawing the turkey to ensure it's done safely (bacteria can grow if thawed improperly). There are two ways to do this:
Refrigerator Thawing
Place the still-packaged turkey on a large baking tray to catch any liquid that drains while thawing. Then, place it in the refrigerator until fully thawed.
The general rule for how long you'll need to thaw: 1 day for every 4 pounds of turkey. If you purchased a 16 pound turkey, it should thaw in the refrigerator for about four days.
After the turkey is fully thawed, it will still be safe for two more days when kept in the refrigerator according to the USDA.
This is my preferred method since it requires the least amount of effort.
Cold Water Thawing
Place the still-packaged turkey in a sink or container that's filled with cold water. Never use warm or hot water, as it will heat the turkey and could lead to harmful bacteria growth.
Change the water every 30 minutes to ensure it stays cold.
The general rule for how long you'll need to thaw: 30 minutes for every 1 pound of turkey. If you purchased a 16 pound turkey, it should thaw in the sink for about eight hours.
With this method, you'll need to immediately cook the turkey after it's done thawing.
Brining (Dry & Wet Brines)
Brining a turkey is a great option if you want to ensure your Thanksgiving turkey has a great taste and stays moist and juicy.
Before I teach you about dry and wet brines, let's chat about some important basics:
- Only do this technique with a "plain" turkey. Check the label to ensure your turkey has not been pre-brined or seasoned. Avoid turkeys that say “kosher,” “self-basting,” and “enhanced” on the label.
- The turkey should be thawed (or at least partially thawed) before brining.
- Be careful not to over-salt the turkey if you choose to brine.
- Be sure to keep the turkey in the refrigerator for the entire duration of brining to keep it cold and food safe.
- Depending on the brine recipe you use, you may want to avoid making gravy from the drippings if they are too salty. I like to remove the excess brine in the bottom of the roasting pan, so I can still make gravy.
Dry vs. Wet Brine
When it comes to brining a turkey, there are two main methods: dry brine and wet brine

Dry brine is when you rub the turkey with a salt mixture that includes various seasonings and some sugar. Then, it sits uncovered in the refrigerator.
Some pros of using a dry brine include:
- Crispier Skin: Since the turkey is not sitting in liquid, the skin dries out during the brining process, leading to crispier skin when roasted.
- Easier and Less Messy: Dry brining doesn’t require a large container or gallons of water. You simply rub the turkey with the seasoned salt and let the fridge do the work.
- Takes Up Less Space: Because you don't need to submerge the bird in liquid, it takes up much less room in the fridge.
Some cons of using a dry brine include:
- Less Moisture Absorption: Unlike wet brining, dry brining doesn't add extra water to the meat, so you need to be more careful not to overcook the turkey.
- Requires Time: A good dry brine works best if left on the turkey for at least 24 to 48 hours, so it requires advanced planning.
- Saltier Flavor: Typically dry brines will introduce more salt into the turkey.
Wet brine is a method that submerges the turkey in salty water that's enhanced with various seasonings and sugar.
Some pros of using a wet brine include:
- Extra Moisture: The turkey absorbs additional water, which helps keep it juicy during roasting.
- Even Flavor: The salt and seasonings in the water penetrate the turkey, ensuring the entire bird is well-flavored.
- Less Likely To Overcook: Because the turkey absorbs water, it’s less likely to dry out, even if overcooked slightly.
Some cons of using a wet brine include:
- Requires a Lot of Space: You’ll need a large container and enough fridge space to store the turkey fully submerged in the brine.
- Can Get Messy: Handling a large turkey in gallons of brine can get messy (trust me on this one).
- Less Crispy Skin: Wet brining can make it harder to get crispy skin.
Guide To Dry Brining
Here's a step-by-step guide to walk you through how to dry brine a turkey:

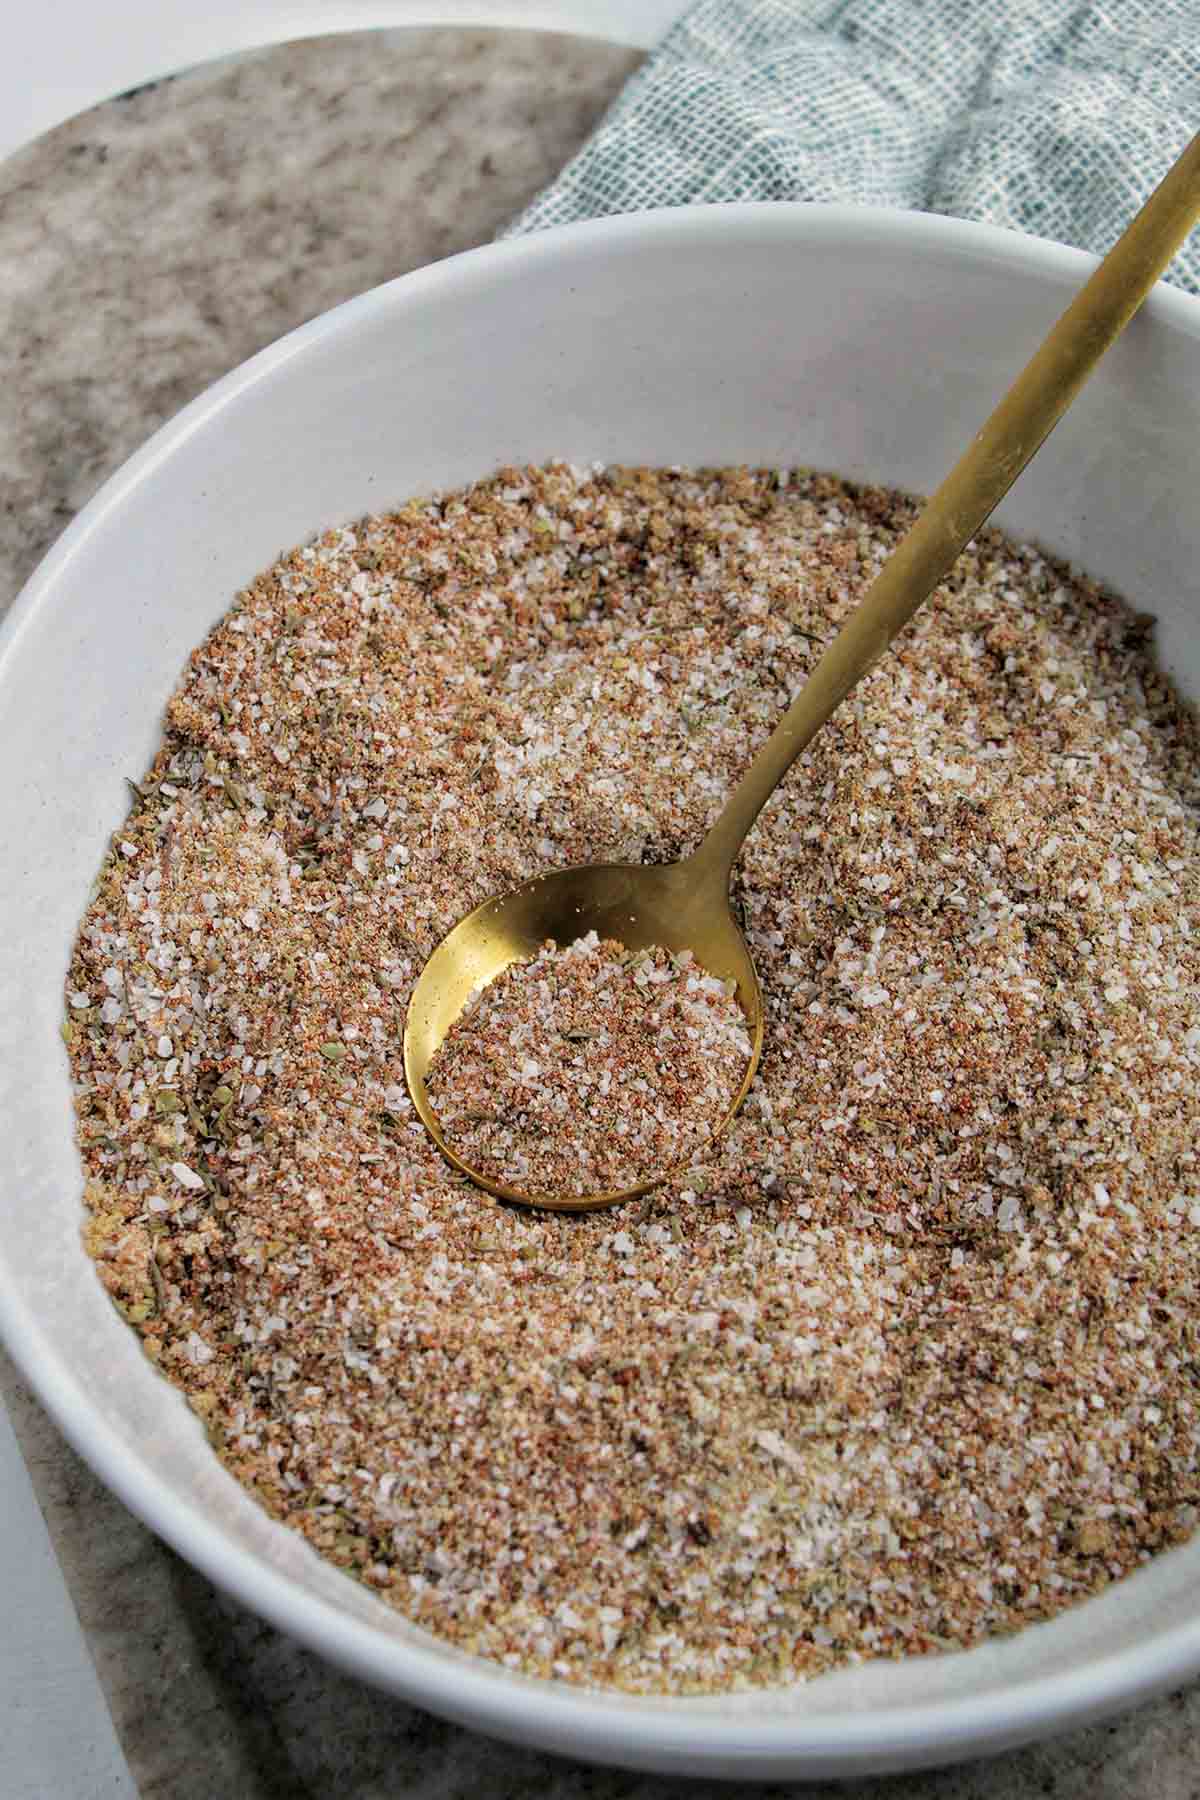
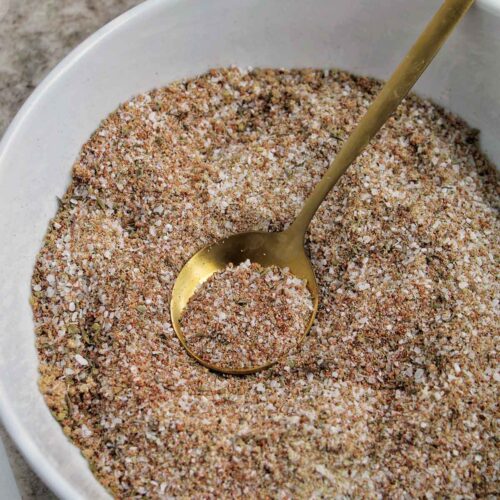
1. Mix the seasonings together in a mixing bowl. I like to use salt, brown sugar, garlic powder, onion powder, paprika, black pepper, oregano, and thyme in my dry brine recipe.
2. Remove the thawed turkey from the package, and place it on a wire rack on top of a baking sheet. Remove the neck and giblets from the inside of the cavity (toss or store in the refrigerator to use later).
3. Loosen the turkey skin on the breast. Rub the turkey with the dry brine including underneath the breast skin, inside the cavity, and all along the outside skin and legs.
4. Place the baking sheet with the turkey uncovered in the refrigerator for 24–48 hours to allow the turkey to season and the skin to dry out.
Guide To Wet Brining
Let me teach you the exact steps you'll need to wet brine a turkey:
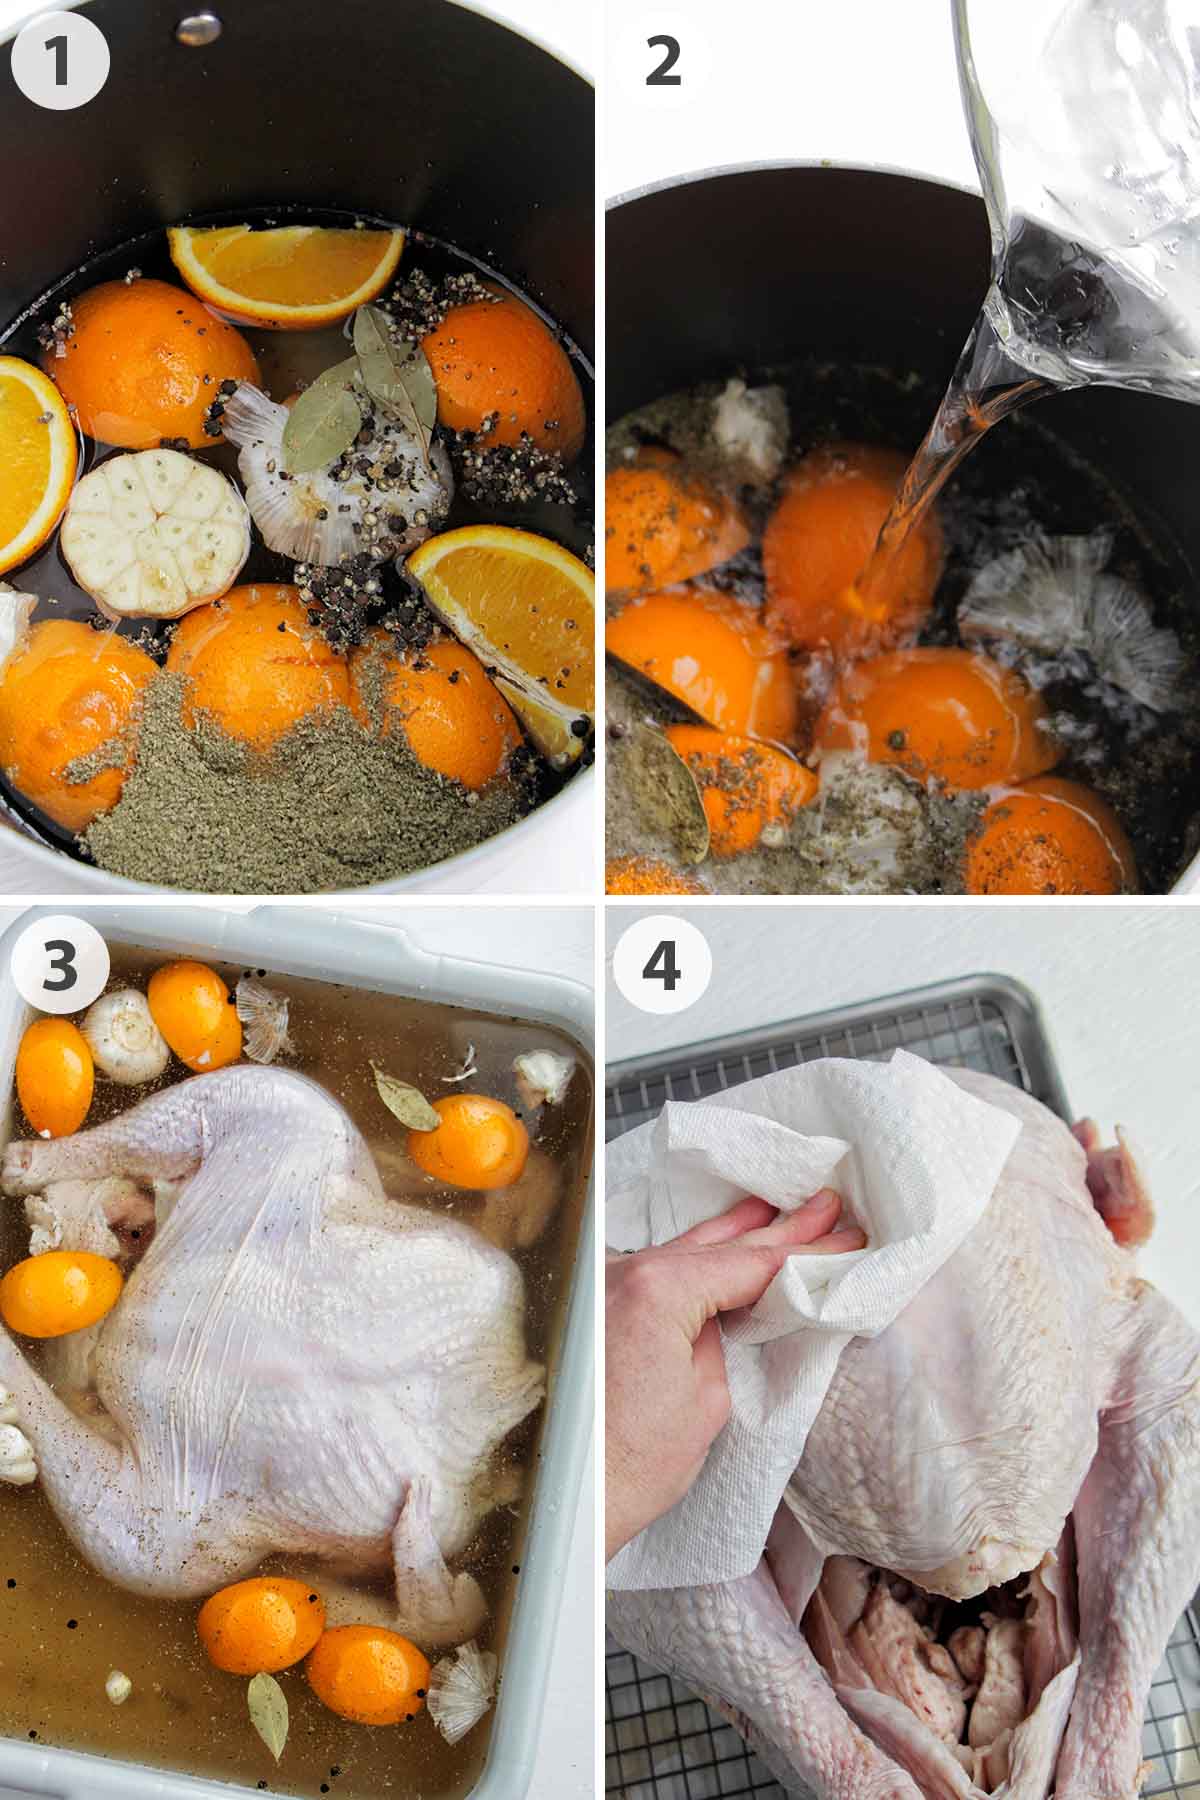
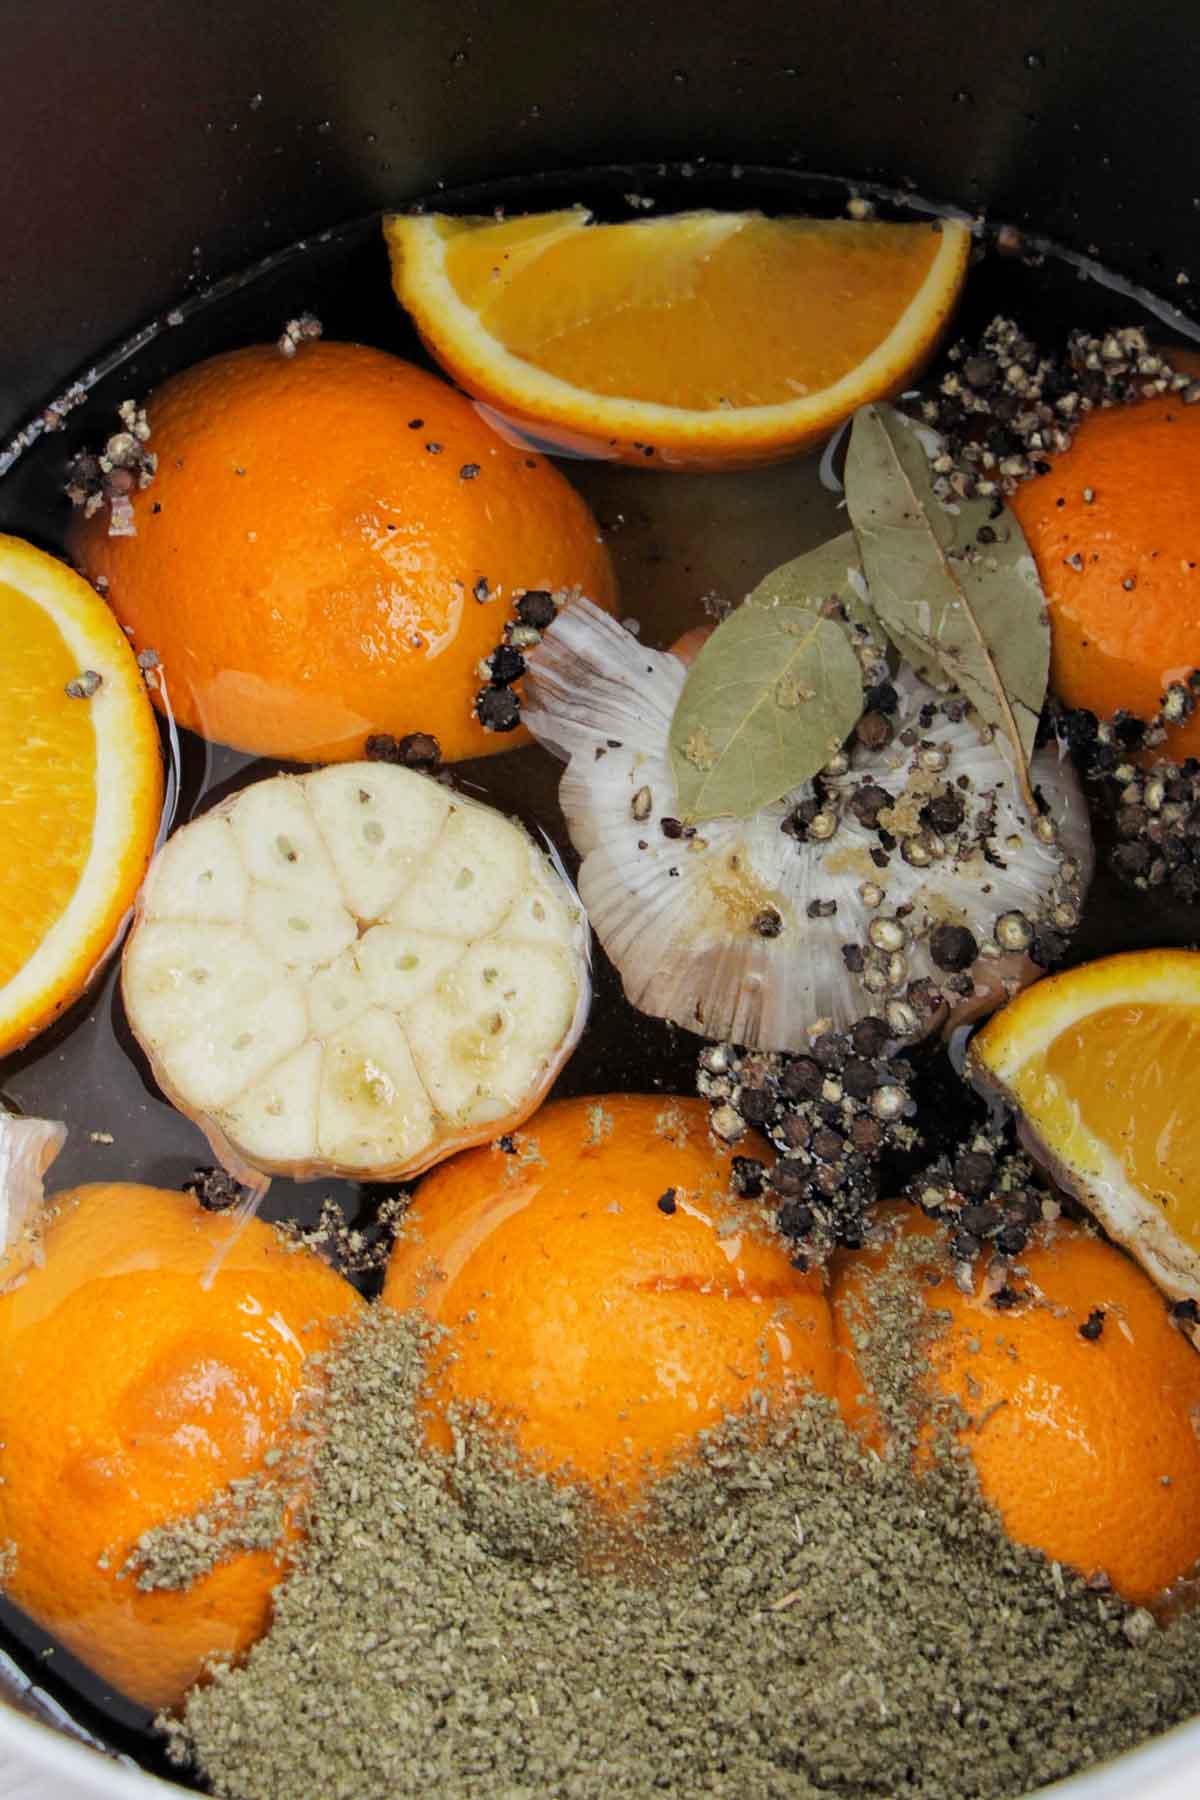
1. Add some water, along with salt and your choice of sugar and seasonings, to a large pot (here's my wet brine recipe). Cook on high heat until the salt has dissolved.
2. Remove the mixture from heat, and add in additional water along with ice. Allow the mixture to cool to room temperature.
3. Separate the thawed (or partially thawed) turkey from the package, and place it in a large pot or food-safe container. Remove neck and giblets from the inside of the cavity (toss or store in the refrigerator to use later).
Then, pour the cooled brine over the turkey. Add more water as needed to ensure the turkey is completely covered.
4. Place the container with the turkey uncovered in the refrigerator for 12–24 hours to allow the turkey to season. If the turkey is floating above the water, weigh it down with a dinner plate.
When you're ready to roast the turkey, pat it dry with paper towels.
How To Season Turkey
Before we get to cooking the turkey, it's important to consider how you want to flavor or season the bird. Here are some of my favorite ideas:
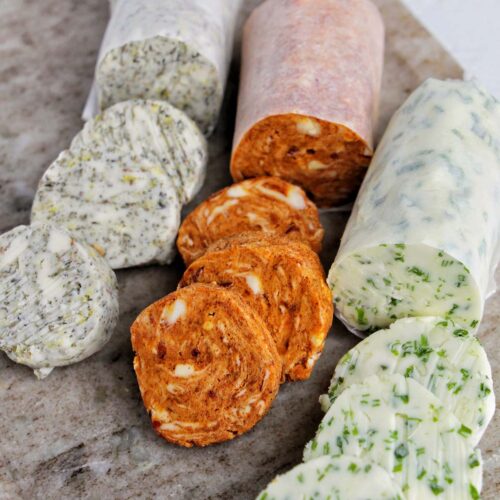
Compound Butter
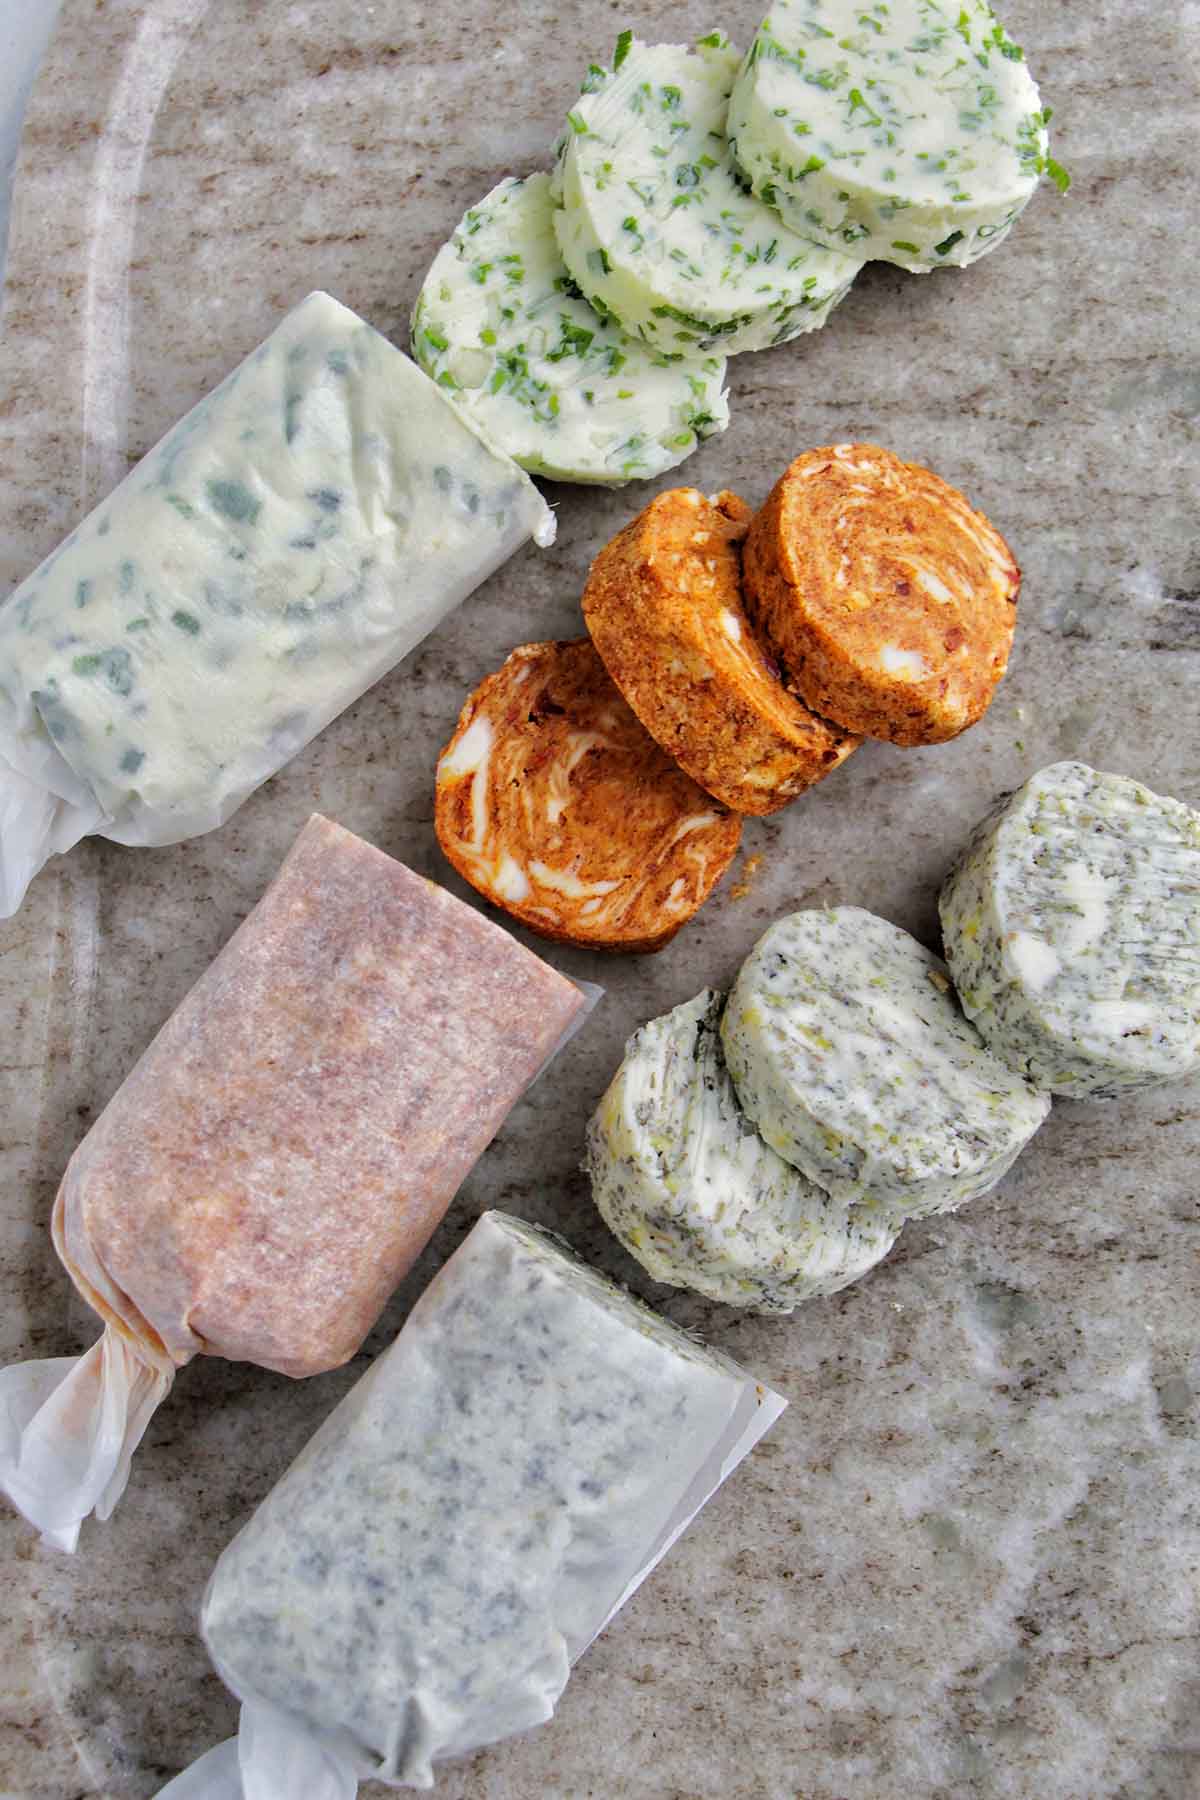
Butter is essential for roasting a turkey. Not only does it impart amazing flavor, but it helps the meat stay juicy and moist.
When using compound butter, you'll rub it between the skin and the body. You can also use some additional melted compound butter to baste the bird as it's cooking.
Here are some compound butter recipes that I use when making turkey.
Stuffing the Cavity
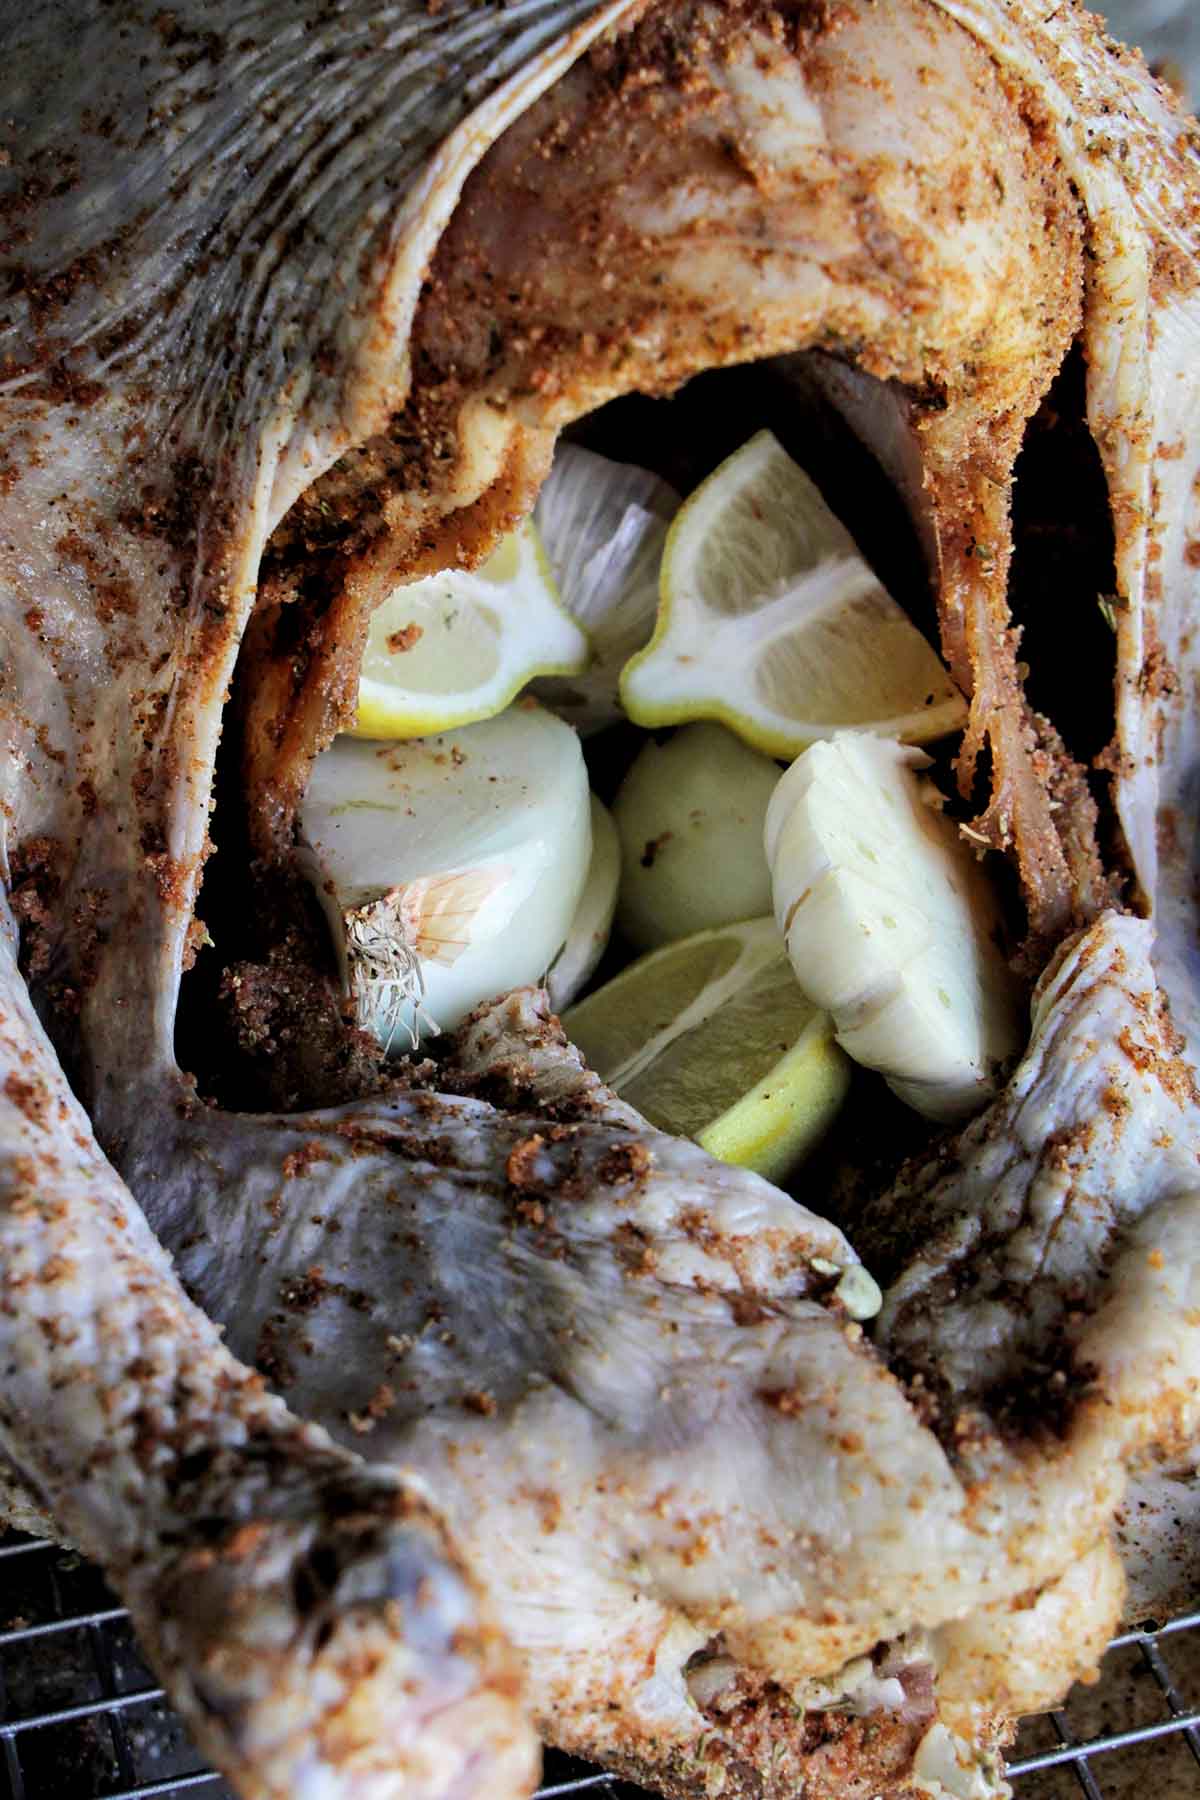
It's not recommended to stuff the inside cavity of the turkey with stuffing due to the increased risk of cross-contamination and harmful bacteria. Not to mention, a turkey filled with stuffing will need to cook longer, therefore making it less juicy and likely to be overcooked.
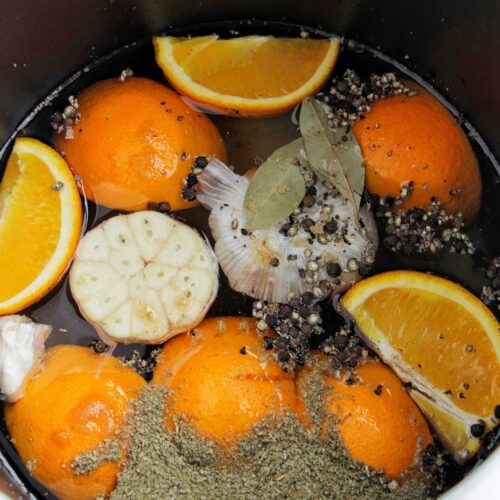
So instead, I'd recommend filling the turkey cavity with various aromatics that will infuse flavor into the bird. After you've removed the neck and giblets from the turkey, generously season the inside cavity with salt and pepper.
Then, add in any (or multiple) of the following aromatics:
- Onion (no need to peel, just chop into smaller to handle pieces)
- Garlic (no need to peel, just chop the entire clove in half)
- Fresh herbs like rosemary, thyme, bay leaves, or sage.
- Carrots or celery (no need to peel, just chop into smaller to handle pieces)
- Lemon or orange (chopped into smaller to handle pieces)
Optionally truss (tie) the legs with kitchen twine to help the aromatics stay inside the bird and to allow the undersides of the legs to brown more evenly.
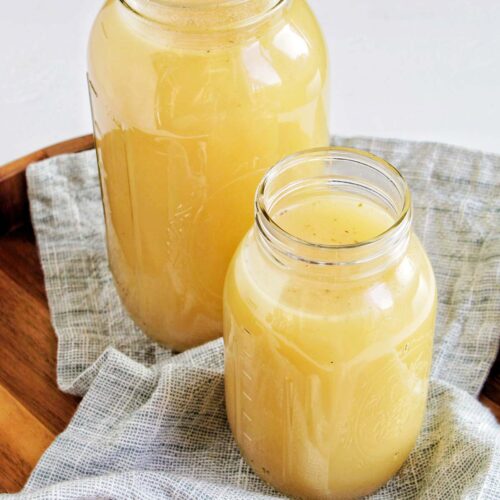
Liquids in the Roasting Pan
You'll always want some kind of liquid in the bottom of your roasting pan. This ensures that the drippings don't burn (you'll want to save these for homemade gravy).
Plus, the liquid cooks up into the bird and adds even more flavor to the turkey. Some of my favorite liquids to use include:
- White wine
- Chicken stock
- Apple cider
- Light beer
However, if none of these appeal to you, opt for water in the bottom of the roasting pan.
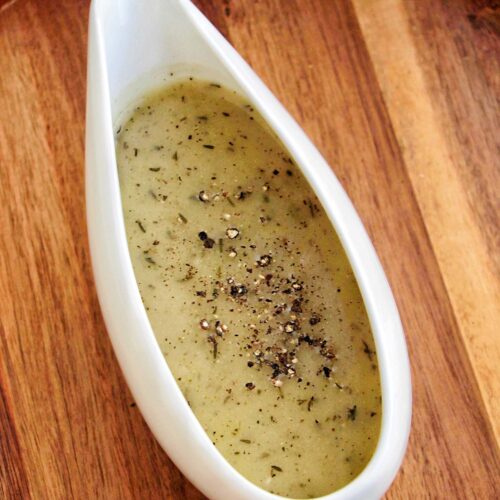
Glaze
A glaze can be brushed onto the turkey as it's cooking (after the skin has browned) to add a fun and unique flavor to the bird. Similar to basting the turkey, you'll add this in multiple layers throughout the cooking process.
Popular glaze options include:
- Brown sugar
- Maple
- Honey
- Citrus
- Spicy (like chipotle)
Seasonings/Rubs
Last, but not least, you can always use seasonings or rubs to give the turkey amazing flavor.
You'll always want to use salt and pepper as a base seasoning, no matter what other flavorings you choose. Be sure to liberally sprinkle the inside cavity, and outer skin with both salt and pepper.
If you brined your turkey, take this into account when adding additional salt to the turkey. I'd recommend not adding salt until you've cooked and tasted the final turkey if it's been brined.
Aside from salt and pepper, you can use your favorite dry rubs such as herb-based seasoning, cajun, or any of your other favorite flavor combinations.
Just be sure the seasoning or rub doesn't have ingredients that will easily burn when you roast the turkey in the oven at a high temperature to brown the skin.
How To Cook Turkey
Next, let's move on to cooking the turkey. This is obviously an important step with all of the effort you've put into the prep work.
I'll show you step-by-step what to do so that you don't feel intimidated or stressed!
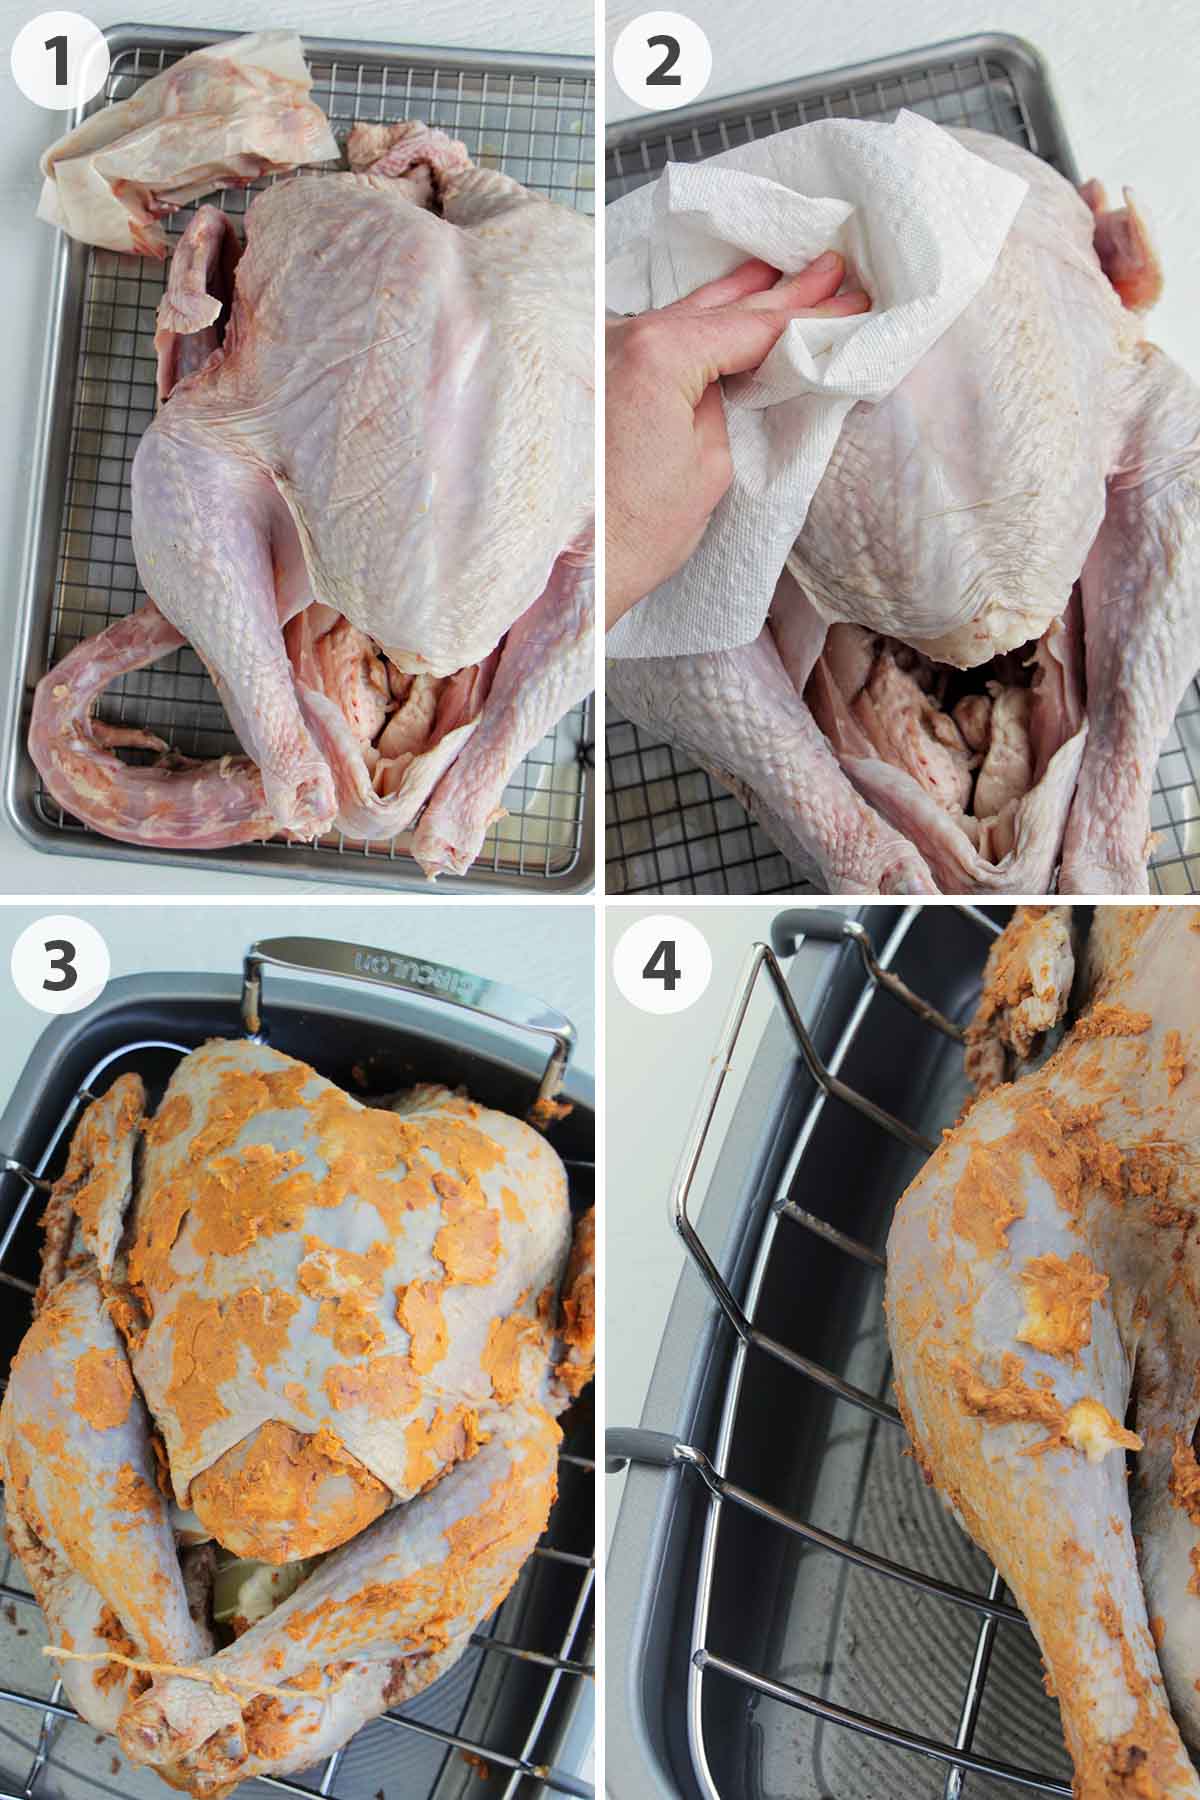
1. Remove the neck and giblets from the inside of the cavity (toss or store in the refrigerator to use later). Then, allow the turkey to come to room temperature for about 1–2 hours.
2. Pat the turkey dry with paper towels.
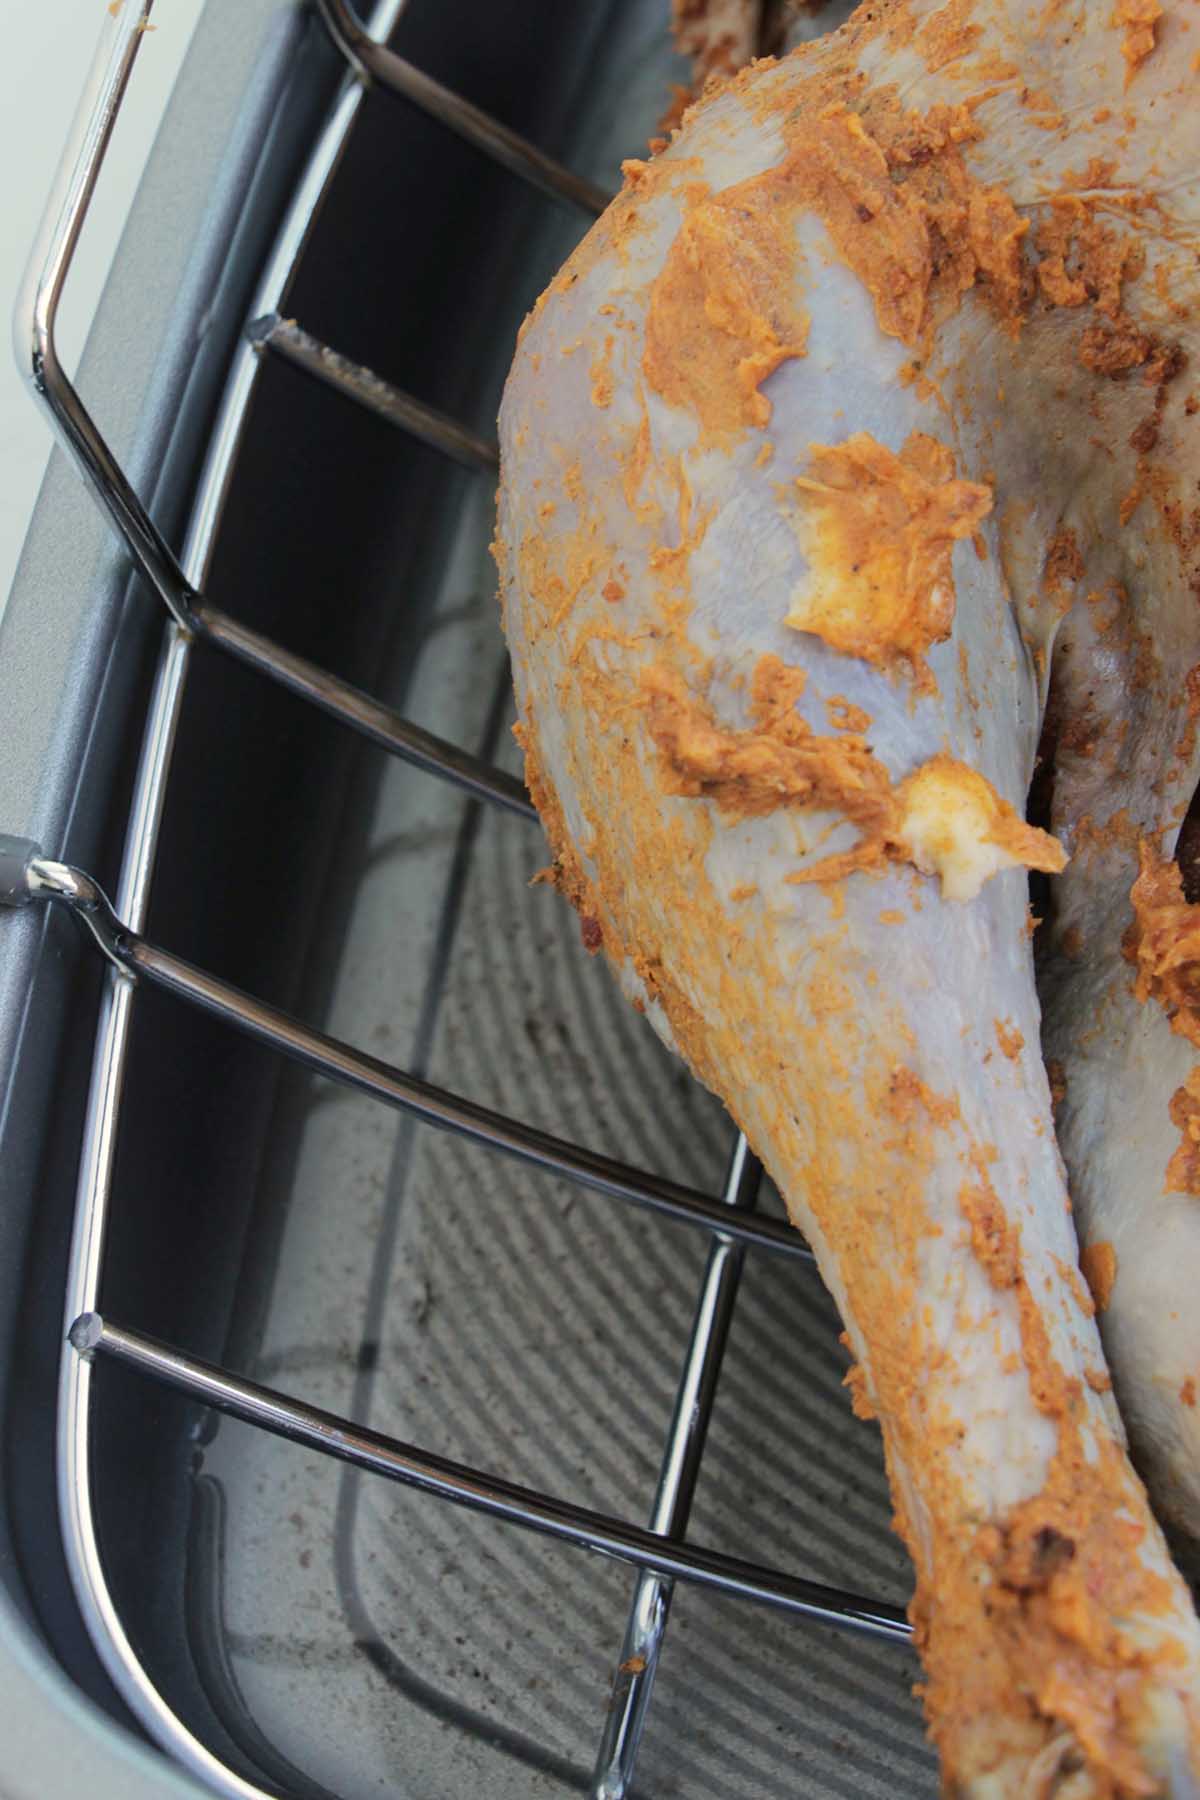
3. Loosen the turkey skin on the breast. Generously, spread one-third of the compound butter under the skin and the remaining two-thirds on the outside of the turkey skin.
Season the outer skin with salt and pepper (you may want to omit this if you used dry brine).
4. Fill the cavity with garlic, lemon, and onion then tie turkey legs together with kitchen twine.
Pour chicken stock and white wine into the bottom of the roasting pan.
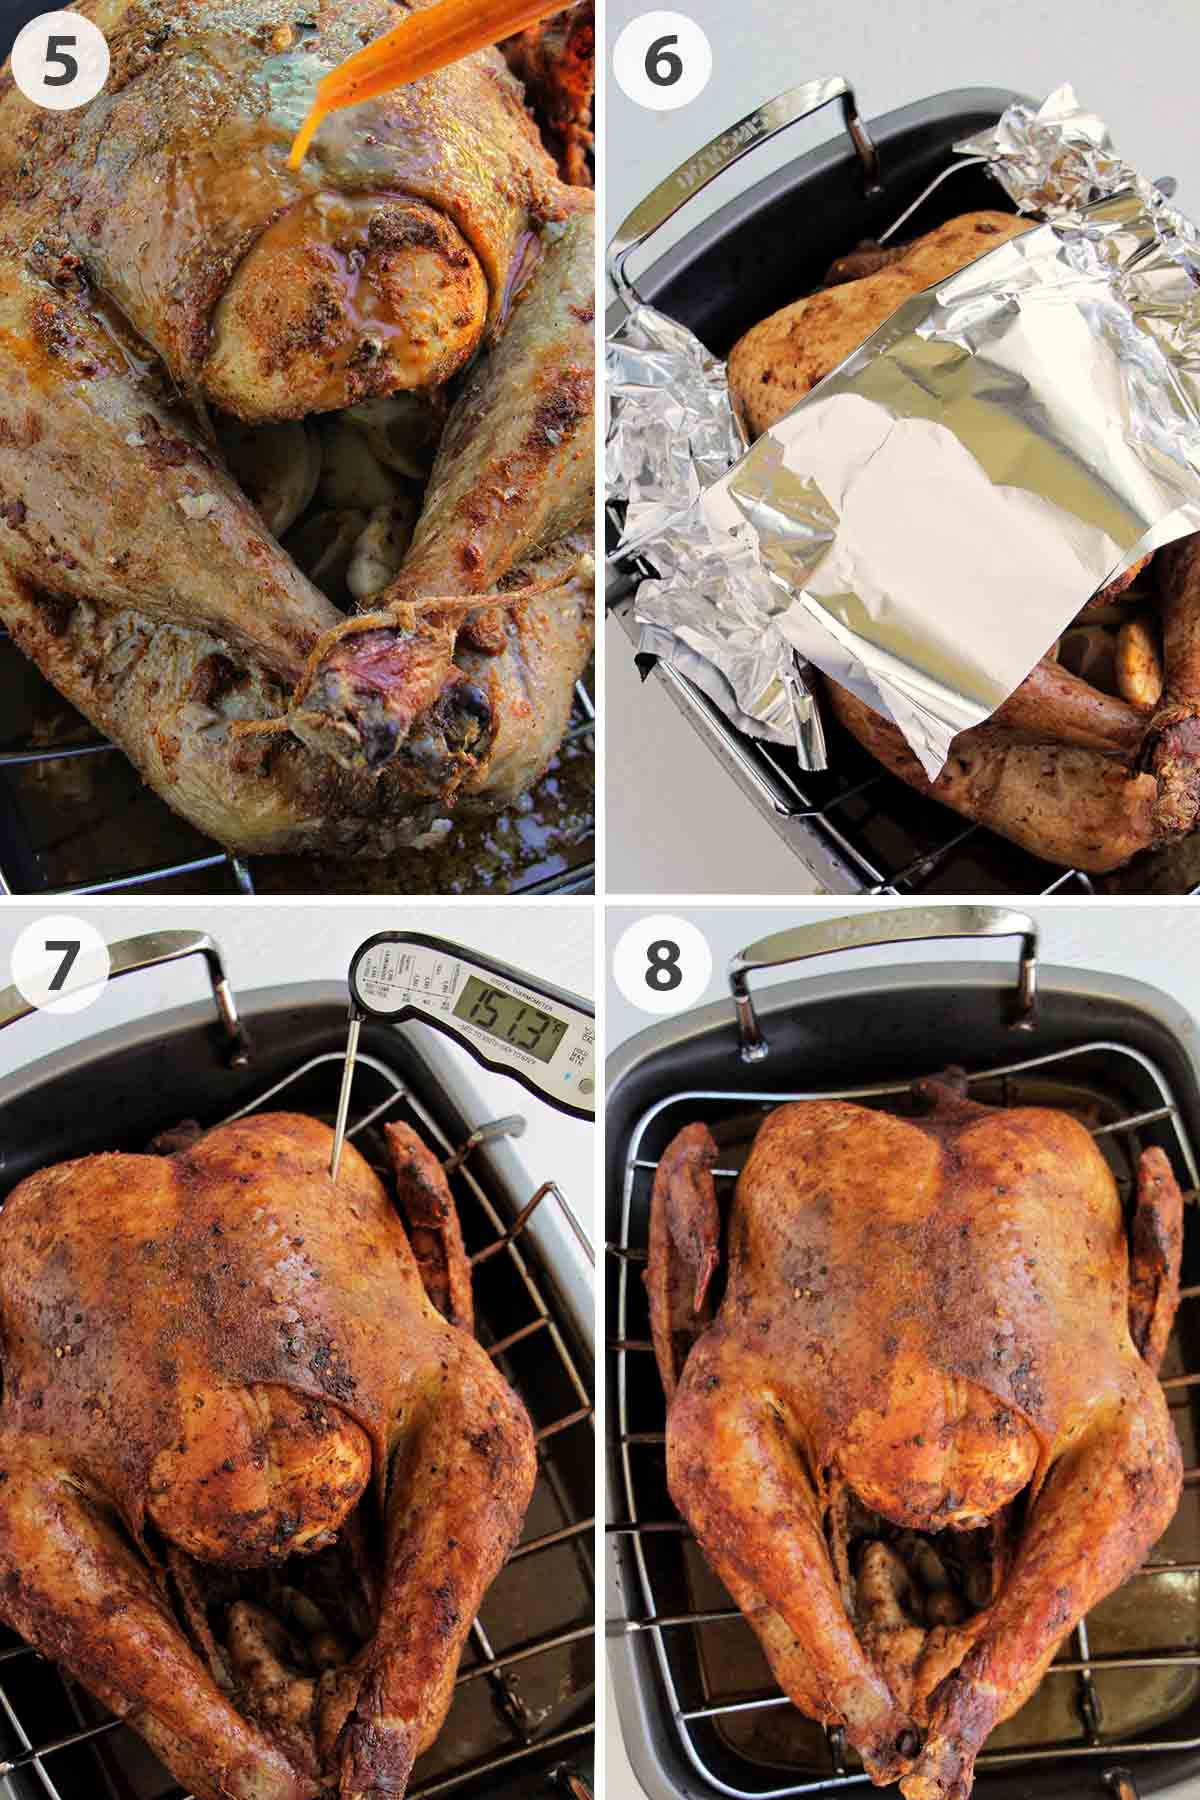
5. Next, it's time to roast the turkey in a 325°F (165°C) preheated oven.
Every 30 minutes baste the turkey by pouring drippings at the bottom of the pan over the turkey skin (this helps to keep the meat moist) then brush the skin with olive oil to achieve a golden brown color and crispy skin.
6. Once the skin is golden brown, loosely cover with aluminum foil to prevent overcooked breast and burnt skin.
7. Cook the turkey for 2+ hours (see suggested cooking times in the recipe card below), until the thickest part of the turkey breast reaches 155°F (68°C) on a digital thermometer.
8. Allow the turkey to rest for 45–60+ minutes before carving.
Carve & Serve A Turkey
After you've spent all that time cooking a delicious turkey, it's important to properly carve and serve it up to your guests. Here's a step-by-step guide so you know exactly what to do.
I'd suggest having a carving fork and carving knife on hand.
1. Allow the turkey to rest for 45–60 minutes after it's done cooking. This helps the juices redistribute throughout the turkey. If you have more time, allow the turkey to rest even longer — it'll be even more juicy!
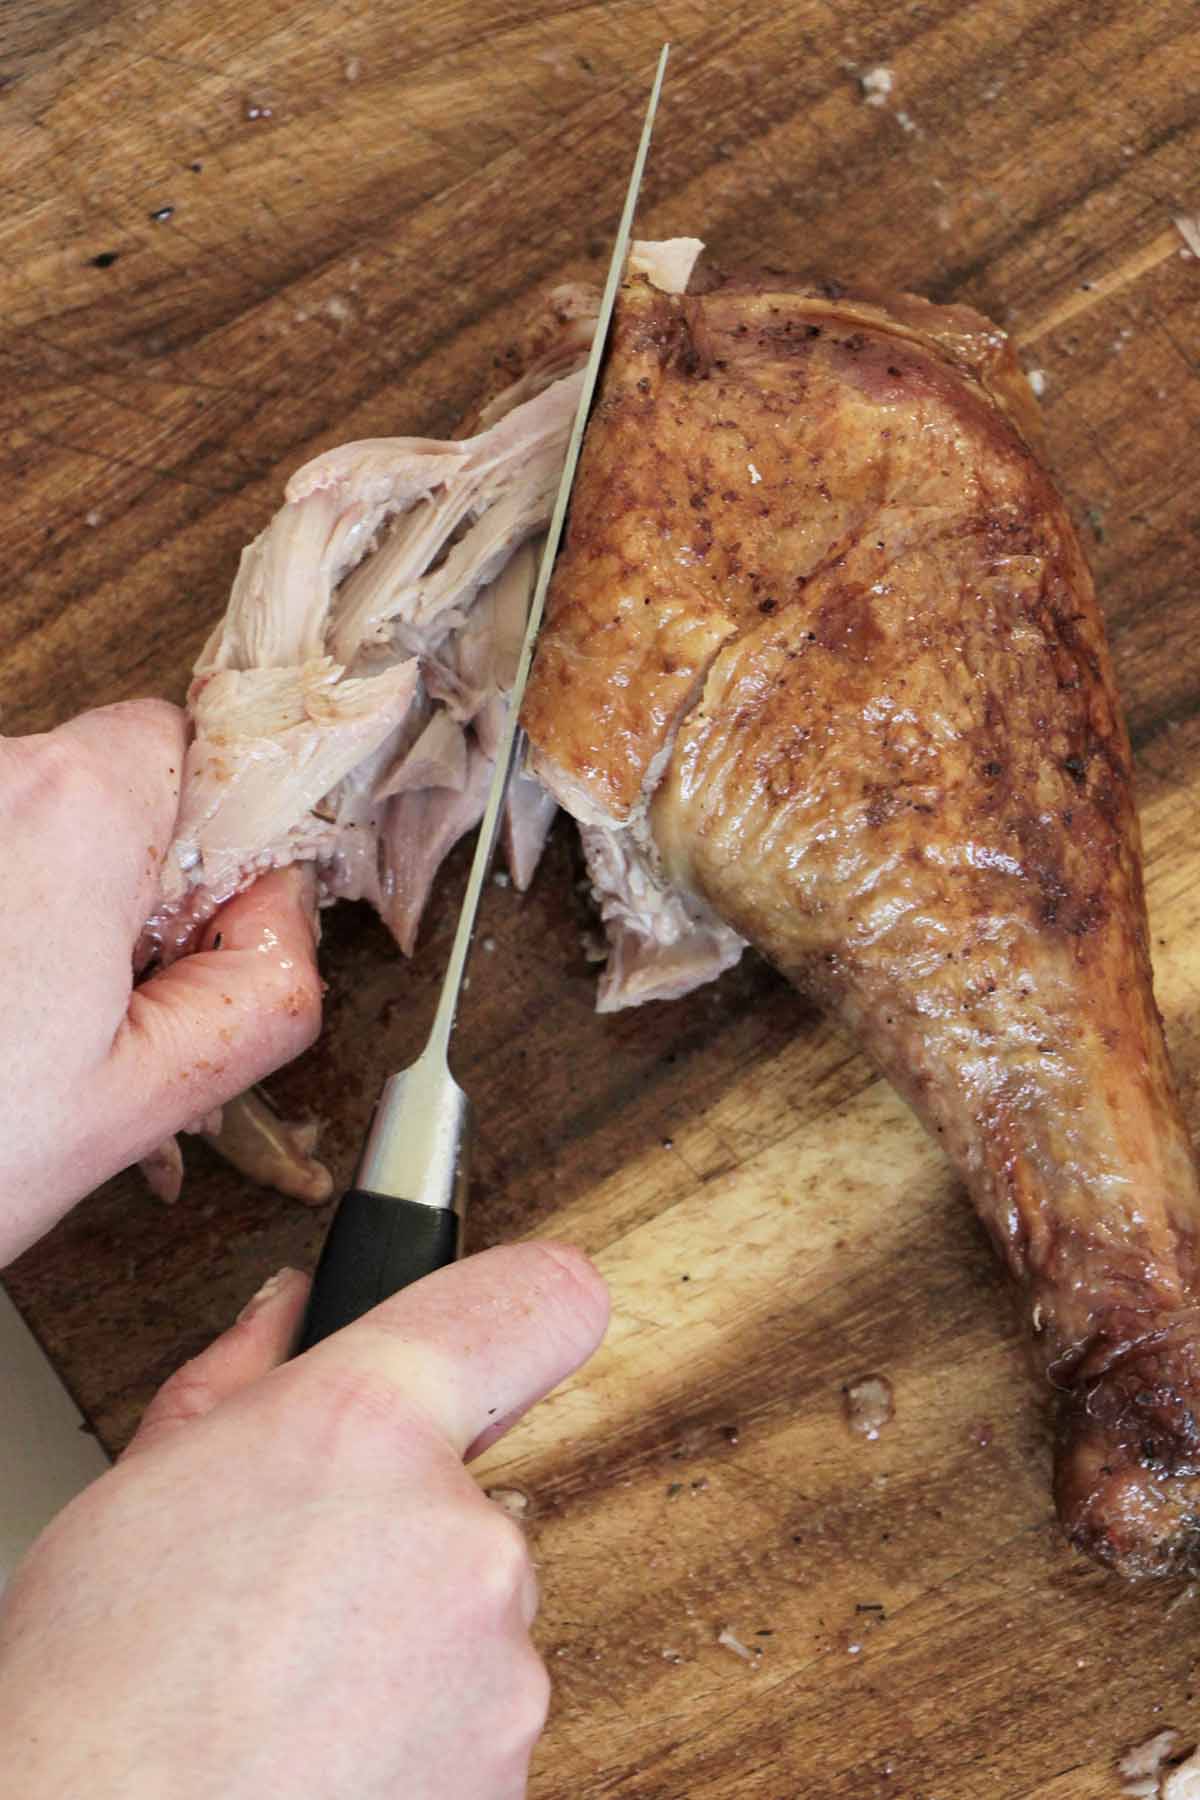
2. Next, use the carving fork to hold the leg of the turkey. Pull the leg outward, and locate the joint. Cut through the joint with the carving knife to fully remove the leg (and thigh that's also attached).
Repeat this process with the other side.

3. Slice the meat off the thigh. Hold the leg bone, then slice the meat parallel to the bone.
4. Separate the thigh from the leg by cutting through the joint. This takes a little effort to separate the two.
Repeat this process with the other side.
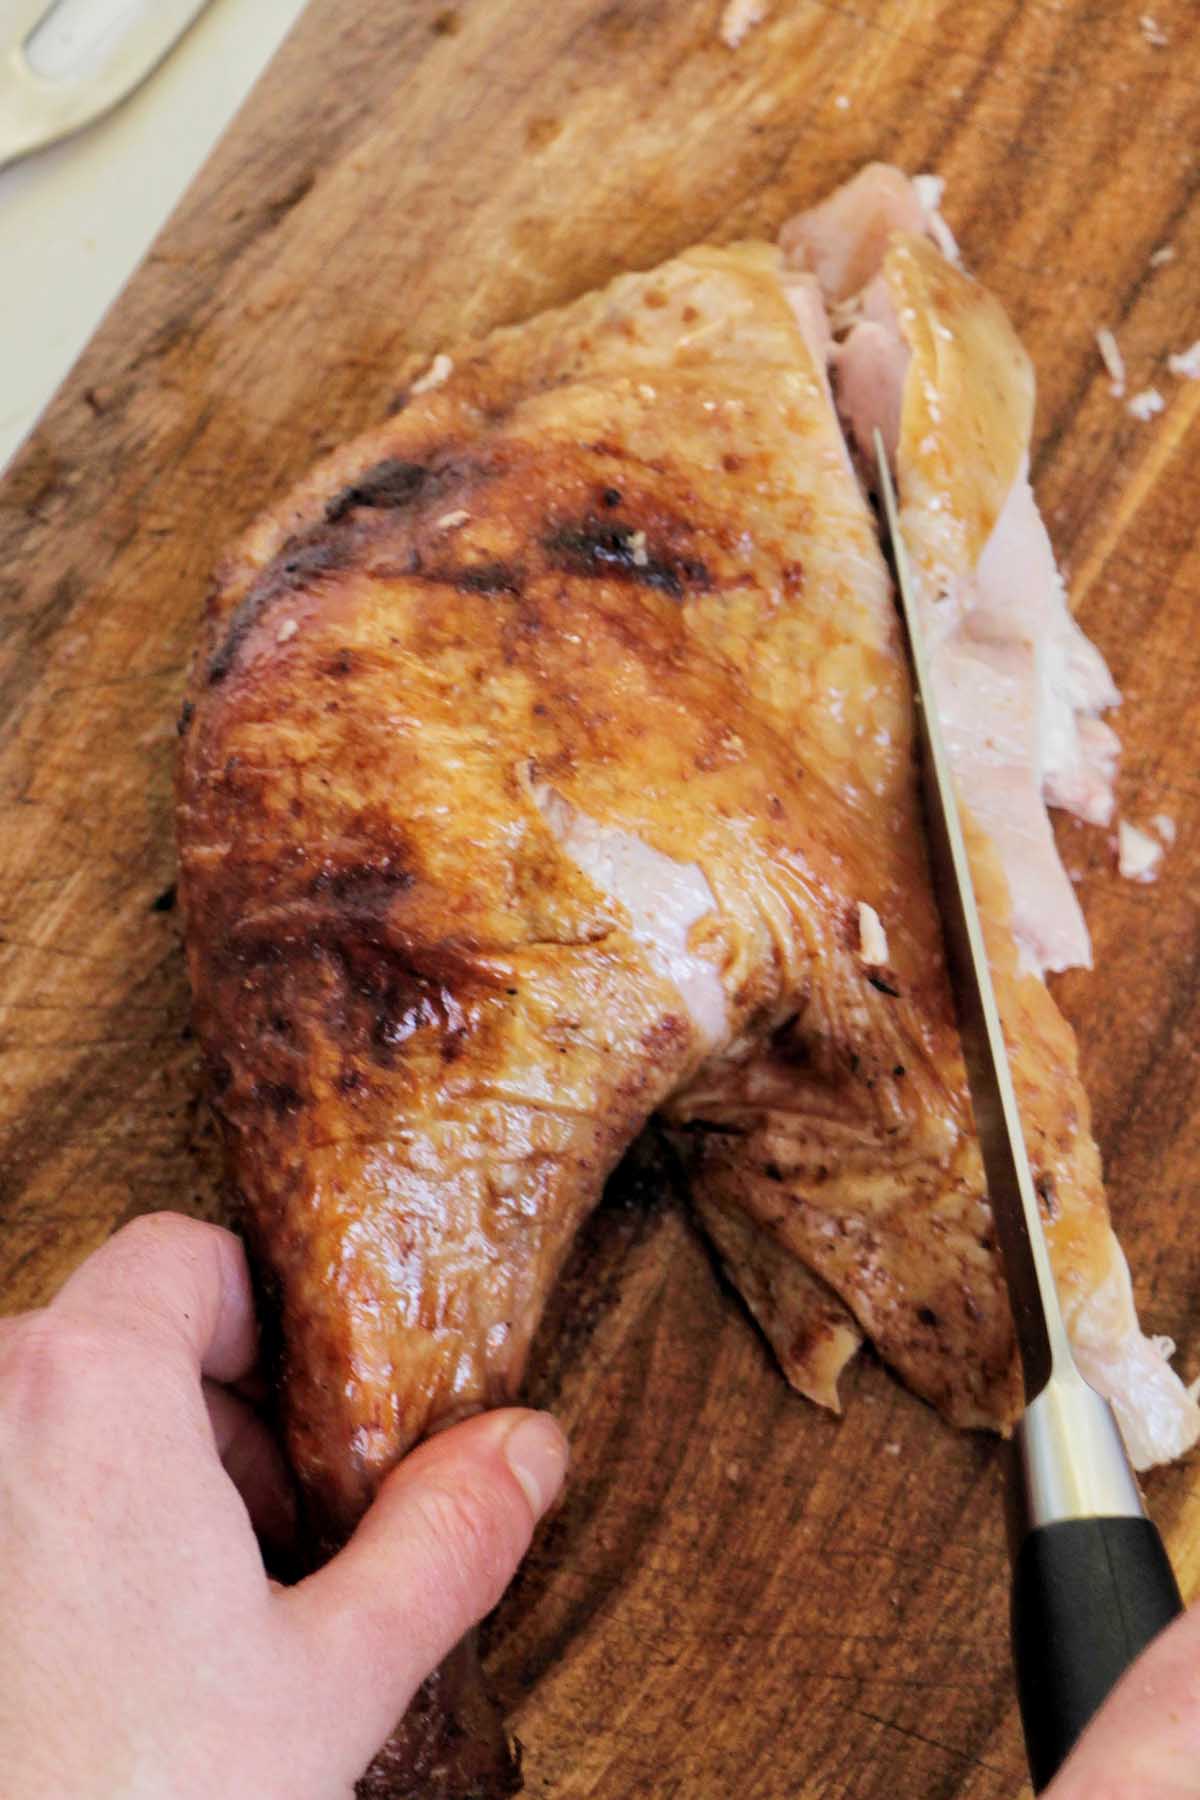
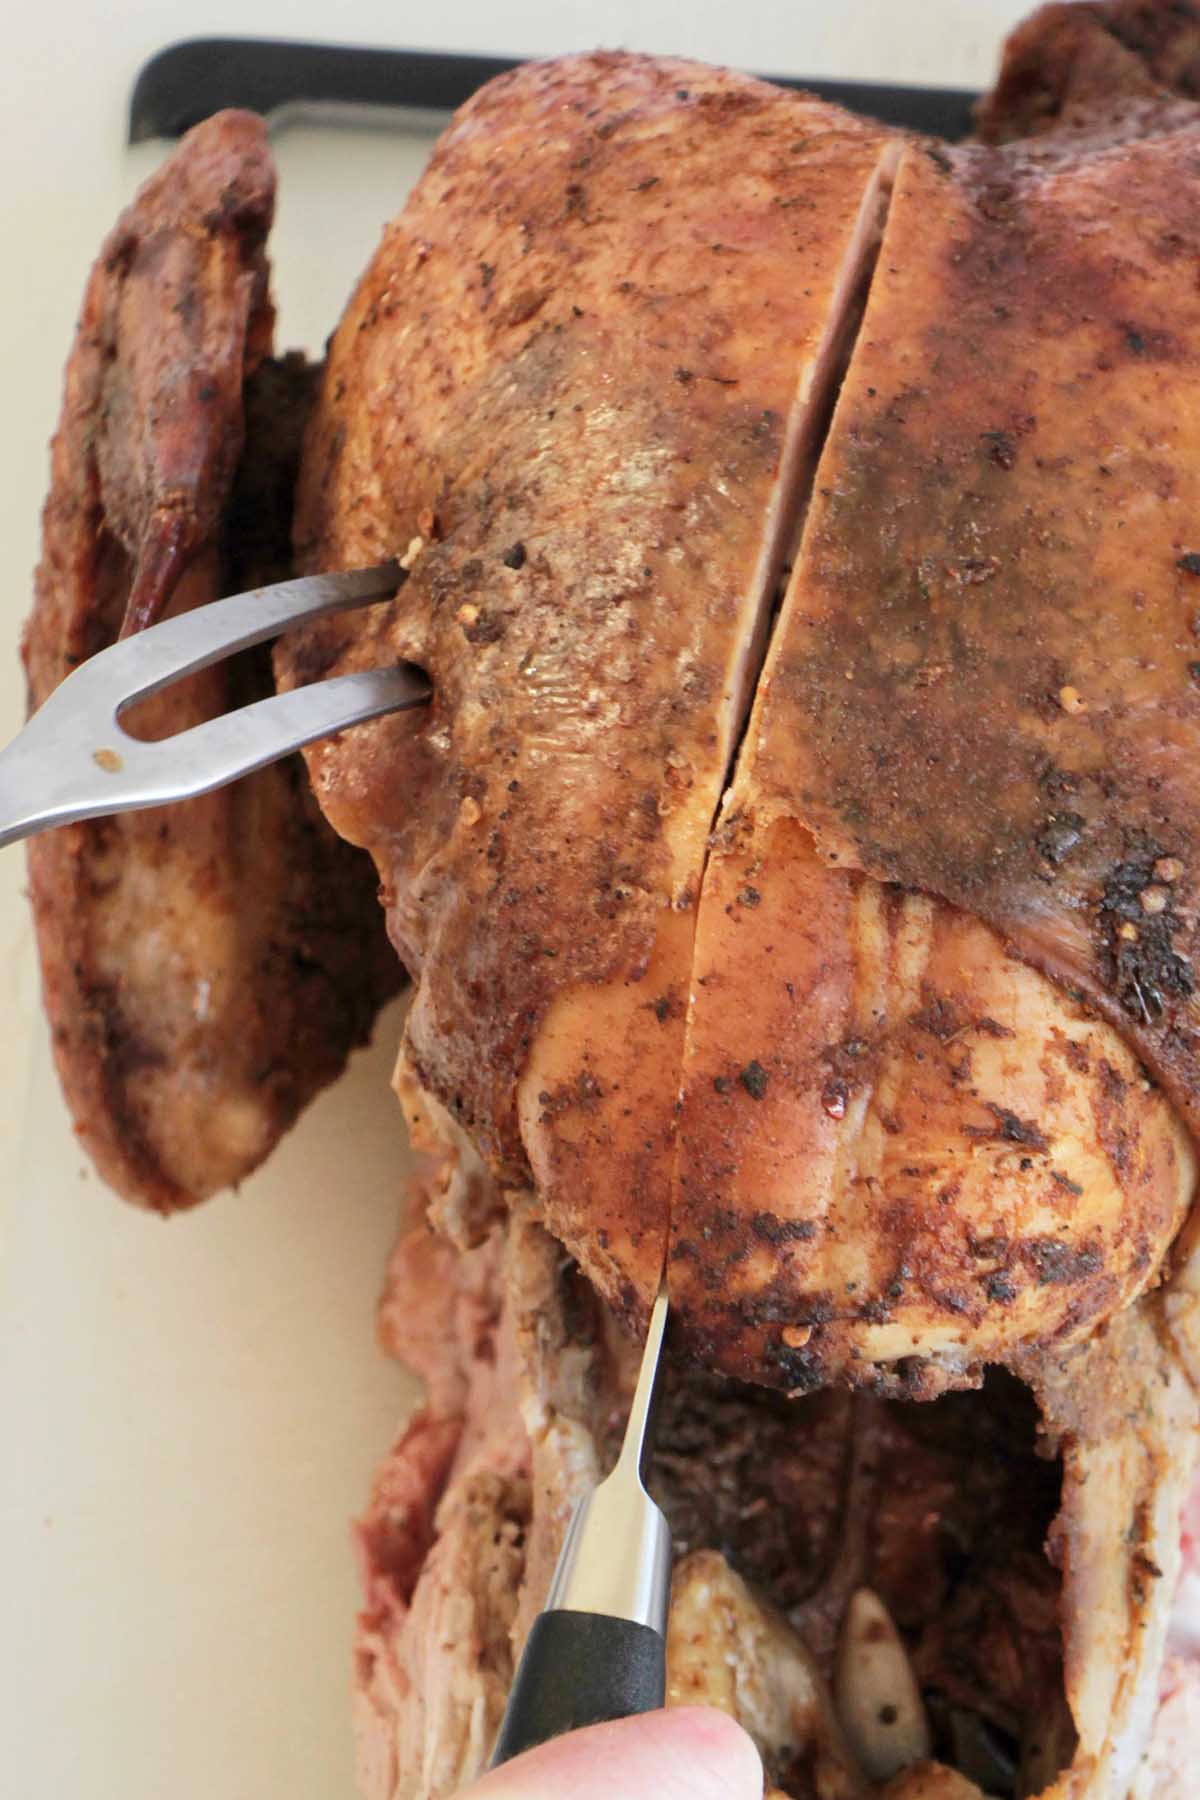
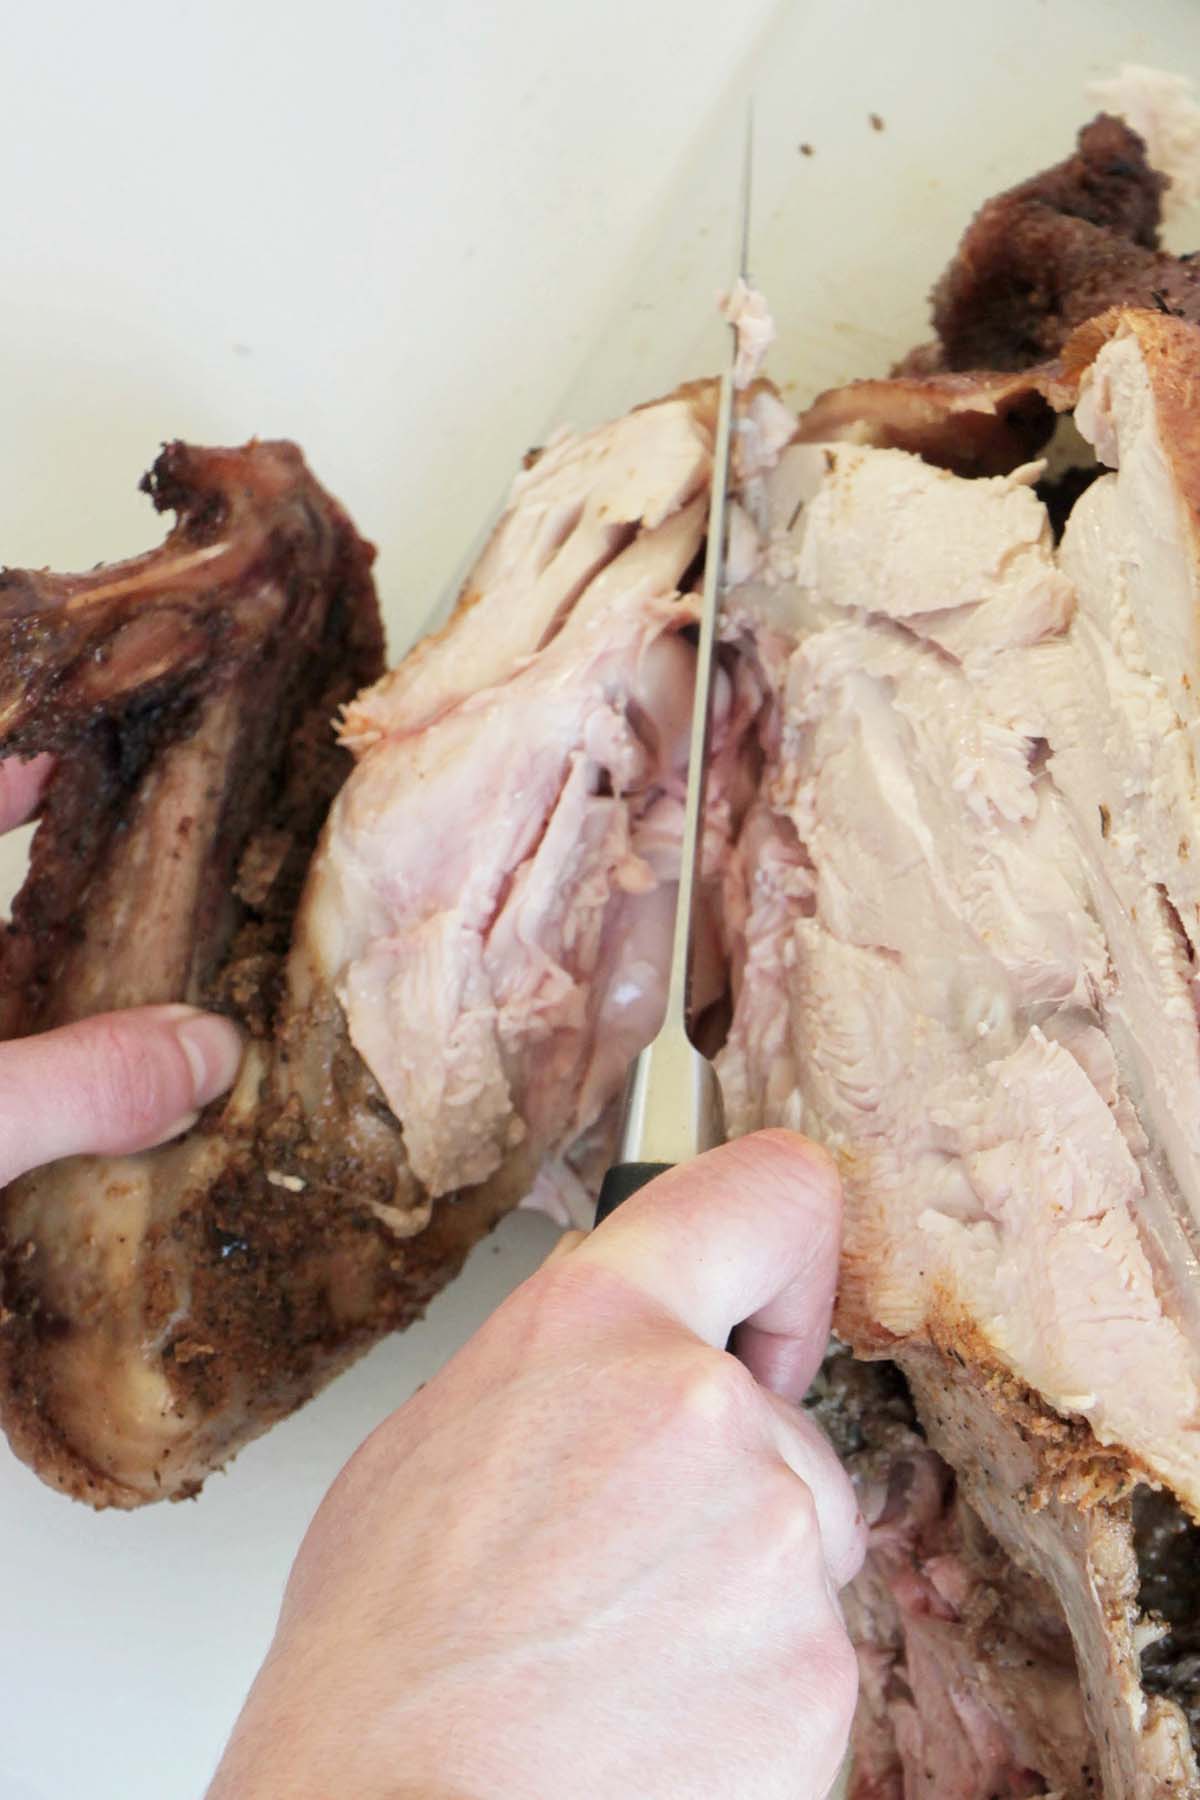
5. Next, it's time to remove the breast meat from the ribs. Use the knife to cut along the backbone. You'll naturally follow the curves of the backbone until the breast meat is completely removed.
Cut the breast meat off the other side of the turkey.
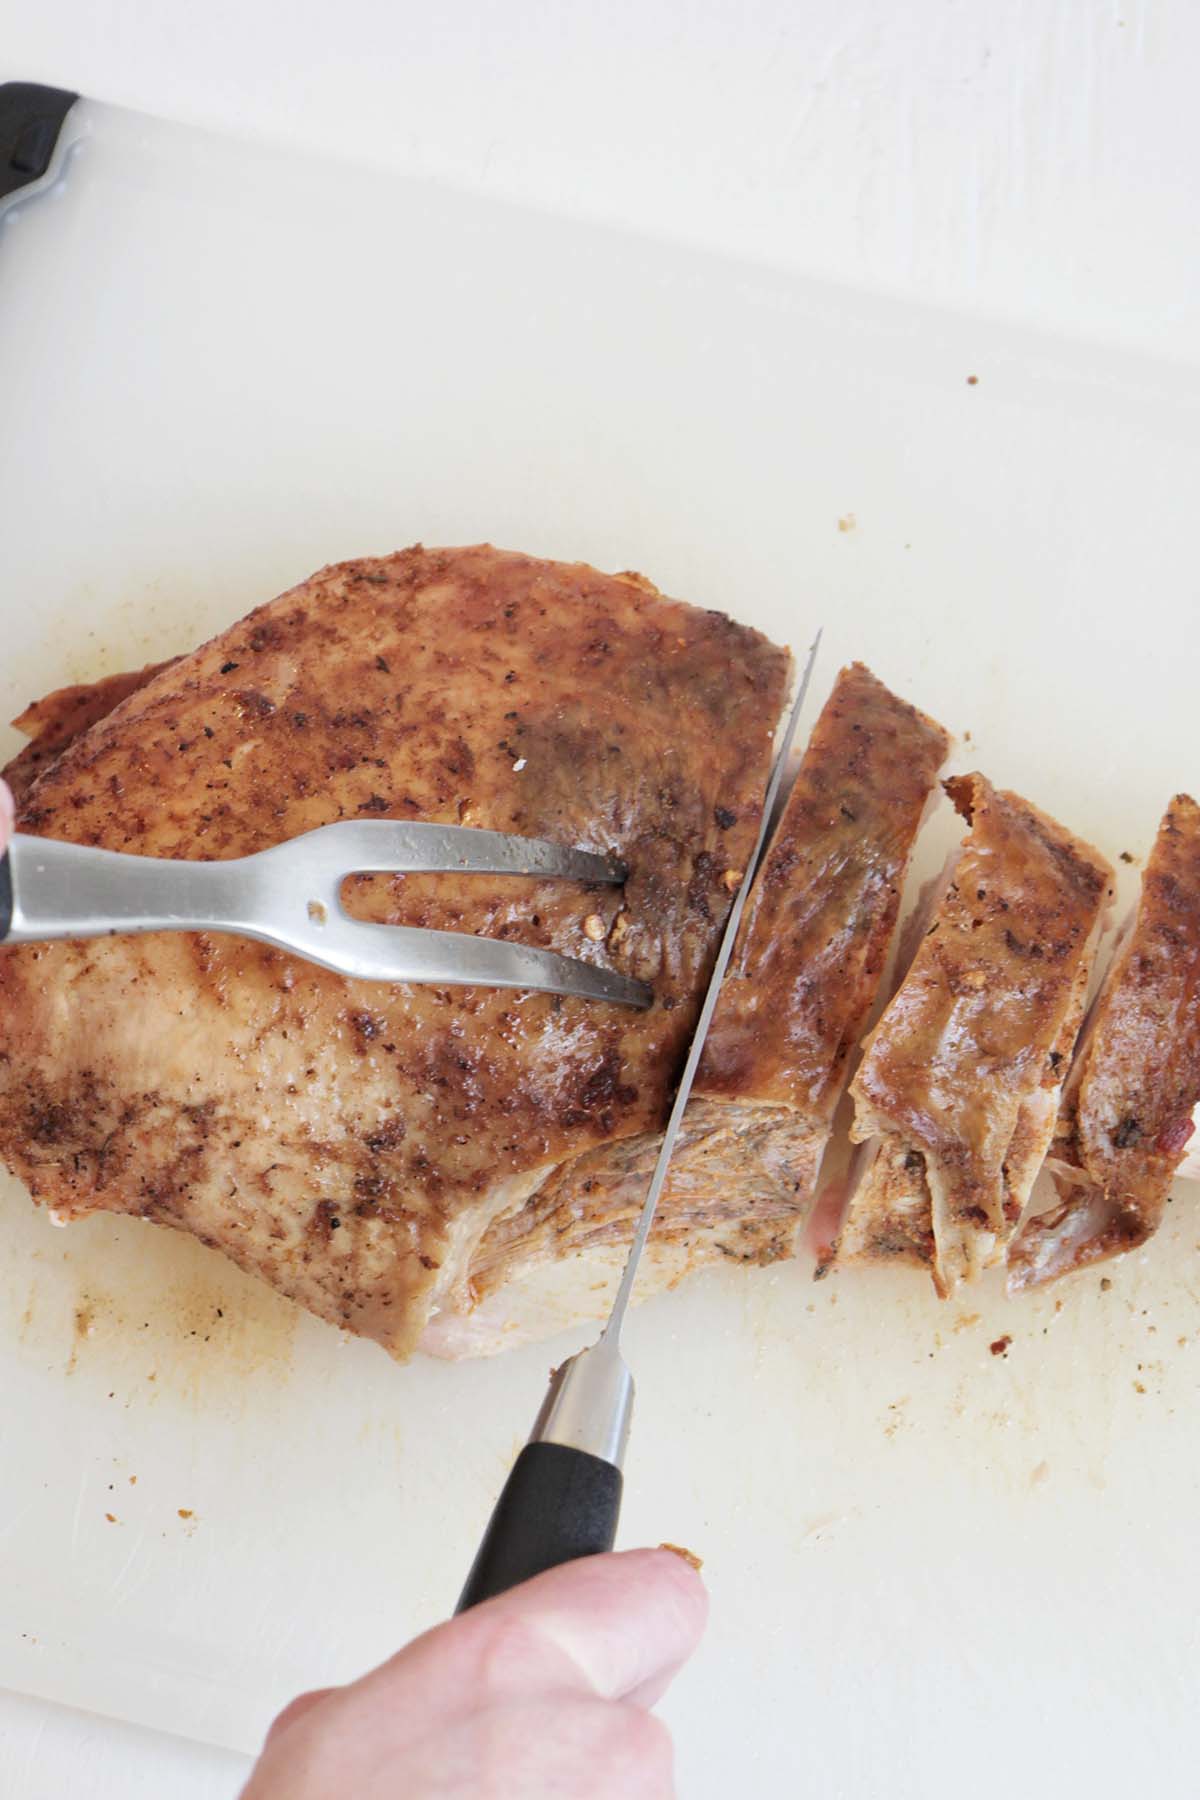
6. Hold the breast meat with the carving fork, then slice it into thin pieces at an angle (this helps to yield larger pieces).
7. Cut through the wing joint to remove it from the carcass on both sides.
8. Arrange the sliced turkey on a serving platter. I like to add the legs, and wings along the side or middle of the platter. Then, fan the sliced pieces of turkey along the outer edges.
Expert Tips
- If you brined the turkey, you may want to hold off on adding additional salt to the turkey to avoid over-salting.
- Leftovers: Store leftovers in an airtight container in the refrigerator for up to 6 days. Or you can freeze the turkey in an airtight container for up to 3 months.
- Don't forget to save the turkey drippings for gravy and the bones for turkey stock.
FAQs
No, there's no need to wash the turkey before cooking. This can be unsanitary and is not recommended in the food safety world. Plus, if you want crispy skin, you'll want to keep the skin dry.
If you want super crispy turkey skin, I'd recommend starting with a dry brine. This not only gives the turkey amazing flavor, but it will allow the skin to dry out in the fridge before cooking.
Next, it's important to use fat when cooking the turkey. I prefer a combination of compound butter and extra virgin olive oil. Both of these fats combine to yield a crispy turkey skin that's really delicious.
Turkey doesn't have to be served piping hot. If you want to keep it warm, simply cover it with foil to trap the heat inside.
It's not recommended to stuff the inside cavity of the turkey with stuffing due to the increased risk of cross-contamination and harmful bacteria. Not to mention, a turkey filled with stuffing will need to cook longer, therefore making it less juicy and likely to be overcooked.
More Turkey Recipes
Love this recipe? Please leave a 5-star ⭐⭐⭐⭐⭐ rating in the recipe card below. Have questions as you're cooking? Leave a comment below, and I'll help!
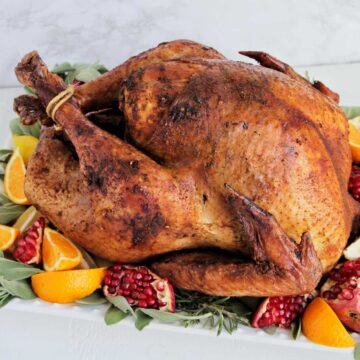
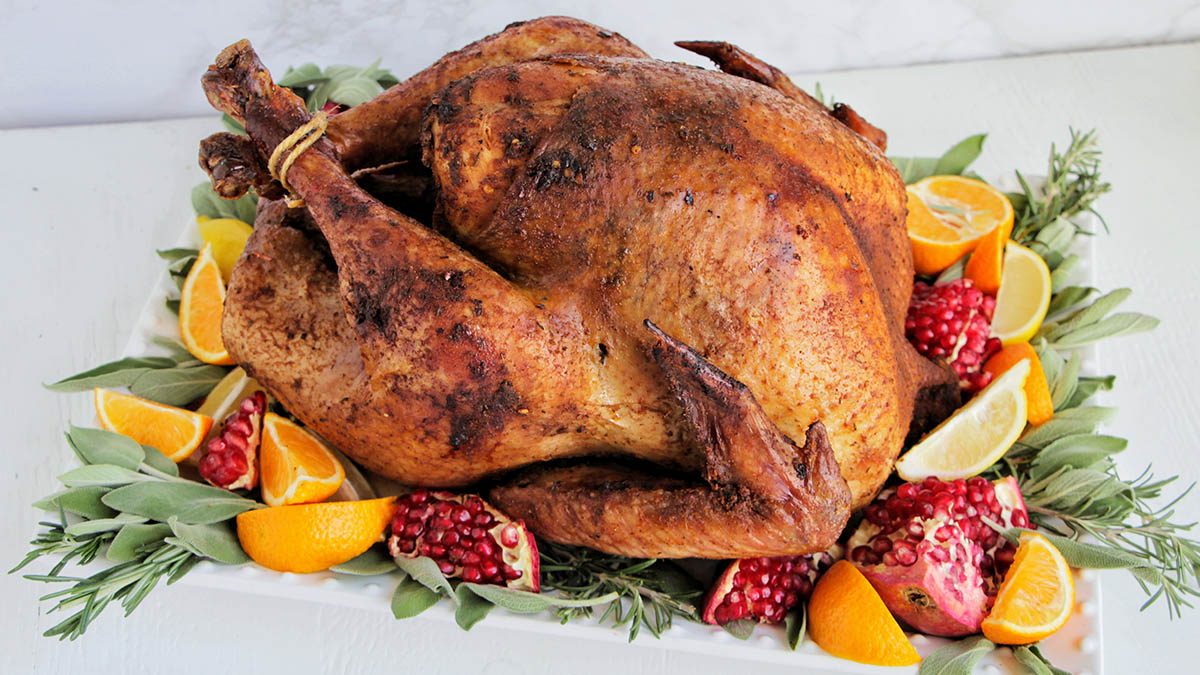
Roasted Turkey With Compound Butter
Equipment
- roasting pan
- kitchen twine
Ingredients
- 16 pound turkey thawed
- ½ cup compound butter
- 3 teaspoons Morton kosher salt
- 1 ½ teaspoons finely ground black pepper
- 1 clove garlic sliced in half
- 1 lemon quartered
- 1 onion roughly chopped
- 2 cups chicken stock plus more as needed
- 1 cup white wine (or more chicken stock)
- ¼ cup extra virgin olive oil plus more as needed
Instructions
- Remove the neck and giblets from the inside of the cavity (toss or store in the refrigerator to use later). Allow turkey to come to room temperature, about 1–2 hours.
- Heat oven to 325°F (165°C).
- Pat turkey dry with paper towels. Place turkey breast side up in a roasting pan.
- Loosen the turkey skin on the breast. Generously, spread one third of the compound butter under the skin and the remaining two thirds on the outside of the turkey skin. Season outer skin with salt and pepper (you may want to omit if you used a salty brine).
- Fill the cavity with garlic, lemon, and onion, then tie turkey legs together with kitchen twine. Pour chicken stock and white wine into the bottom of the roasting pan.
- Cook turkey for 2+ hours (see suggested cooking times below), rotating halfway through the cooking process, until the thickest part of the turkey breast reaches 155°F (68°C) on a digital thermometer (make sure the thermometer isn't hitting a bone). Every 30 minutes baste the turkey by pouring drippings at the bottom of the pan over the turkey skin (this helps to keep the meat moist) then brush the skin with olive oil to achieve a golden brown color and crispy skin. If you notice there's no liquid in the bottom of the pan, add additional chicken stock. Once the skin is golden brown, loosely cover with aluminum foil to prevent overcooked breast and burnt skin.
- Allow turkey to rest for 45–60+ minutes before carving.
- If you wish to make gravy, save the turkey drippings. If you wish to make stock, save the turkey bones.
Notes
- 8–10 pounds: 2–2.5 hours
- 10–12 pounds: 2.5–3 hours
- 12–14 pounds: 3–3.5 hours
- 14–18 pounds: 3.5–4.5 hours


Leave a Reply