One of the best feelings in the world is a clean (and organized) kitchen. It may seem intimidating to organize your pantry. However, with 9 easy & practical steps, you'll be on your way to a more functional kitchen and pantry space! These are some of the best realistic kitchen organization tips!

Want To Save This Article?
Enter your email below and we'll send it straight to your inbox. Plus, you'll receive new weekly recipe inspiration.
So many of us spend HOURS in our kitchens cooking to make sure our family and friends are fed. With so much time spent in this one room, it's easy for food and kitchen items to get out of hand. Let's face it...our pantries are probably one of the messiest rooms in our house. They get filled with crumbs, empty wrappers, and (who knows how old) expired boxes of food.
The problem with organizing the pantry is that it can seem like such a daunting and tedious task. Plus, if you truly like to cook, you can't afford to leave your pantry in shambles while you organize everything for days.
Making an Organization Plan
So here's how this is going to work! You're going to come up with a plan (a surefire and realistic way) to get & more importantly KEEP your kitchen pantry organized. And step one starts with preparation!
First things first take inventory of what you have in your pantry. What items do you always have on hand? Do you tend to store certain items in bulk? What types of containers does your food come in (i.e. cans, jars, boxes). Write these all down so your notes can help you in the next step.
Step two is figuring out what organization containers you need to purchase. Below are the containers I use in my own kitchen pantry. I know you will love these products! They have proven week after week to keep me organized (after going grocery shopping, hosting dinner parties, and sometimes being a messy cook). And with any organization strategy, it has to be realistic and be adaptable to your lifestyle.
The great thing about these organization products is that they are intuitive. It makes it easy to sort out what food is placed in a certain container. And with a few labels, you can even train your family to follow this system!
P.S. If you have wire shelves, a thin layer of plexiglass sheet helps prevent your containers from falling through the shelves. It's definitely an investment, but it makes things SO much easier to wipe down when they get dirty. You can pick up plexiglass sheets at Home Depot or Lowe's.

Dry goods (flour, rice, cereal, oats)
For your dry goods, I recommend glass containers that have some sort of rubber seal for freshness. The glass allows you to easily see what food item is in the container. Plus, you can rest assured knowing that your food will stay nice & fresh!

Condiment jars
For all the various sauces, sweeteners, and nuts butters that come in a jar or glass container, use a turntable. Turntables allow you to maximize the space you have, while creating easy and equal access to all jars or containers.
Depending on the size of your jars, you could use either turntable linked below. Having various style of turntables is also going to give you a more visually appealing look. However, do what works best for your pantry staples!
Snack foods/miscellaneous items (chip bags, parchment paper, napkins)
I prefer to use baskets to store snack food items - chip bags, snacks for your kiddos, etc. It makes the pantry look less cluttered when all the open bags and packages are inside a basket. Plus, it's easy for kids to utilize.
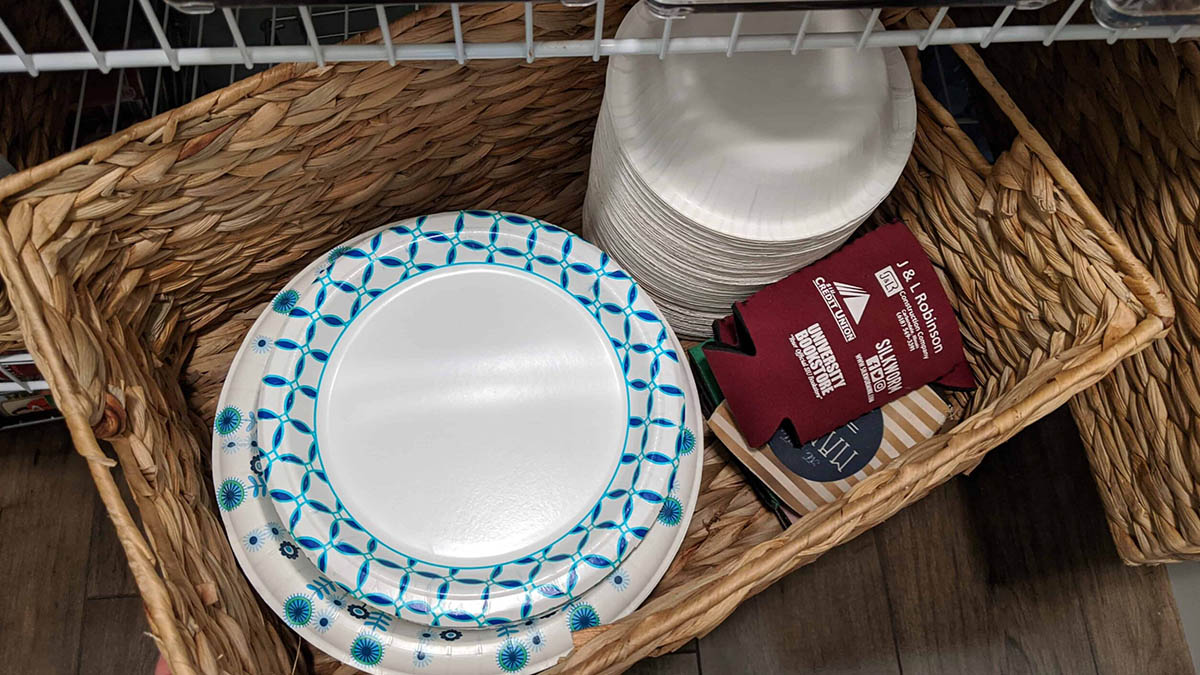
I also like to store my paper products or cooking essentials in baskets - napkins, paper plates, parchment paper, aluminum foil.
Packaged food items
Packaged food items such as nuts, seeds, boxed or bagged food items are easily corralled in these clear plastic bins. Part of the reason I encourage using containers for these items is to consistently keep like items together. All of one type of food will be in the same place week after week.
Once boxed or bagged items are open, they can tend to look messy within the pantry. Placing items in the plastic bins keeps them contained, meaning the pantry will look more put together aesthetically.
Canned goods
Most of us typically purchase the same (or very similar) types of canned goods each week. Rather than purchasing the same staples week after week, stock up once a month by purchasing 3-4 cans of your staples items and store them in this gravity can feeder. This item fits nicely on the floor of the pantry to leave the valuable shelf space for other items.
Produce
Produce that needs to stay in a cool, dark place is perfect in these stackable wire bins. An open bin allows you to easily see any produce that might be going bad - I'm looking at you sprouted potatoes. Less waste, and easy storage access?! That's a win!
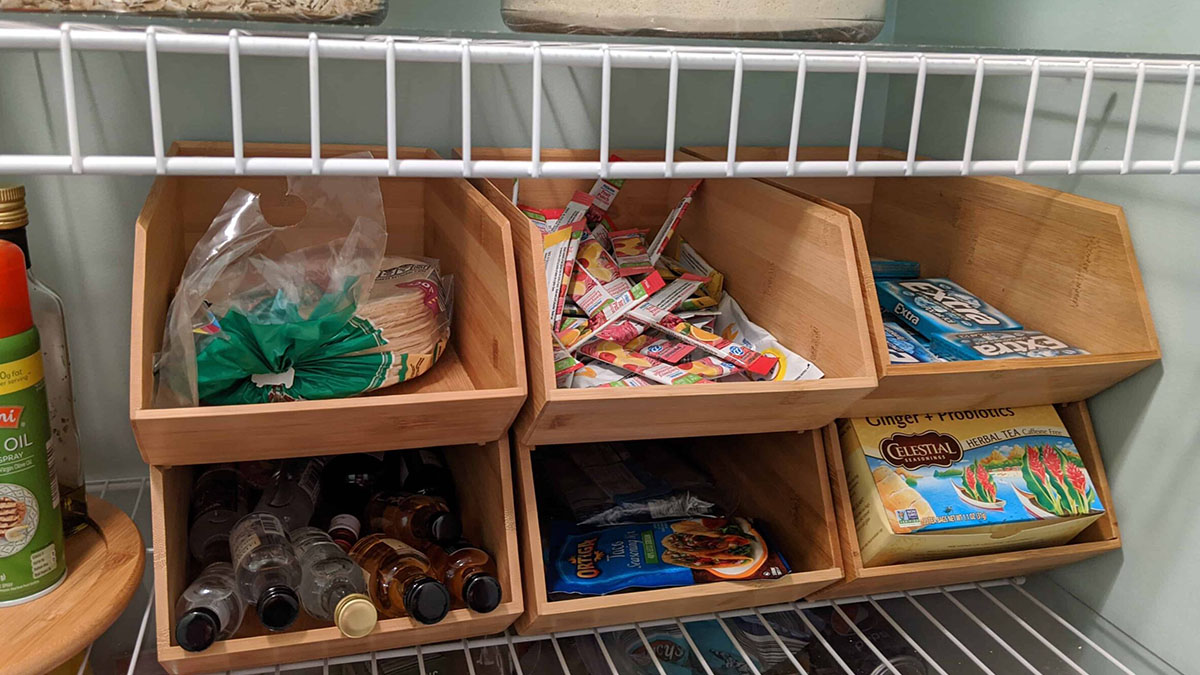
Grab & go snacks
These are my favorite storage bins in my pantry. Look how freaking cute they are!! Aside from that, they function very well for grab & go snacks - granola bars, pre-packaged chips or crackers, fruit snacks - you name it! This section is very helpful if you pack lunches or snacks every day.
Baking
Baking - it's the best! But there are so many little items to store - sprinkles, vanilla extract, baking soda, cupcake liners, and more! This lazy susan comes in handy when you have a baking day. Just pull it out of the pantry, and set it on your counter. I also love the dividers that allow you to group by category.
Steps for organizing your pantry in less than 24 hours
The good news is that the rest of the steps can be done in less than 24 hours. Before you move on to this step, make sure you've ordered the the necessary storage containers. Then, once everything has arrived, it's time to get to work! So after you've placed your order for the pantry organization supplies that best fit your space, continue on to the following steps:
- Take EVERYTHING out! When I say everything, I mean everything.
- Throw away any items that are expired or you no longer use. No negotiation. If it's old, that means you didn't eat it and probably are not going to eat it in the future. Throw it out - no questions!
- Wipe down the inside of your pantry cabinets, the floor, and the door and/or cabinets.
- Sort your pantry items into categories: Condiments, dry goods/grains, snacks, paper products, baking, canned goods, nuts & seeds, sweeteners, oil & vinegar, and miscellaneous.
- Place your items the best storage bin or container by using the items you purchased. You should already have a plan for this, so now it's just about executing this. Get your kiddos to help with this process so they can start to learn where everything goes!
- Create labels for your bins or baskets, if you'd like. This would be a helpful step if you have a family who also needs to keep the pantry organized.
- Re-assemble your pantry. You'll want to be strategic about this step. Low items are things your kids need to reach. High items are things you rarely use. Group like items together so they are easy to find. Be realistic about what you use often (lower shelves) and what you only need occasionally (higher shelves) in your kitchen.
- You're done! Celebrate with a large freaking glass of wine - you deserve it!
Did you organize your pantry?!
Well what are you waiting for - comment below, or share a picture on Instagram with the hashtag #HomebodyEats. I can't wait to see what you did! Happy organizing, Homebody family!

Leave a Reply