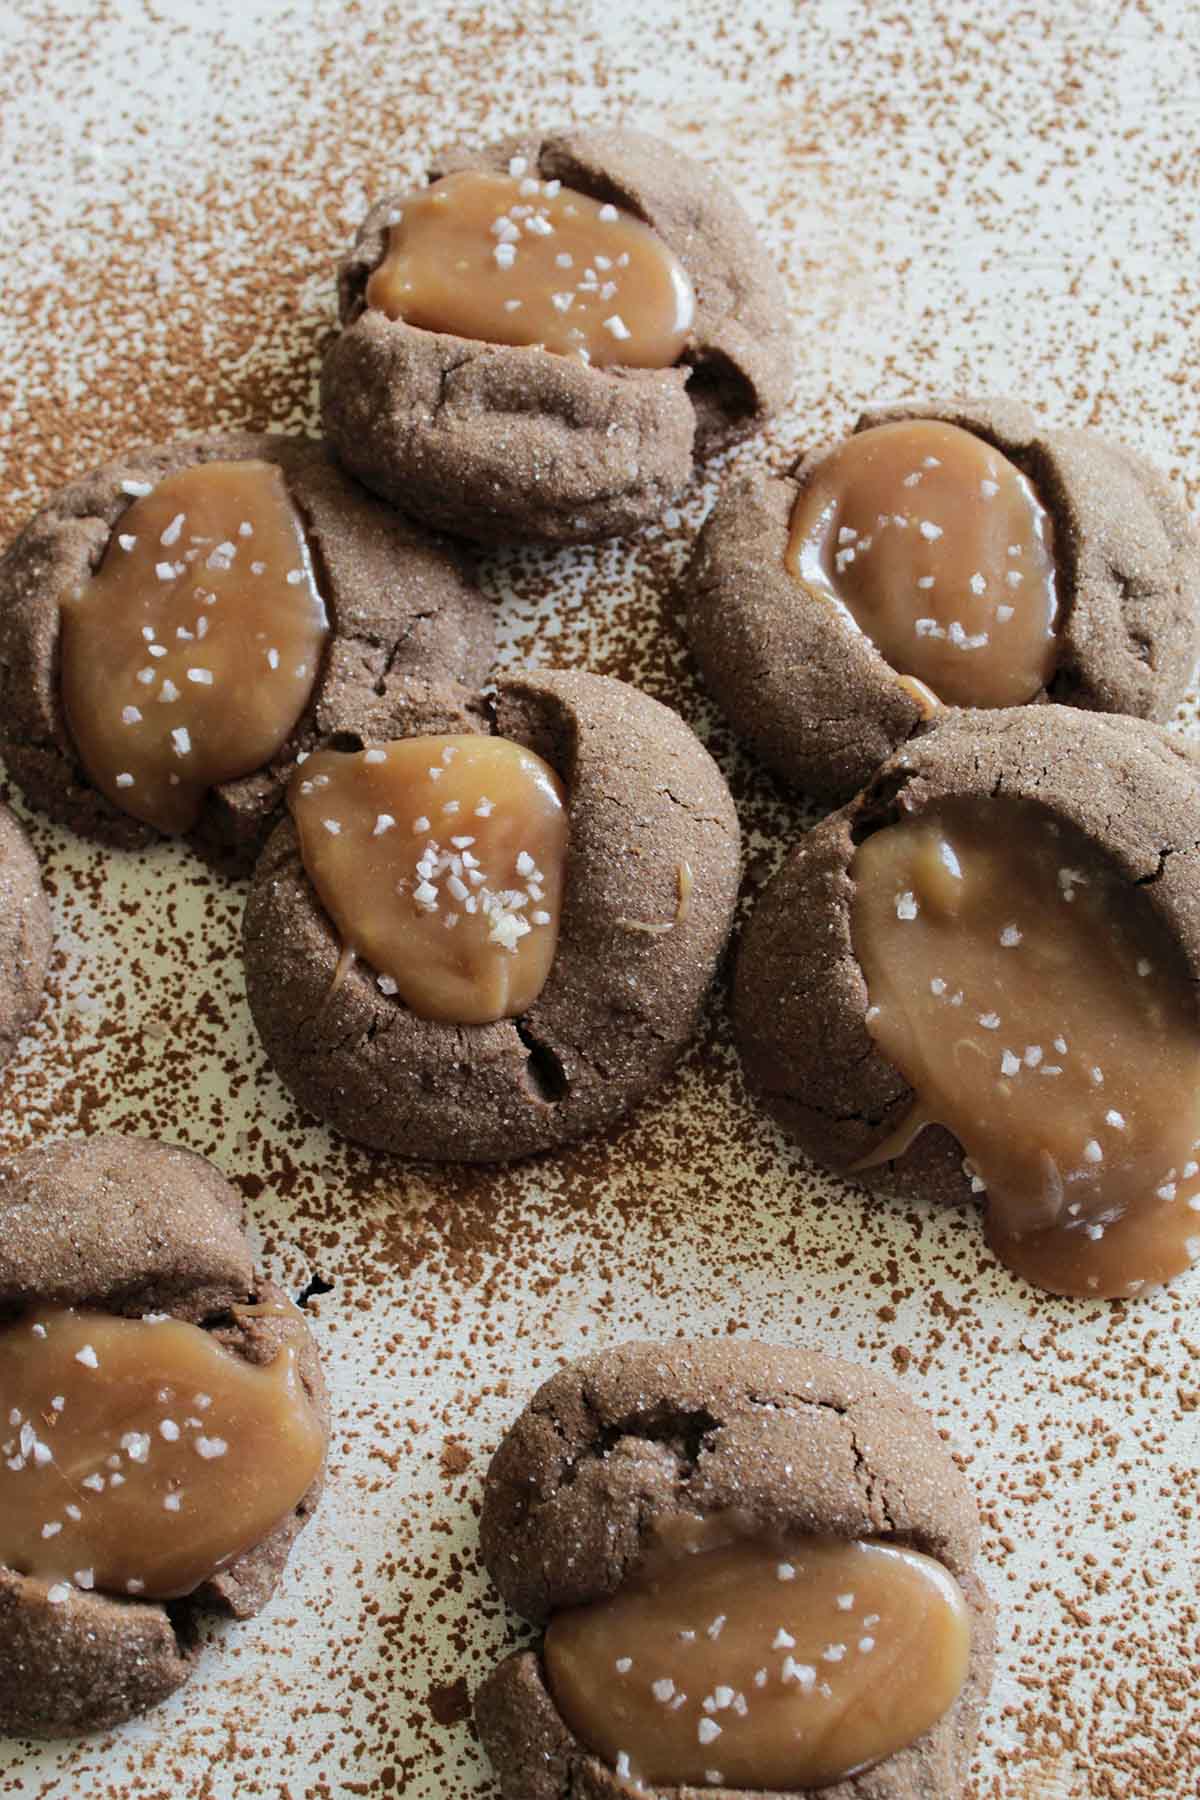
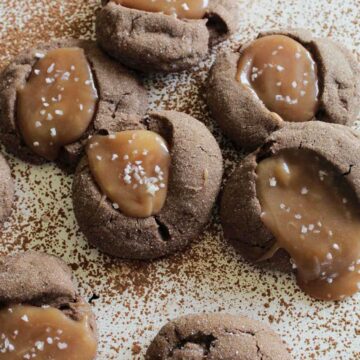
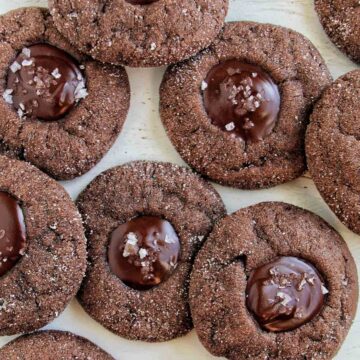
Bake up some delicious and gooey caramel chocolate cookies. The soft thumbprint cookie provides a great vessel for the sweet and salty caramel sauce that's finished with coarse salt for garnish.
Want To Save This Article?
Enter your email below and we'll send it straight to your inbox. Plus, you'll receive new weekly recipe inspiration.
I feel like such a cliché, but chocolate and salted caramel are undeniably one of my favorite combinations.
These cookies seriously fulfill everything I could want in a cookie. They have just the right amount of sweetness, combined with a salty bite of caramel. And, most importantly, they're nice and gooey!
These caramel chocolate cookies would make the perfect holiday treat or weekend pick-me-up. Make them all year round, and I promise they'll never disappoint!
Jump to:
What You'll Learn In This Recipe
Baking recipes are some of my favorites. There are lots of important lessons to learn in order to become a great home baker. In this recipe you'll learn:
- How to make homemade caramel.
- The technique for making thumbprint cookies. Once you learn this, there are thousands of delicious combinations to try!
- Why it's important to measure your baking ingredients by weight.
If you want to learn many more baking secrets, download my free guide with 10 secrets to instantly become a better baker.
Ingredients You Need
Here are the ingredients you'll need for caramel chocolate cookies:
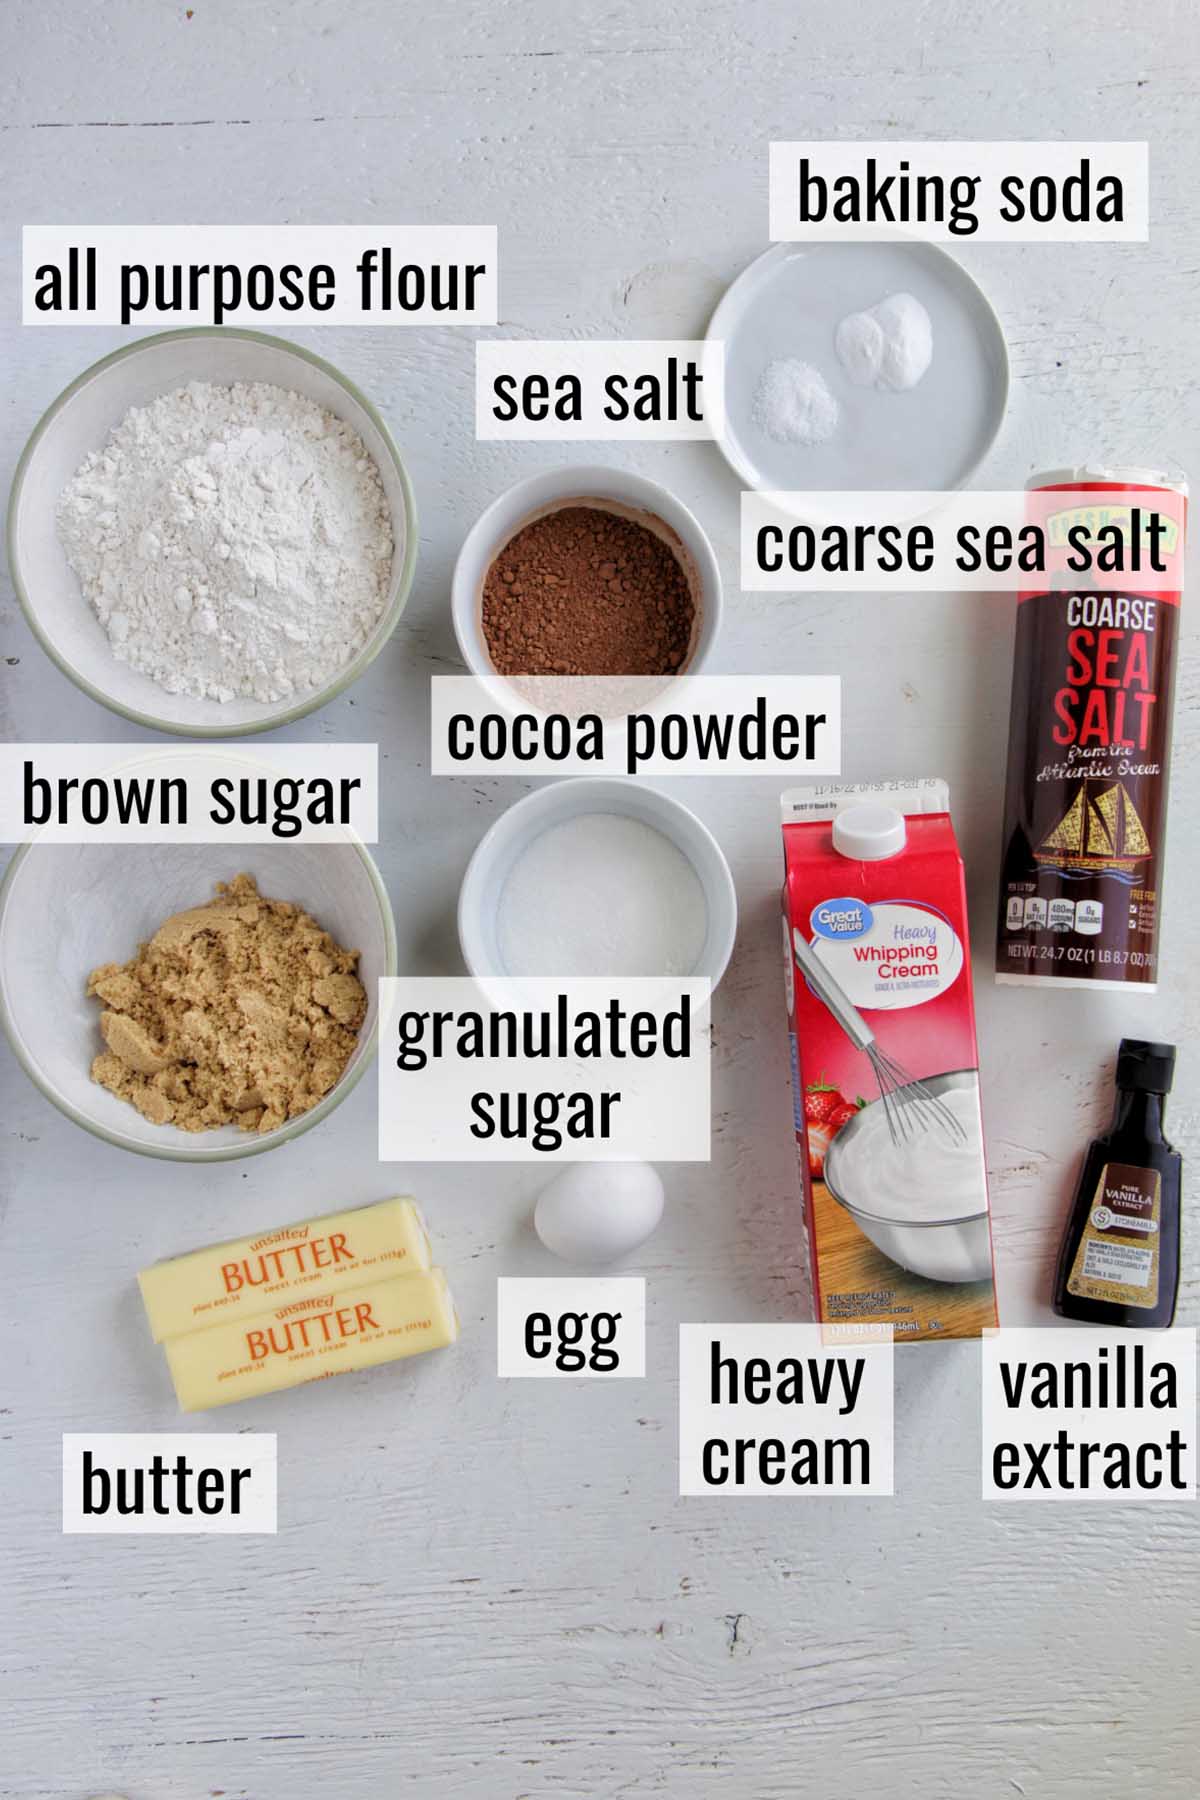
You'll notice that both volume and weight measurements are given for this recipe. I will always encourage you to measure your ingredients by weight with a digital food scale because it will result in more accurately measured ingredients.
Here are a few more important ingredient notes:
Flour: Make sure you are measuring your flour correctly if you're not using a digital food scale. The proper way to measure flour is:
- Fluff up the flour using a spoon.
- Scoop the flour into the measuring cup.
- Level off the top of the measuring cup with a knife to remove excess flour.
If you need to make this cookie gluten-free, opt for a 1-to-1 gluten-free baking flour, like Bob's Red Mill.
Unsweetened cocoa powder: Do not substitute for dutch-process cocoa powder. They are not the same thing.
Baking soda: If you haven't used your baking soda in a while, make sure it's still fresh so you get the proper rise on the cookies. You can test the baking soda by mixing a ½ cup of hot water and a ¼ teaspoon of white vinegar. If you pour ¼ teaspoon of baking soda into the water mixture and you get a fizzing reaction, the baking soda is fresh. If there's no activity, it's time to buy some new baking soda.
Salt: I find fine sea salt works best for this cookie so the salt can easily be distributed throughout the dough.
Butter: Make sure you use unsalted butter. If you need to substitute for salted butter, cut back the amount of added salt according to personal taste and preference.
Be sure the butter is at room temperature to ensure it will smoothly incorporate with the sugar.
Brown sugar: Be sure to pack down the brown sugar if you're measuring it by volume.
Granulated sugar: Don't forget to save a little extra sugar to roll the dough in. It gives the cookies a beautiful look!
Egg: Eggs are another ingredient that should be at room temperature. If you have a cold egg, you can place it in a glass of hot water. It will heat it up to room temperature in no time.
Vanilla extract: If possible, make sure to buy good-quality vanilla that is made with real vanilla beans like Nielsen-Massey.
How To Make This Recipe
Here's how to make these delicious caramel chocolate cookies.
Bake the Cookies
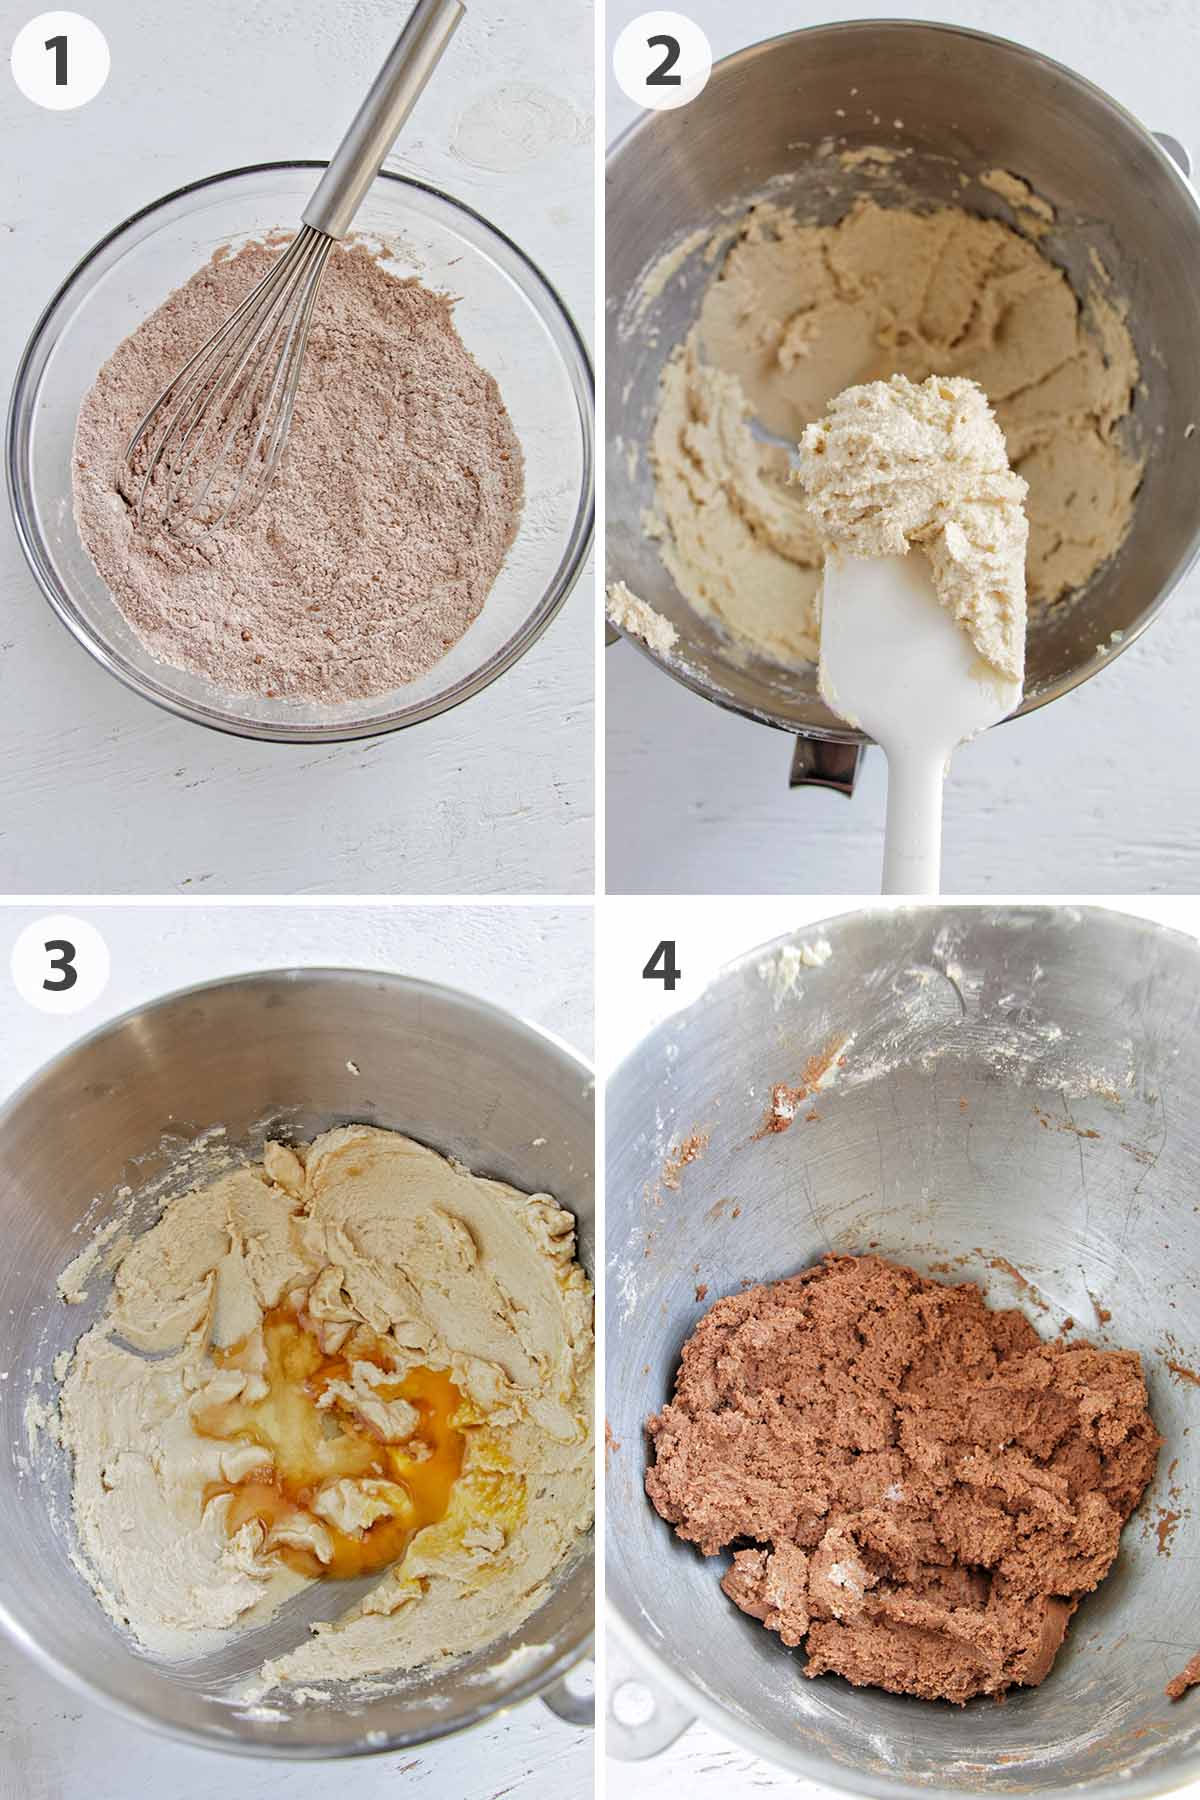
1. First, we're making some chocolate dough. Whisk together flour, cocoa powder, baking soda, and salt in a medium-sized mixing bowl.
2. Add the softened butter, brown sugar, and ¼ cup (50 grams) of granulated sugar to a stand mixer fitted with a paddle attachment. Beat together on medium speed for 2 minutes until the mixture is light and fluffy.
3. Add the egg and vanilla extract and beat together until fully combined.
4. Scrape down the sides of the mixing bowl to ensure all of the ingredients are able to evenly incorporate. Begin adding the dry ingredients into the mixing bowl with the mixer running on medium-low speed.
Mix just until the dough comes together. It will be slightly sticky at this point.
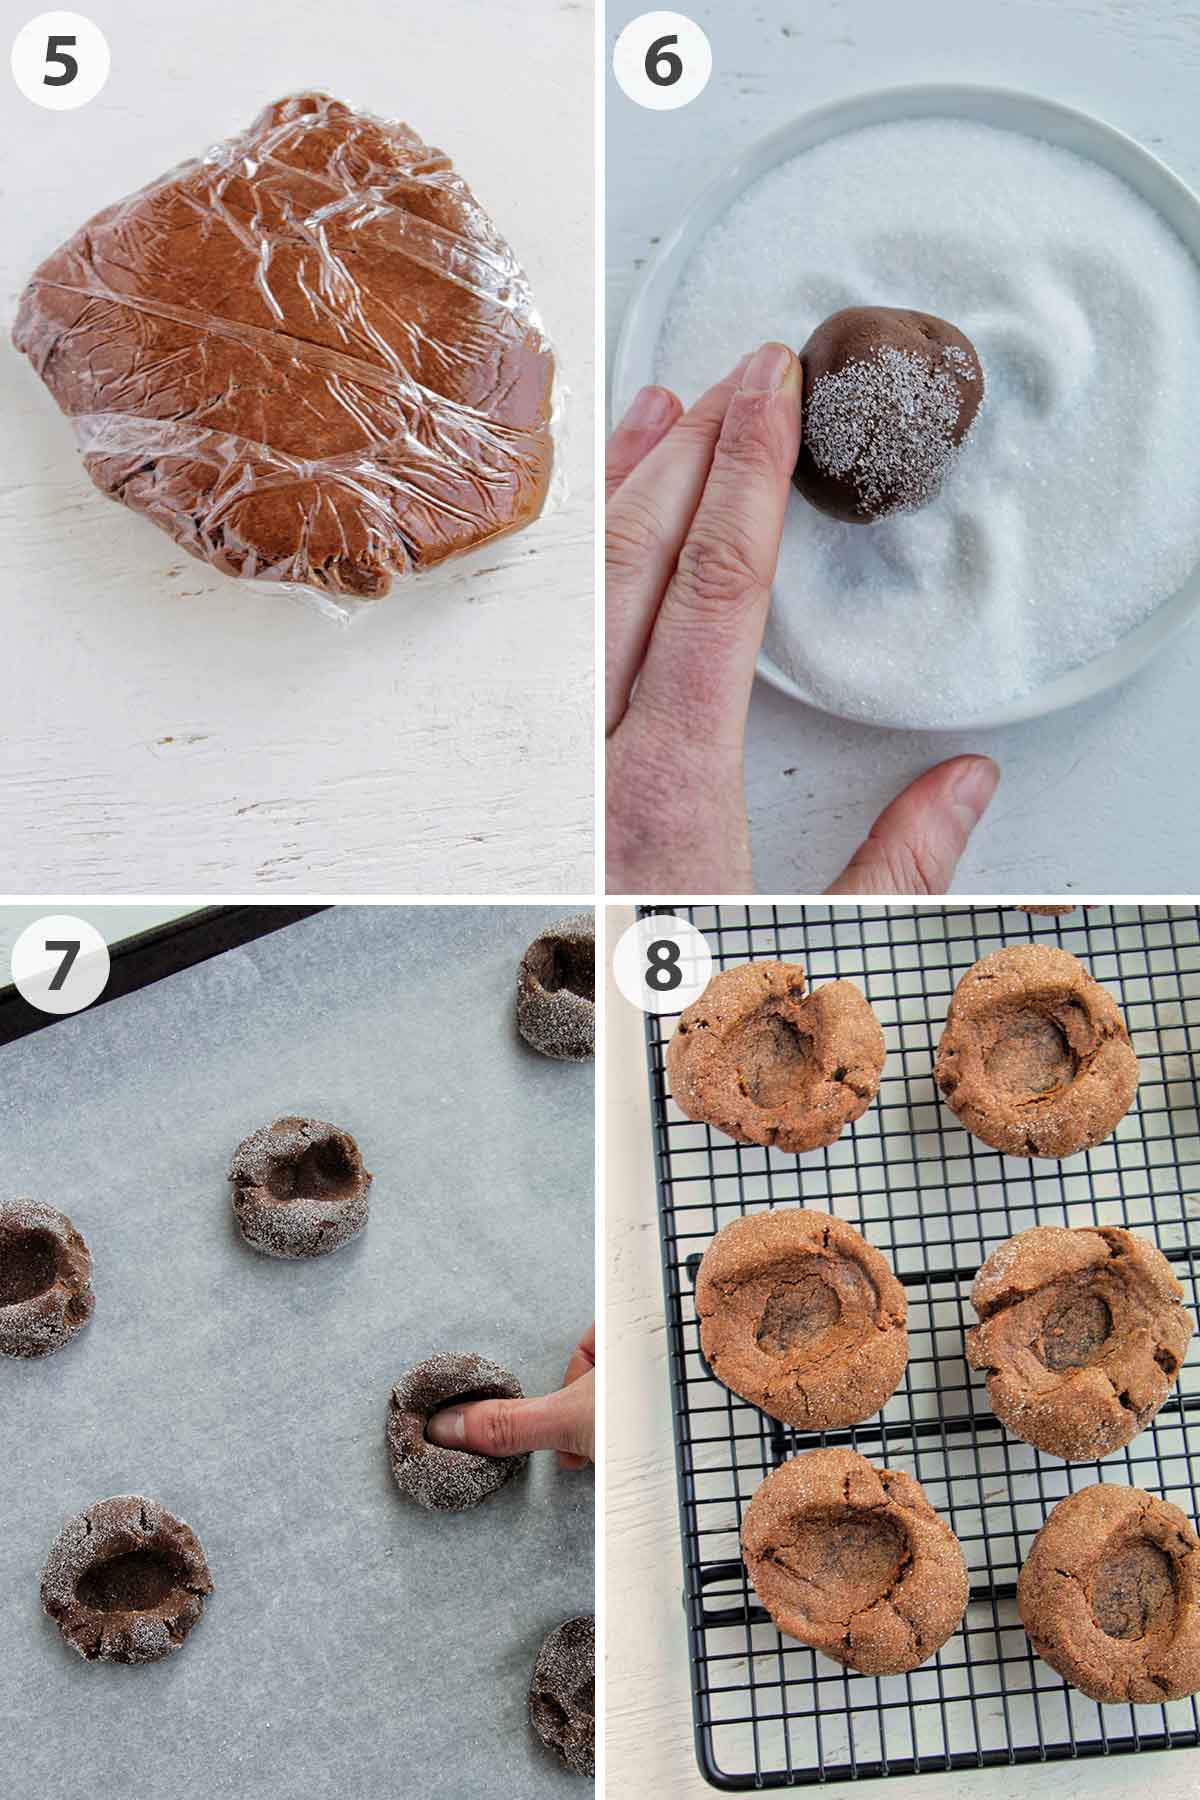
5. Wrap cookie dough in parchment paper or plastic wrap and refrigerate for at least 3 hours or up to overnight until the dough has firmed up.
6. Add the remaining 3 tablespoons (40 grams) of granulated sugar to a shallow plate. Scoop the chilled chocolate cookie dough into 2 tablespoon balls using a cookie scoop, then roll them around in the sugar.
7. Place dough 1-2 inches (2.5 - 5 centimeters) on a large baking sheet lined with a silicone baking mat or parchment paper. Use your thumb or the end of a spatula to make an indent in each cookie.
If the dough begins to crack on the outside, simply use your hands to push it back together.
8. Bake the cookies in a preheated 350°F (175°C) oven for 12 - 14 minutes until the cookies have fully set.
If any of the indents puffed up during the baking process, use a small spoon to push the indent down. Transfer to a cooling rack to fully cool.
Make Homemade Caramel

9. Next, it's time to make some homemade caramel. Start by adding sugar and ¼ cup (56 grams) of water to a heavy-bottom saucepan. Cover with a lid and let boil over medium heat until the sugar is completely melted.
10. Once the sugar is melted, remove the lid and allow the sugar to continue cooking. Make sure you do not stir the caramel while it's cooking. If you see the caramel burning, gently swirl the pan.
11. You'll know the caramel is done cooking because it will become amber-colored. This process usually takes about 4 - 6 minutes.
12. In order to turn the caramel into a sauce, we will need to add heavy cream. Be careful, the caramel will slightly bubble up and steam when you stir in the heavy cream.
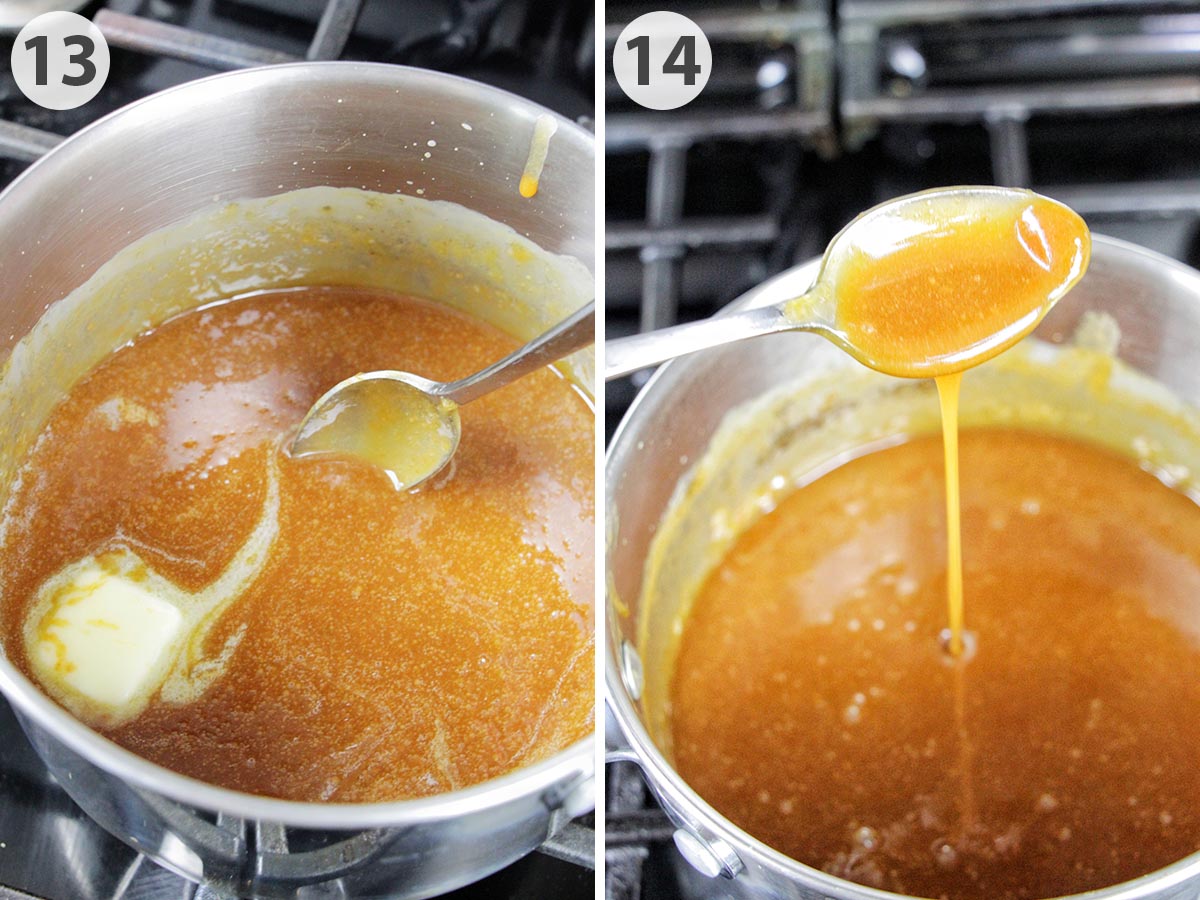
13. Finally, add butter (one cube at a time), as well as vanilla extract and salt. Stir to combine.
14. You should be left with a smooth and shiny caramel sauce.
Decorate The Cookies
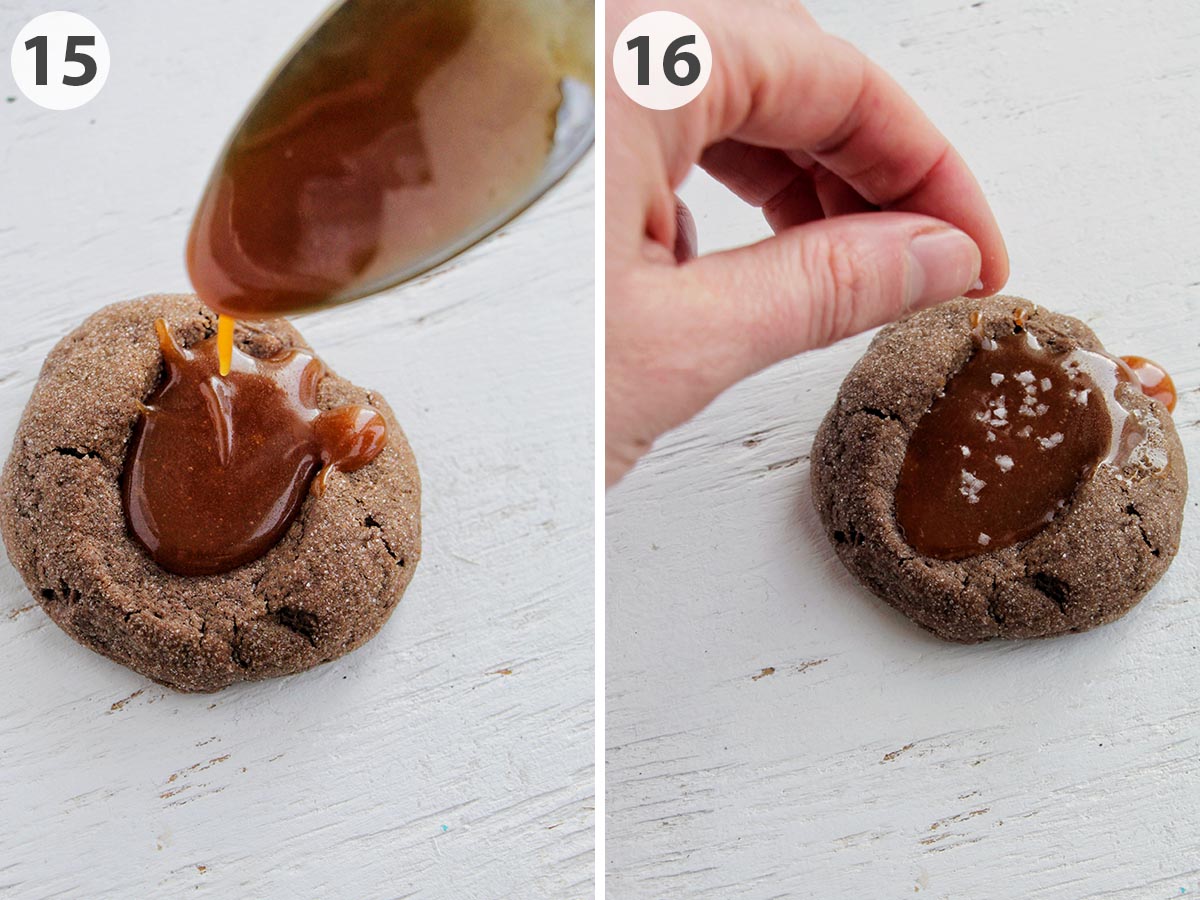
15. The last step to make caramel chocolate cookies is filling each thumbprint hole with caramel.
16. Optionally, sprinkle the top of each caramel cookie with some coarse sea salt. Place in the refrigerator for 15-20 minutes to allow the caramel to firm up.
Expert Tips
- It's important to use a heavy bottom saucepan when making caramel. It will ensure the sugar melts evenly and nothing gets burned. A nonstick pan will not work.
- The only way to get 100% accurate measurements is by using a digital food scale. If possible, bake using the weight measurements listed below.
- Do you have extra caramel? Store leftover caramel in an airtight container in the fridge to use as a topping or filling for another dessert. Caramel will last for 2 weeks if stored properly.
- Store cookies in an airtight container at room temperature for up to 5 days.
- Store baked and filled caramel chocolate cookies in the freezer for up to 2 months. Place them in an airtight container in between parchment paper.
Recipe FAQs
Yes. Make the chocolate cookie dough up to 4 days ahead of time and store it in the refrigerator until you're ready to bake.
Be sure you chilled the dough for the full 3 hours and it feels firm to the touch when pulled out of the fridge. If your cookies spread too much, you may need to chill the dough longer.
Also, check that your oven isn't getting too hot and making the cookies spread too quickly. All you need is an oven thermometer to ensure it's heating properly.
That's okay - it happened to me too! Just take a small spoon and gently push down the puffed up part of the indent (thumbprint) to re-flatten it.
The caramel is grainy because of crystallized sugar. This likely happened because you did not follow the instructions below correctly. If a piece of sugar falls back into the caramel, or you stir the sugar/water mixture while the sugar is dissolving, it can result in grainy caramel.
Another common mistake is not allowing the sugar to fully melt before it begins to further cook and darken.
If any of these happen to you, you'll need to start over and make a new batch from scratch because you cannot fix a grainy (crystallized) caramel. Be sure to follow the instructions closely on your next try!
There's no way to fix this! You'll need to start over and make a new batch from scratch. Be sure to follow the instructions closely on your next try and use a heavy bottom saucepan. Don't walk away from the stove while you're making caramel.
Your caramel should be silky smooth, without any grainy or gritty pieces.
Place it in your sink, and allow it to soak with very hot water and a little dish soap until the sugar has dissolved.

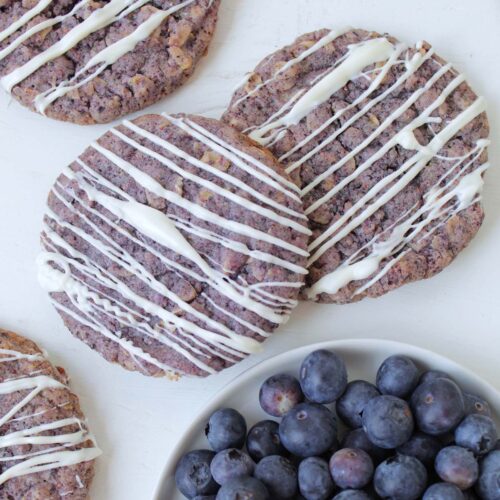
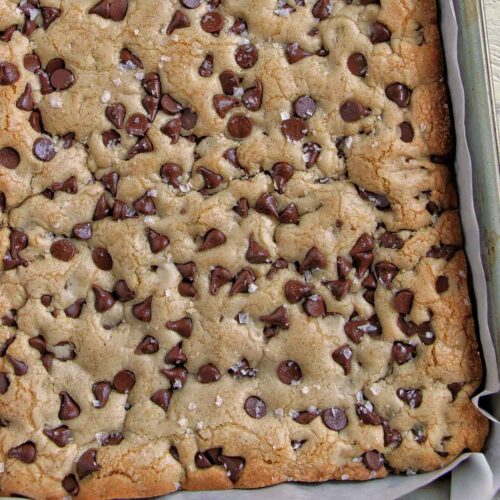
More Cookie Recipes
If you need some more cookie-baking inspiration, check out these recipes:
Love this recipe? Please leave a 5-star ⭐⭐⭐⭐⭐ rating in the recipe card below. Have questions as you're cooking? Leave a comment below, and I'll help!
Salted Caramel Chocolate Thumbprint Cookies
Equipment
- parchment paper or silicone baking mat
- digital food scale
Ingredients
For the Cookies
- 1 ¾ cup (210 grams) all purpose flour
- ¼ cup (21 grams) unsweetened cocoa powder
- ½ teaspoon baking soda
- ¼ teaspoon fine sea salt
- ½ cup, (113 grams) unsalted butter softened
- ½ cup (107 grams) firmly packed brown sugar
- ¼ cup, plus 3 tablespoons for rolling (50 grams, plus 40 grams for rolling) granulated sugar
- 1 large (50 grams) egg room temperature
- ½ tablespoon vanilla extract
For the caramel
- 1 cup (198 grams) granulated sugar large impurities removed
- ½ cup (114 grams) heavy cream room temperature
- 8 tablespoons (113 grams) room temperature unsalted butter cut into 1 tablespoon pieces
- ½ teaspoon vanilla extract
- ½ teaspoon fine sea salt
- coarse sea salt for garnish
Instructions
For the cookies
- Whisk together flour, cocoa powder, baking soda, and salt in a medium bowl. Set aside.
- Add butter, brown sugar, and ¼ cup (50 grams) granulated sugar to a large bowl or stand mixer fitted with a paddle attachment. Beat together on medium speed for 2 minutes using a handheld electric or stand mixer until the mixture is light and fluffy. Add in egg and vanilla extract and beat on medium speed until combined.
- Scrape down the side of the bowl, then add the dry ingredients to the wet ingredients in two batches. Mix on medium-low speed until fully incorporated. The dough will be slightly sticky. Wrap cookie dough in parchment paper or plastic wrap and refrigerate for at least 3 hours or up to overnight until the dough has firmed up.
- Meanwhile, pour 3 tablespoons (40 grams) of granulated sugar on a plate and set aside.
- Heat oven to 350°F (175°C).
- Remove dough from the refrigerator and form into 2 tablespoon balls. Roll the outside of the dough balls in the granulated sugar. Place dough 1-2 inches (2.5 - 5 centimeters) on a large baking sheet lined with a silicone baking mat or parchment paper. Use your thumb or the end of a spatula to make an indent in each cookie. If the dough begins to crack on the outside, simply use your hands to push it back together.
- Bake on the middle rack for 12-14 minutes, or until cookie edges are set. Remove from the oven and let stand for 5 minutes. If any of the indents have puffed up, use a small spoon to push the indent down. Transfer to a cooling rack to fully cool.
For the caramel
- In a medium heavy bottom saucepan, add sugar and ¼ cup (56 grams) of water. Cover with a lid and let boil over medium heat until sugar is completely melted about 2-4 minutes.
- Remove lid and continue cooking until the sugar begins to darken. Do NOT stir the caramel at this point. If it appears to be burning, you can gently swirl it in the pan. Once the sugar reaches an amber-colored liquid, about 4-6 minutes later, remove from heat.
- Stir in heavy cream (be careful, the cream will bubble and slightly splatter). Once the heavy cream is incorporated, add butter one cube at a time, vanilla extract, and salt. Stir until the caramel is smooth. Allow caramel to cool slightly to room temperature.
- Using a spoon, gently fill each thumbprint hole with caramel, about 1-2 teaspoons each. If desired, sprinkle the top of the caramel with a pinch of coarse sea salt. Place in the refrigerator for 15-20 minutes to allow the caramel to firm up.
- Store cookies in an airtight container at room temperature for up to 5 days.


Alex M.
They are so good. Can’t wait to eat more of them!!
Angela
Thanks Jessica. Husband loves the cookies!! 😄