
With only 3 main ingredients, finally master a super flaky and flavorful all-butter pie crust by hand. This crust can be used for all your favorite holiday pies, including hand pies, galettes, or tarts.
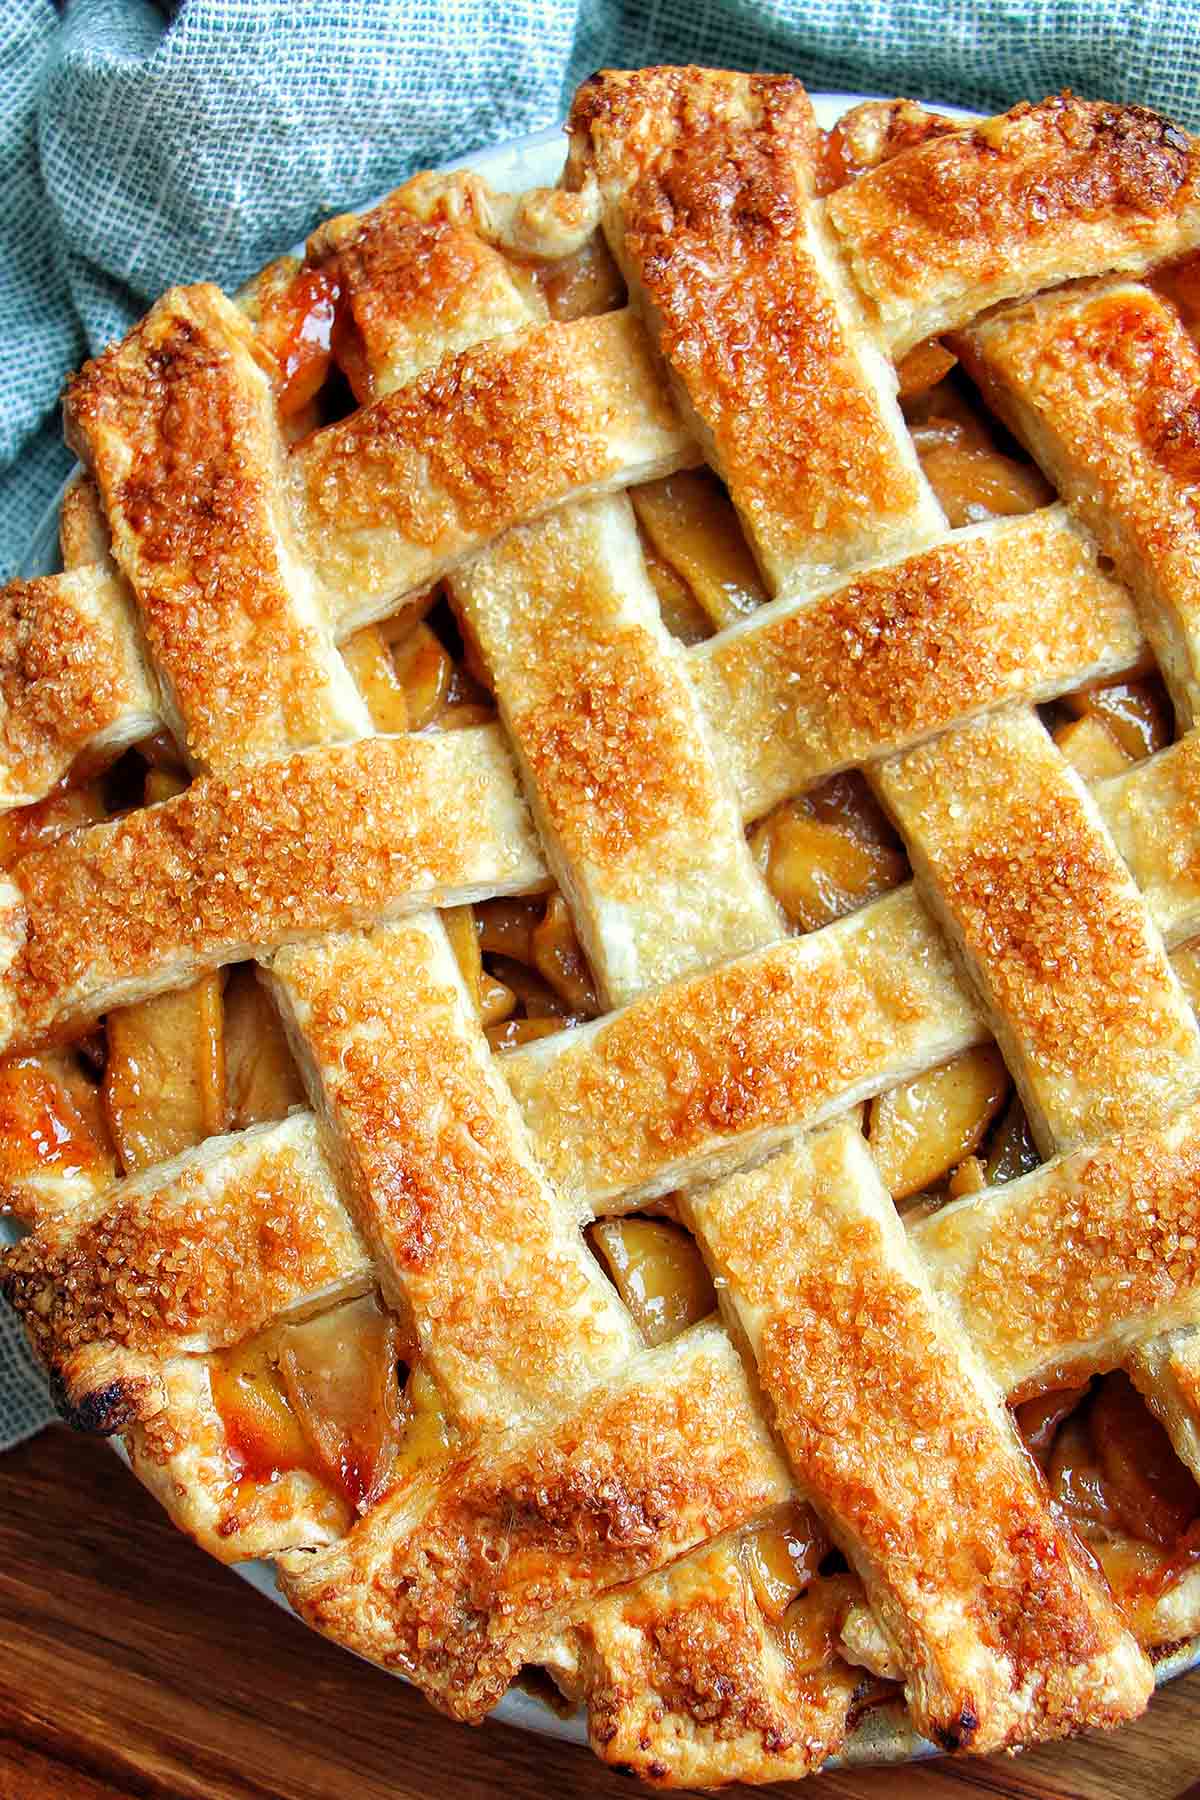
Quick Look: 3 Ingredient Pie Crust By Hand
- Servings: two 9 inch (23 cm) pie crusts
- Kitchen Timing: 40 minutes of active time (3 hours 49 minutes with chilling and baking)
- Flavor Profile: Super buttery with lots of flaky goodness
- Leftover Tips: The pie dough will last 3 days in the fridge, or wrap and freeze for up to 3 months.
- Skill Level: Intermediate
- What You'll Learn: All the techniques for making pie crust by hand, including butter lamination (which prevents butter from leaking while baking), proper hydration levels, and the importance of cold ingredients.
- Why You'll Love This Recipe: I'll walk you through the process step by step, including pictures, so you can see how pie dough should look and feel at each step.
SUMMARIZE AND SAVE THIS POST ON
If there's one thing I love after going to culinary school, it's mastering a new technique in the kitchen.
You see...once you finally understand how to make a basic recipe (like pie crust), you suddenly realize just how many recipes you now understand!
Everything from your Thanksgiving pumpkin pie to apple hand pies or classic cinnamon apple pie, galettes, tarts, and quiche can all be made with this homemade pie crust.
I'll help walk you through all the important steps of mastering a from-scratch pie crust (no fancy equipment needed). If you need help along the way, just let me know!
And if you want to keep growing your baking skills, join my email series with my top 10 tips for instantly becoming a better baker.
Ingredients You Need
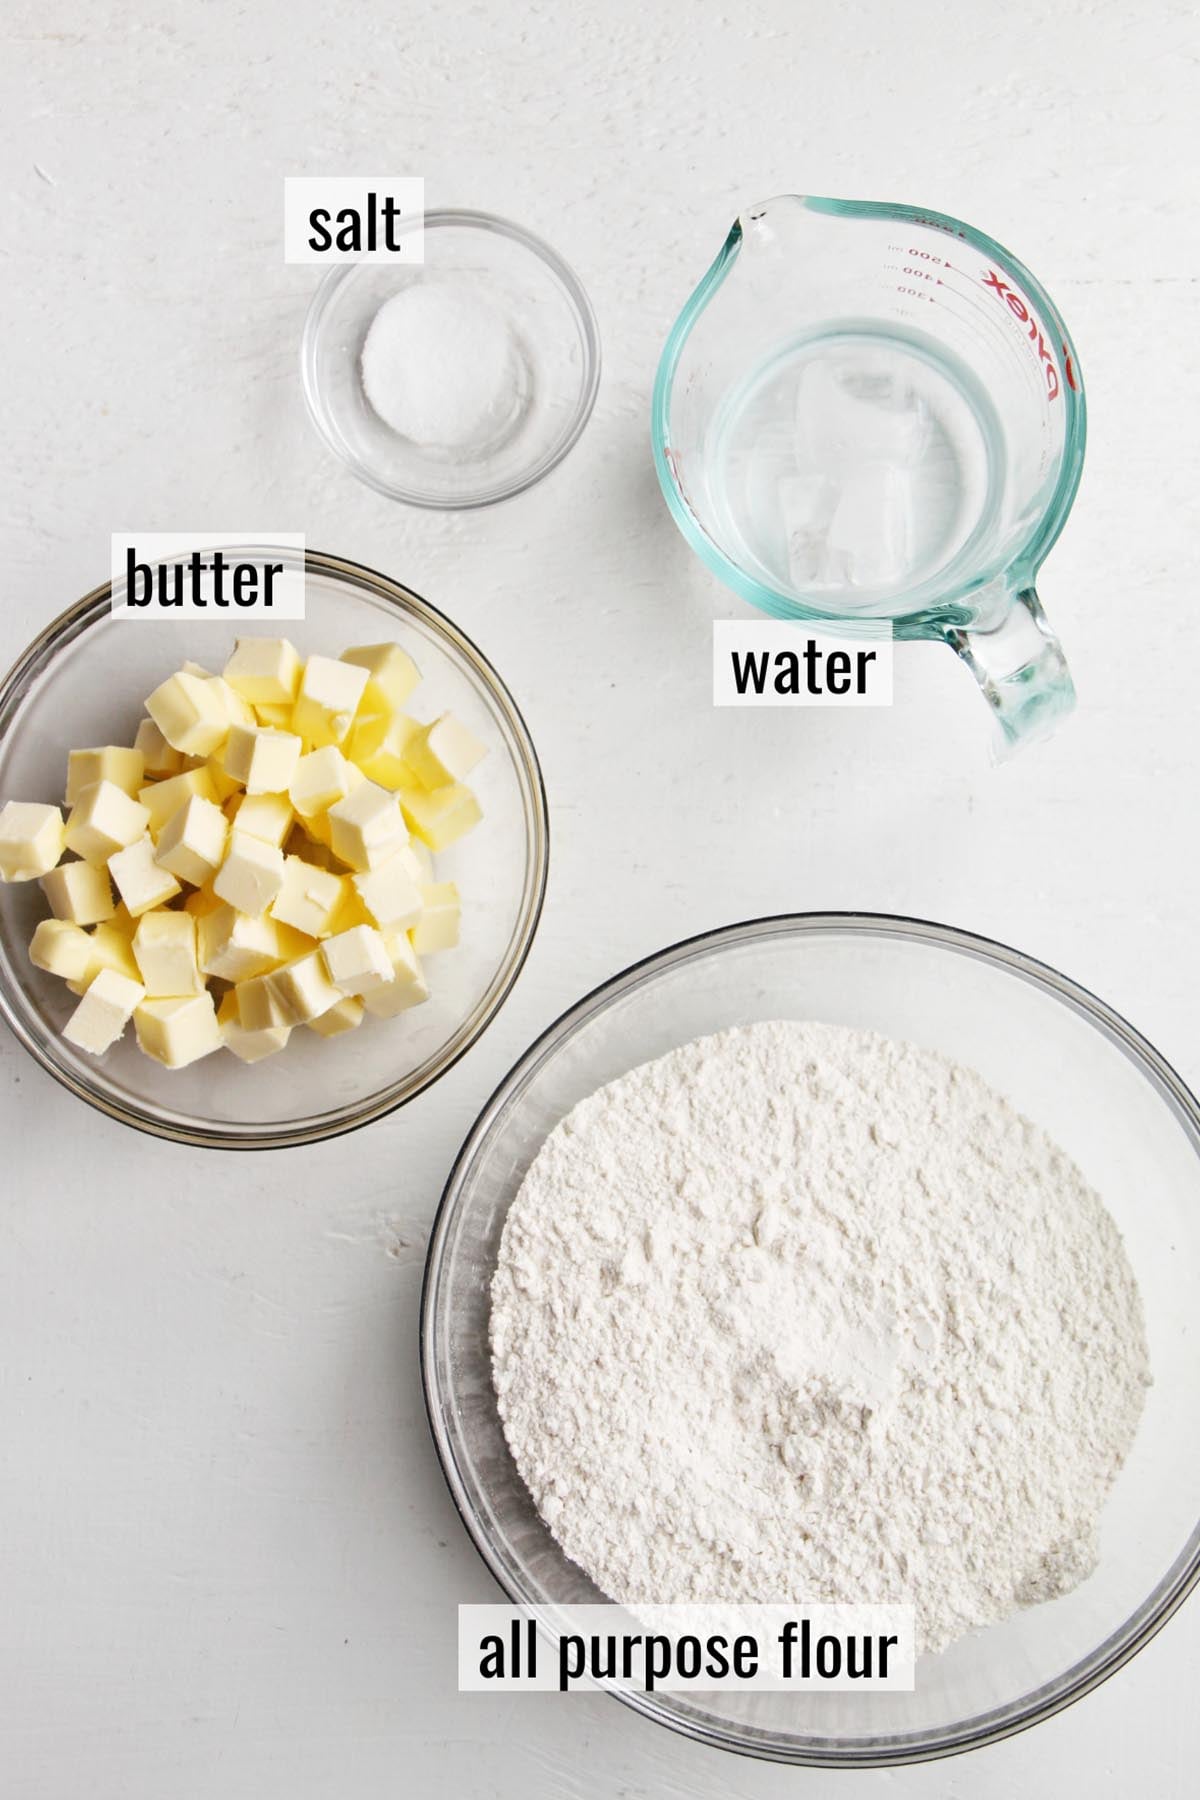
- All purpose flour: Any brand of flour will work for this recipe. If you notice the flour is lumpy, go ahead and sift it before adding to the mixing bowl.
- Fine sea salt: Whether you're using a sweet or savory filling, I always add salt to my pie crust to boost the flavor. You can omit this additional salt if you're using salted butter.
- Unsalted butter: Pay attention to how the butter is prepped and cut into ½ inch (1 cm) pieces. Keep the butter in the fridge (so it stays super cold) until you're ready to mix it with the flour.
- Cold water: The key to a good pie crust is keeping all of the ingredients cold. Because of this, I like to add a few ice cubes to my water to keep it extra cold. That said, don't add the ice cubes into the pie dough (strain them out).
Look at the recipe card below for exact measurements.
How To Make Pie Crust By Hand
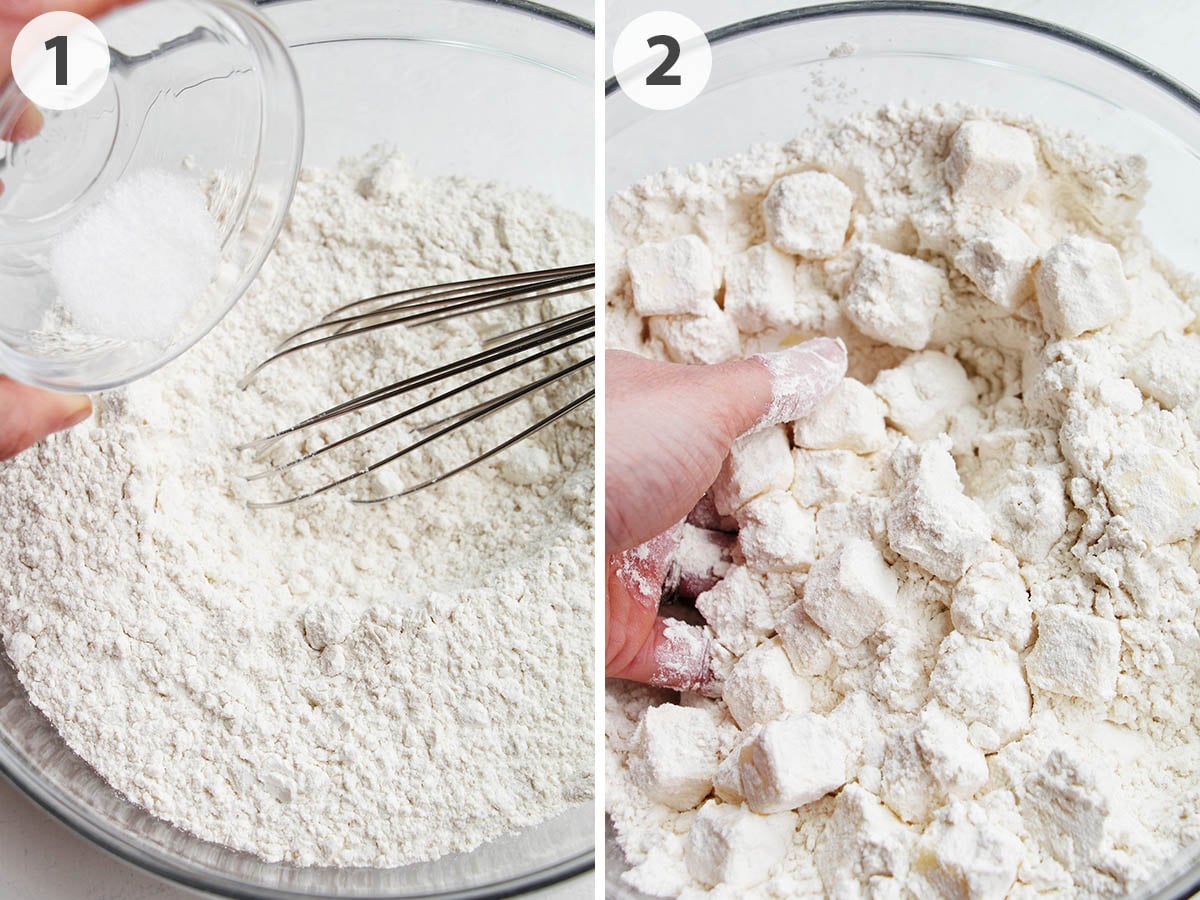
Step 1: First, mix the dry ingredients by whisking together flour and salt.
Step 2: Coat every piece of butter in flour. This step is important because it will help minimize gluten formation.
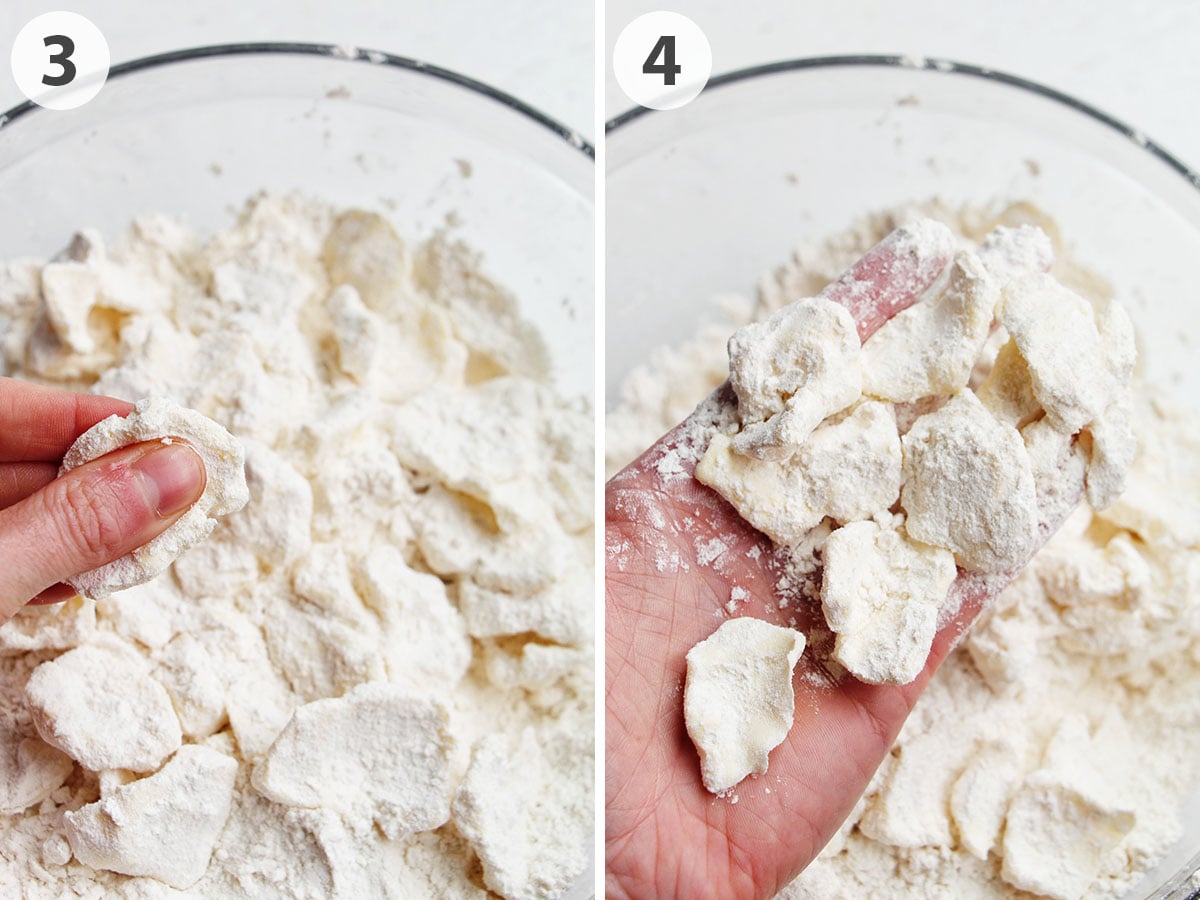
Step 3: Grab a piece of butter in your fingers, and flatten it with your thumb. Don't worry too much about the specific size of the butter. If some pieces break in half, that's okay. Similarly, if the pieces stay large, that's okay as well.
Step 4: Continue this process until all cubes of butter have been flattened. I like to then re-toss the butter to ensure they're coated in flour.
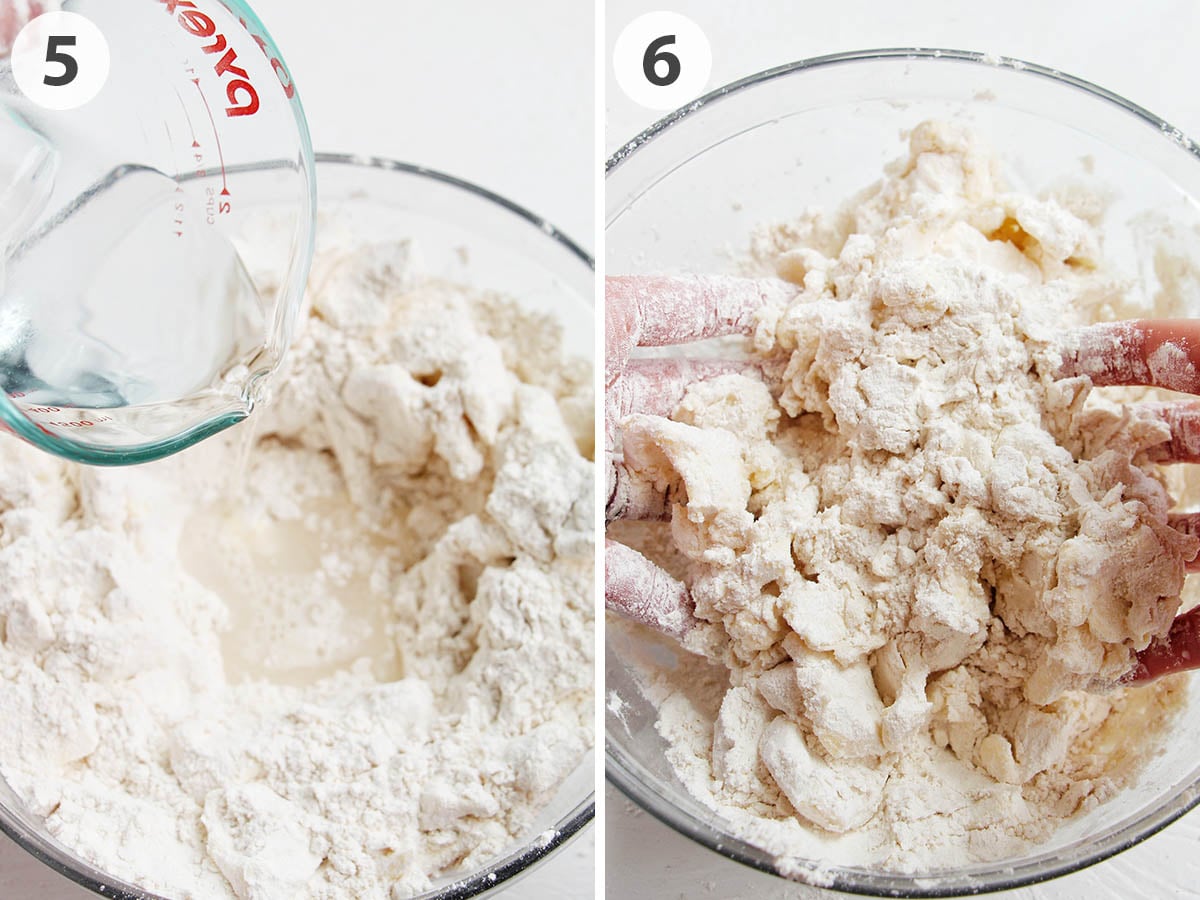
Step 5: Make a well in the center of the flour and butter, and pour in ½ cup (114 grams) of water (not any of the ice cubes).
Step 6: Use your fingertips to toss the dough together. Do your best to help the flour absorb the water without kneading the dough.
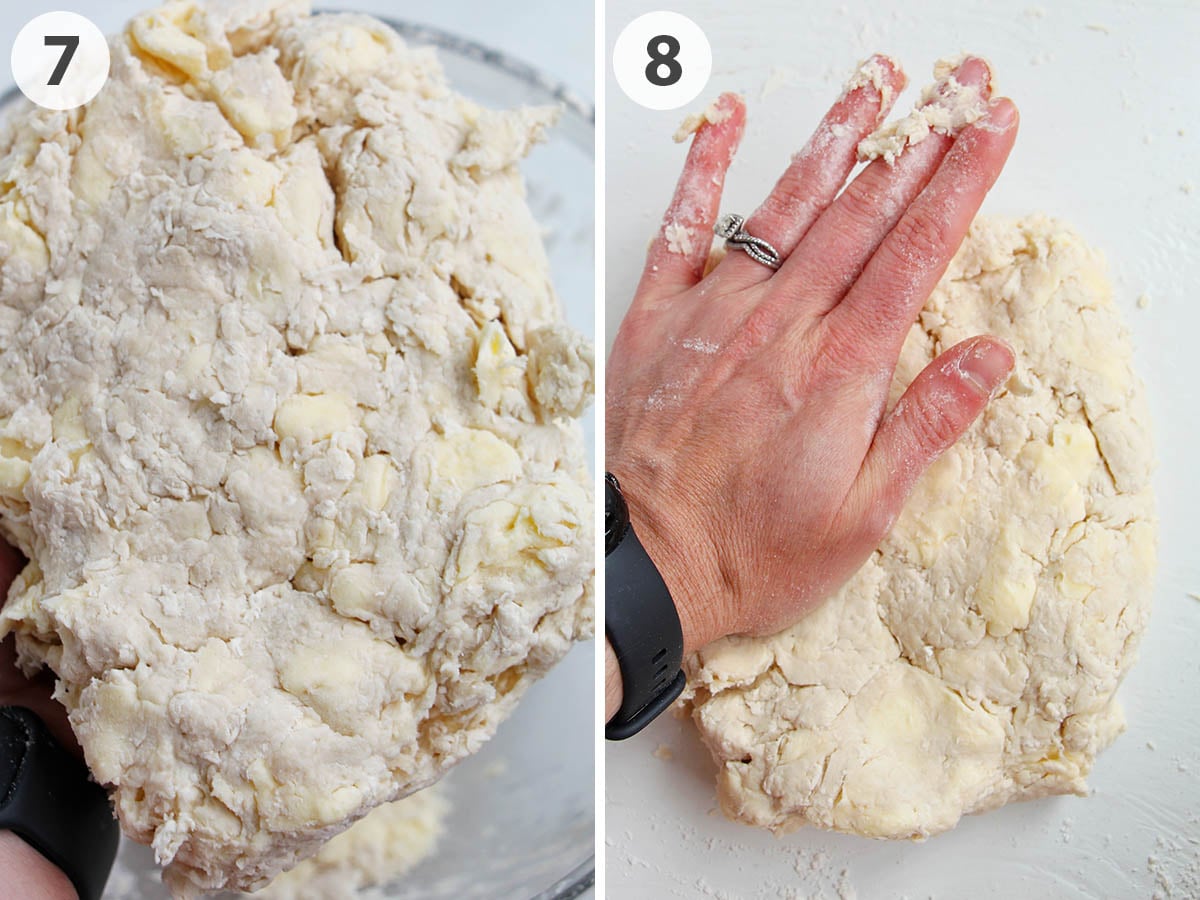
Step 7: Next, check the hydration level of the dough. You'll likely still need to add more water. Push the dough together and see how easily it sticks together. If you notice it doesn't stay together well, or there are still large amounts of flour, it's time to add more water. Add in water only 1 tablespoon (14 grams) at a time until you notice the dough can easily hold together but isn't overly wet or sticking to your hands.
Step 8: Transfer the dough to the counter and pat in any excess flour. Then shape it into a rectangle and tightly wrap it with some plastic wrap. Allow the dough to chill, so the butter gets solidified, for about 30 - 60 minutes.
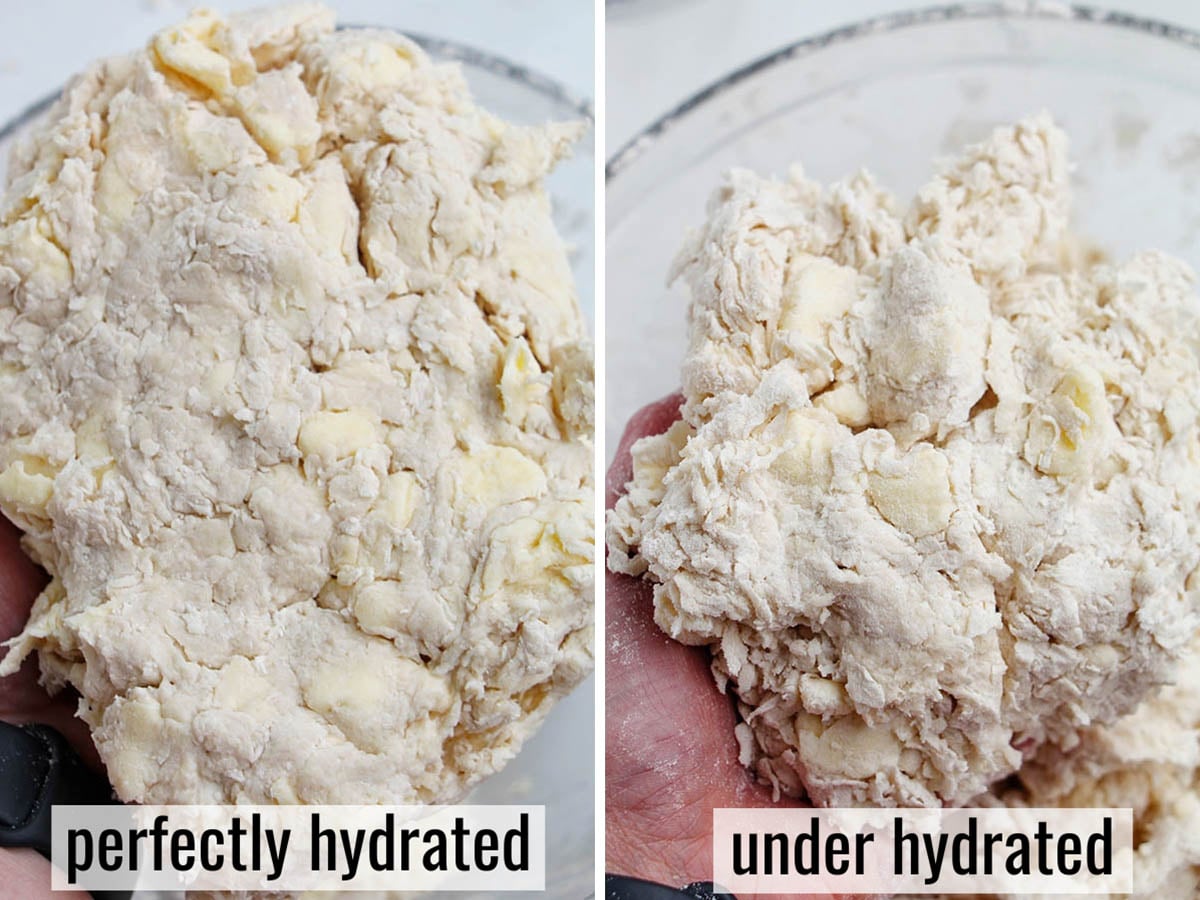
Here's an example of what my fully hydrated pie dough looks like compared to under-hydrated dough that still needs more water.
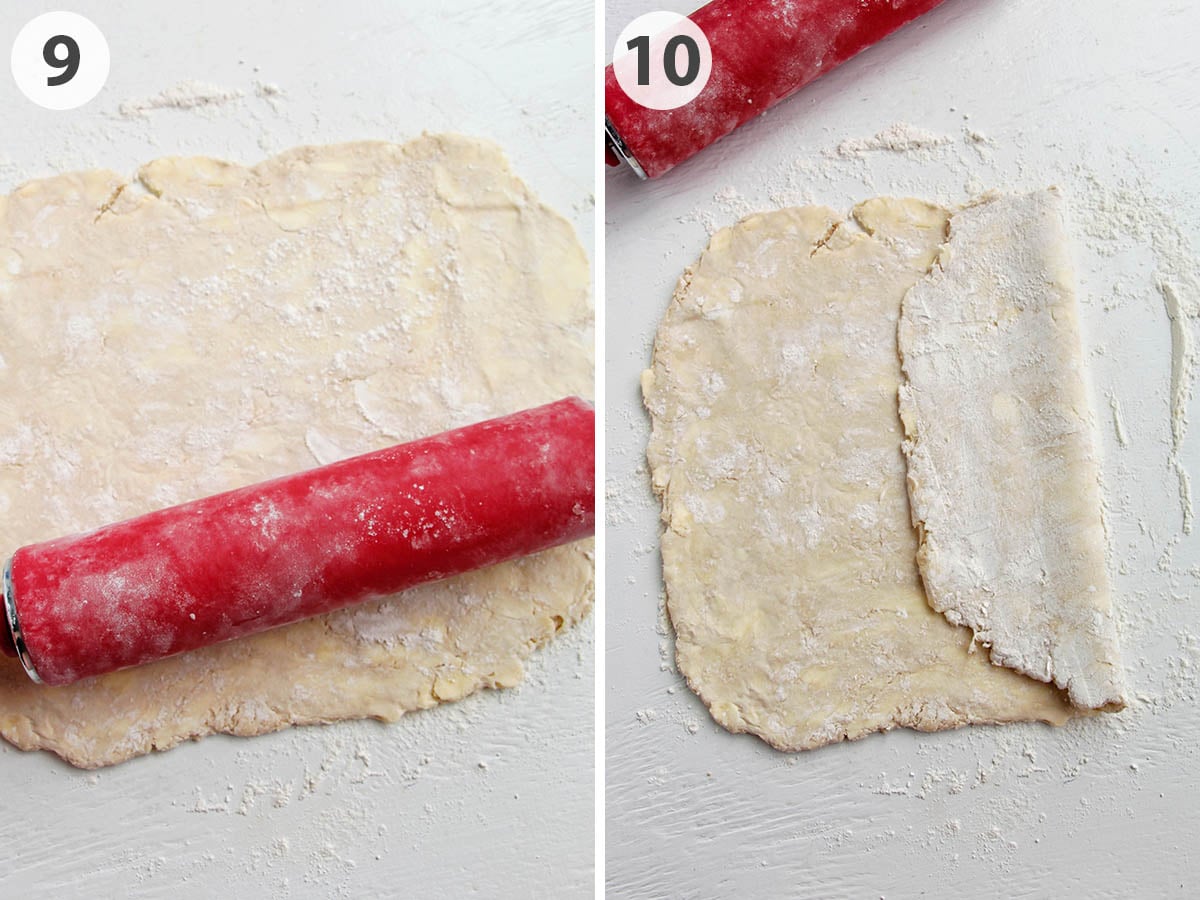
Step 9: Now it's time to roll out the dough. This is an important step called lamination. Don't skip this, as it will help incorporate the butter into the pie dough and ensure it doesn't leak out as it bakes. On a lightly floured surface, roll the dough until it's a large rectangle, about ¼ inch (6 mm) thick.
Step 10: Then fold the dough in thirds, starting by bringing the right side of the dough to the center.
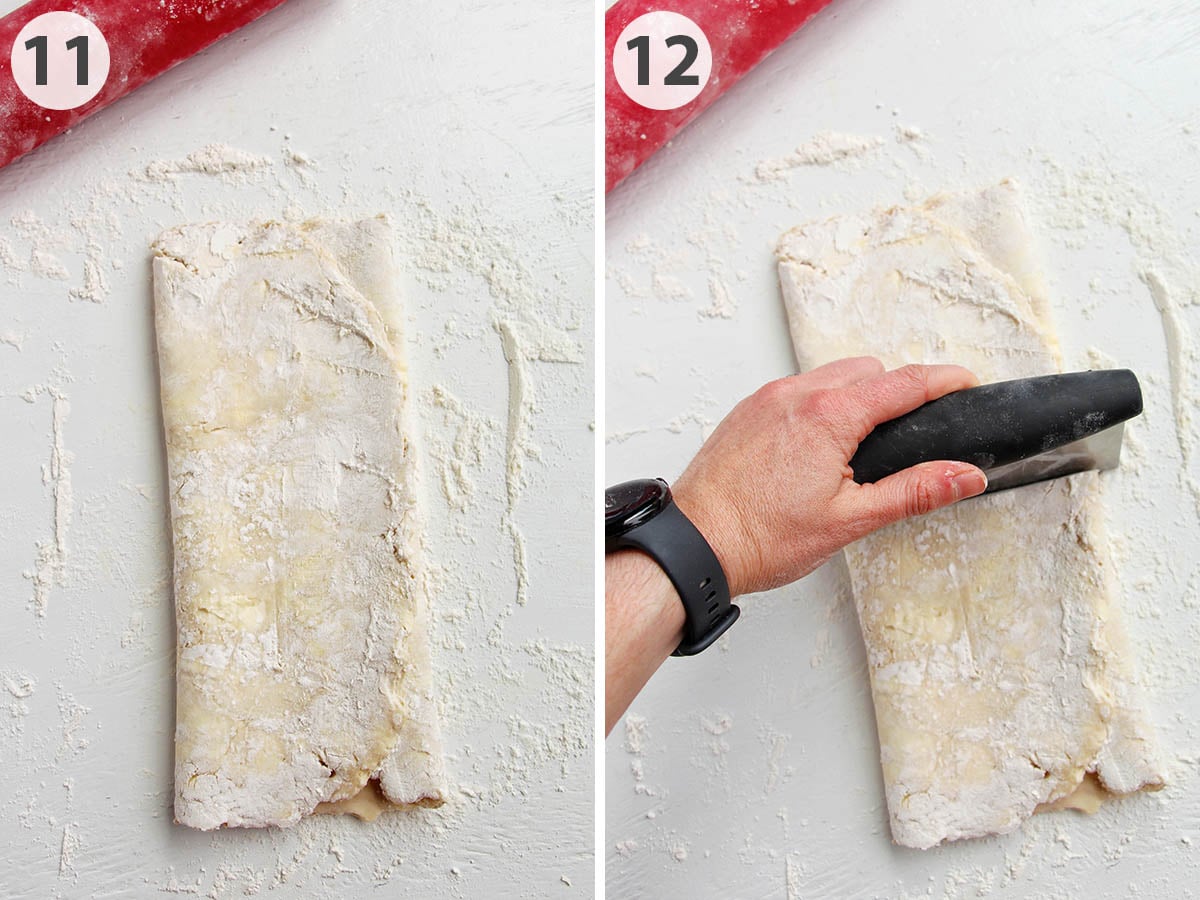
Step 11: Then flip and overlap the left side of the dough on top.
Step 12: Cut the dough in half, so you end up with two smaller rectangles.
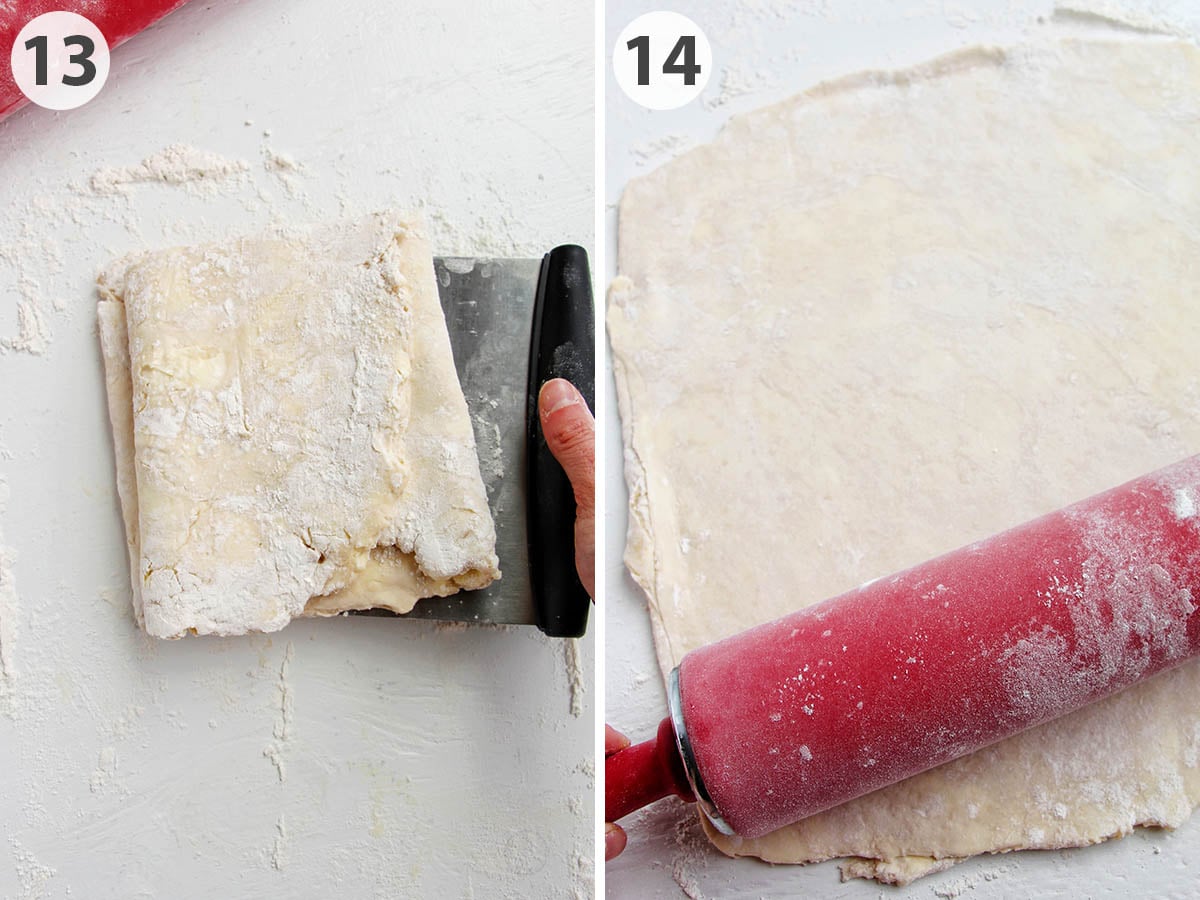
Step 13: Then stack them on top of each other.
Step 14: Repeat the same process of rolling out the dough, adding a little more flour only if you notice the dough is sticking to the counter or the rolling pin.
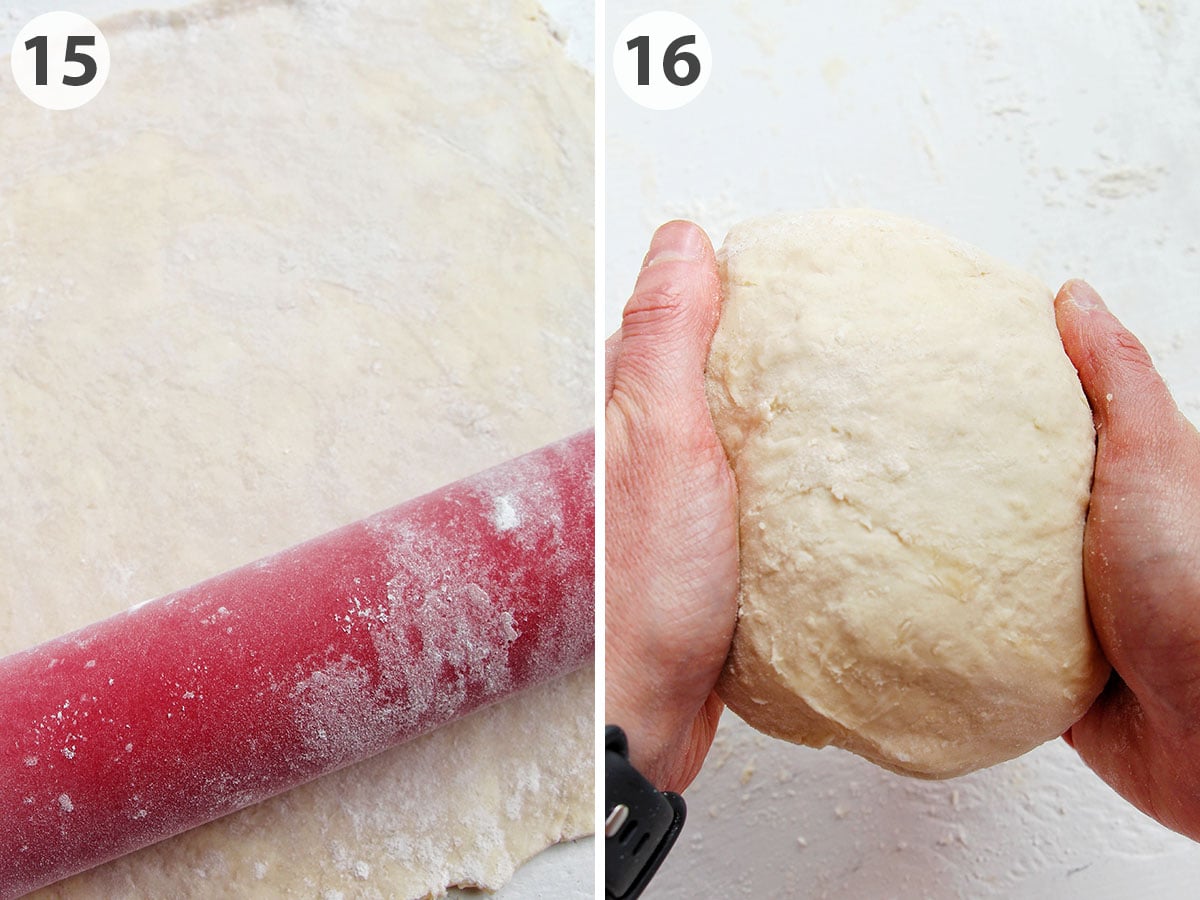
Step 15: At this point, the butter should be evenly laminated within the dough.
Step 16: This recipe yields two pie crusts, so you'll need to cut the dough in half and shape each piece into a circle. Then tightly wrap them in plastic wrap and rest in the refrigerator for at least 1 hour or overnight, until the butter has fully solidified and chilled.
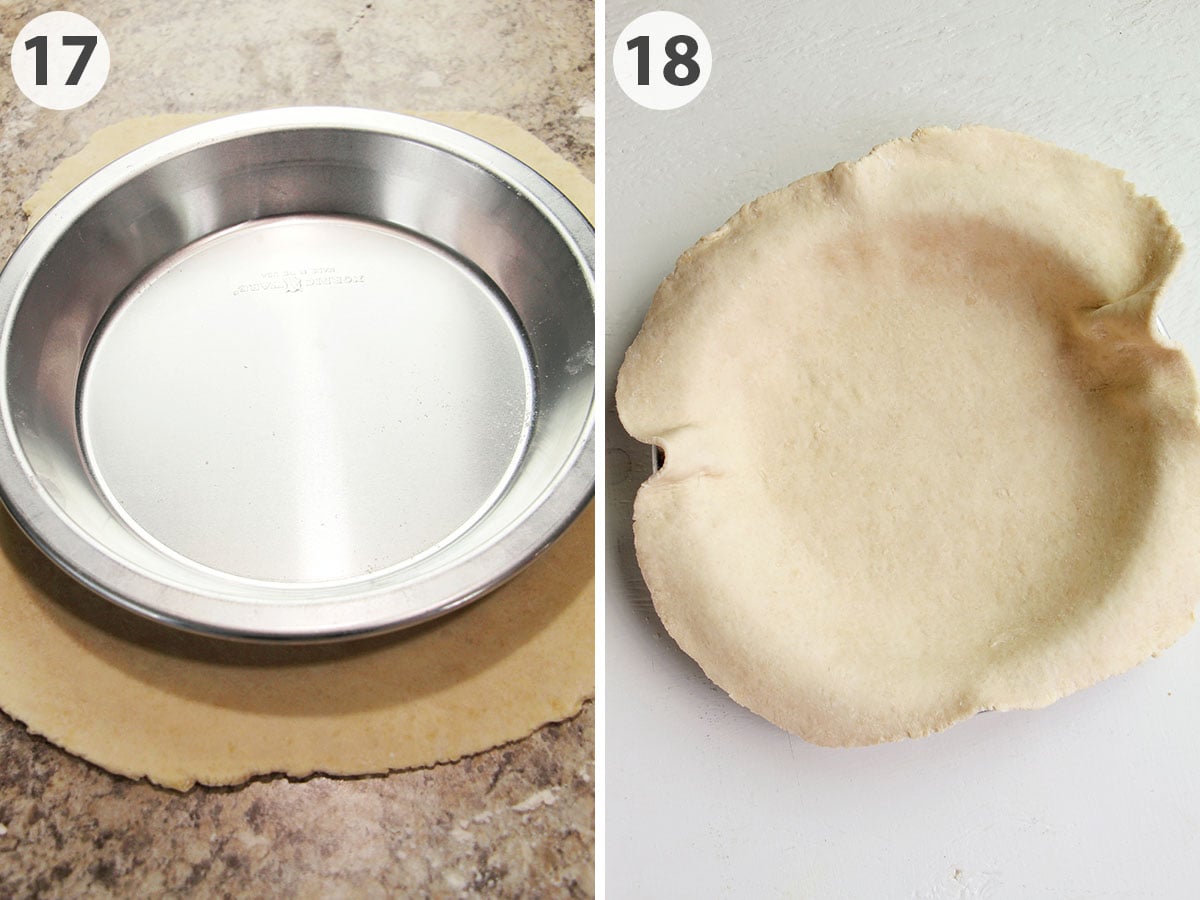
Step 17: When you're ready to begin making your pie, work with one piece of dough at a time. Roll it out on a lightly floured counter until it's slightly larger than your pie dish and ¼ inch (6mm) - ⅛ inch (3mm) thick.
Step 18: Place the dough inside your pie plate (I prefer a metal pie dish).
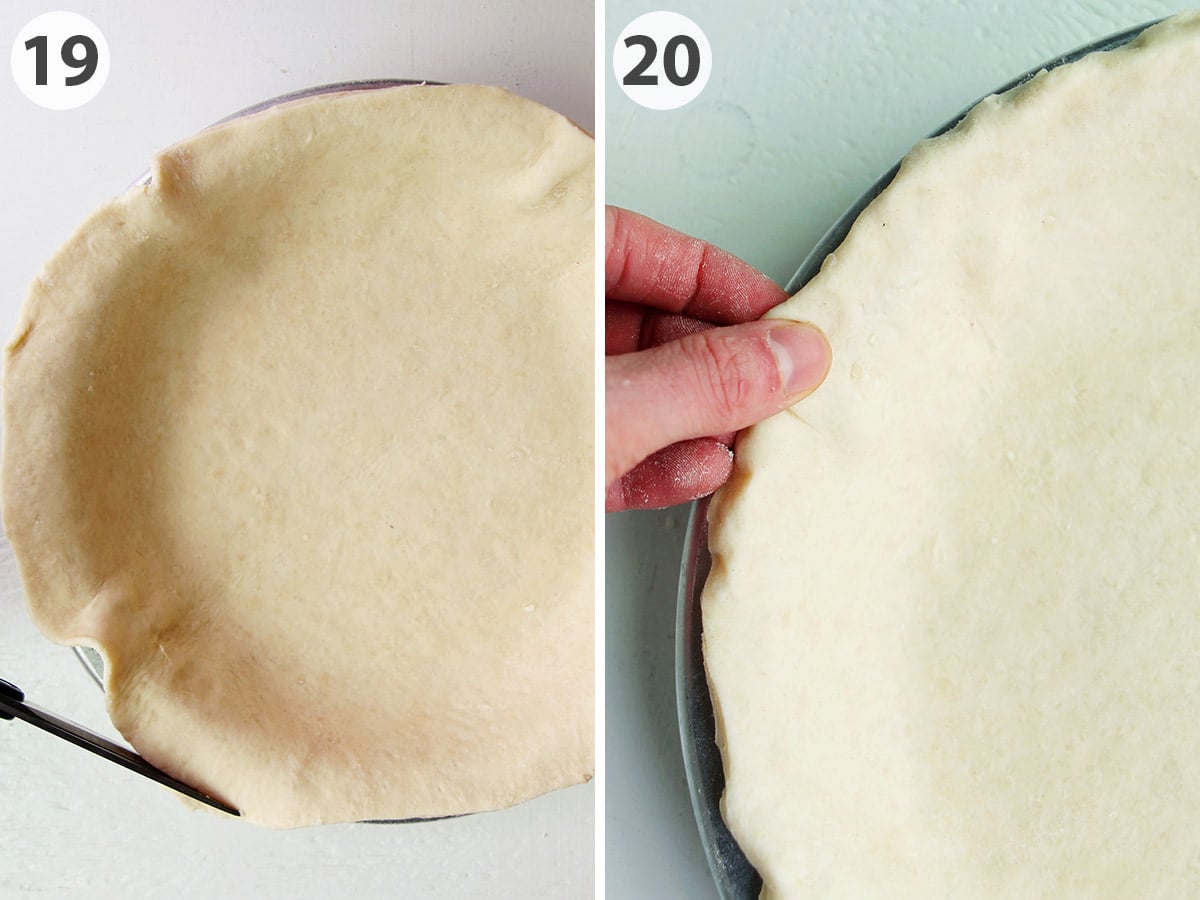
Step 19: Use kitchen scissors or a sharp paring knife to trim off any excess dough, leaving about ½ inch (1- 2 cm) of overhang.
Step 20: Then tuck the ends of the pie crust underneath itself and press them together to make a uniform crust that's flush with the edge of the pie plate. After this, you'll want to chill the pie crust in the refrigerator for 30 - 45 minutes, until the dough has fully chilled
Jessica's Expert Tips
- It's important to rest the dough because it gives the gluten time to relax. This helps to prevent the dough from shrinking as it bakes.
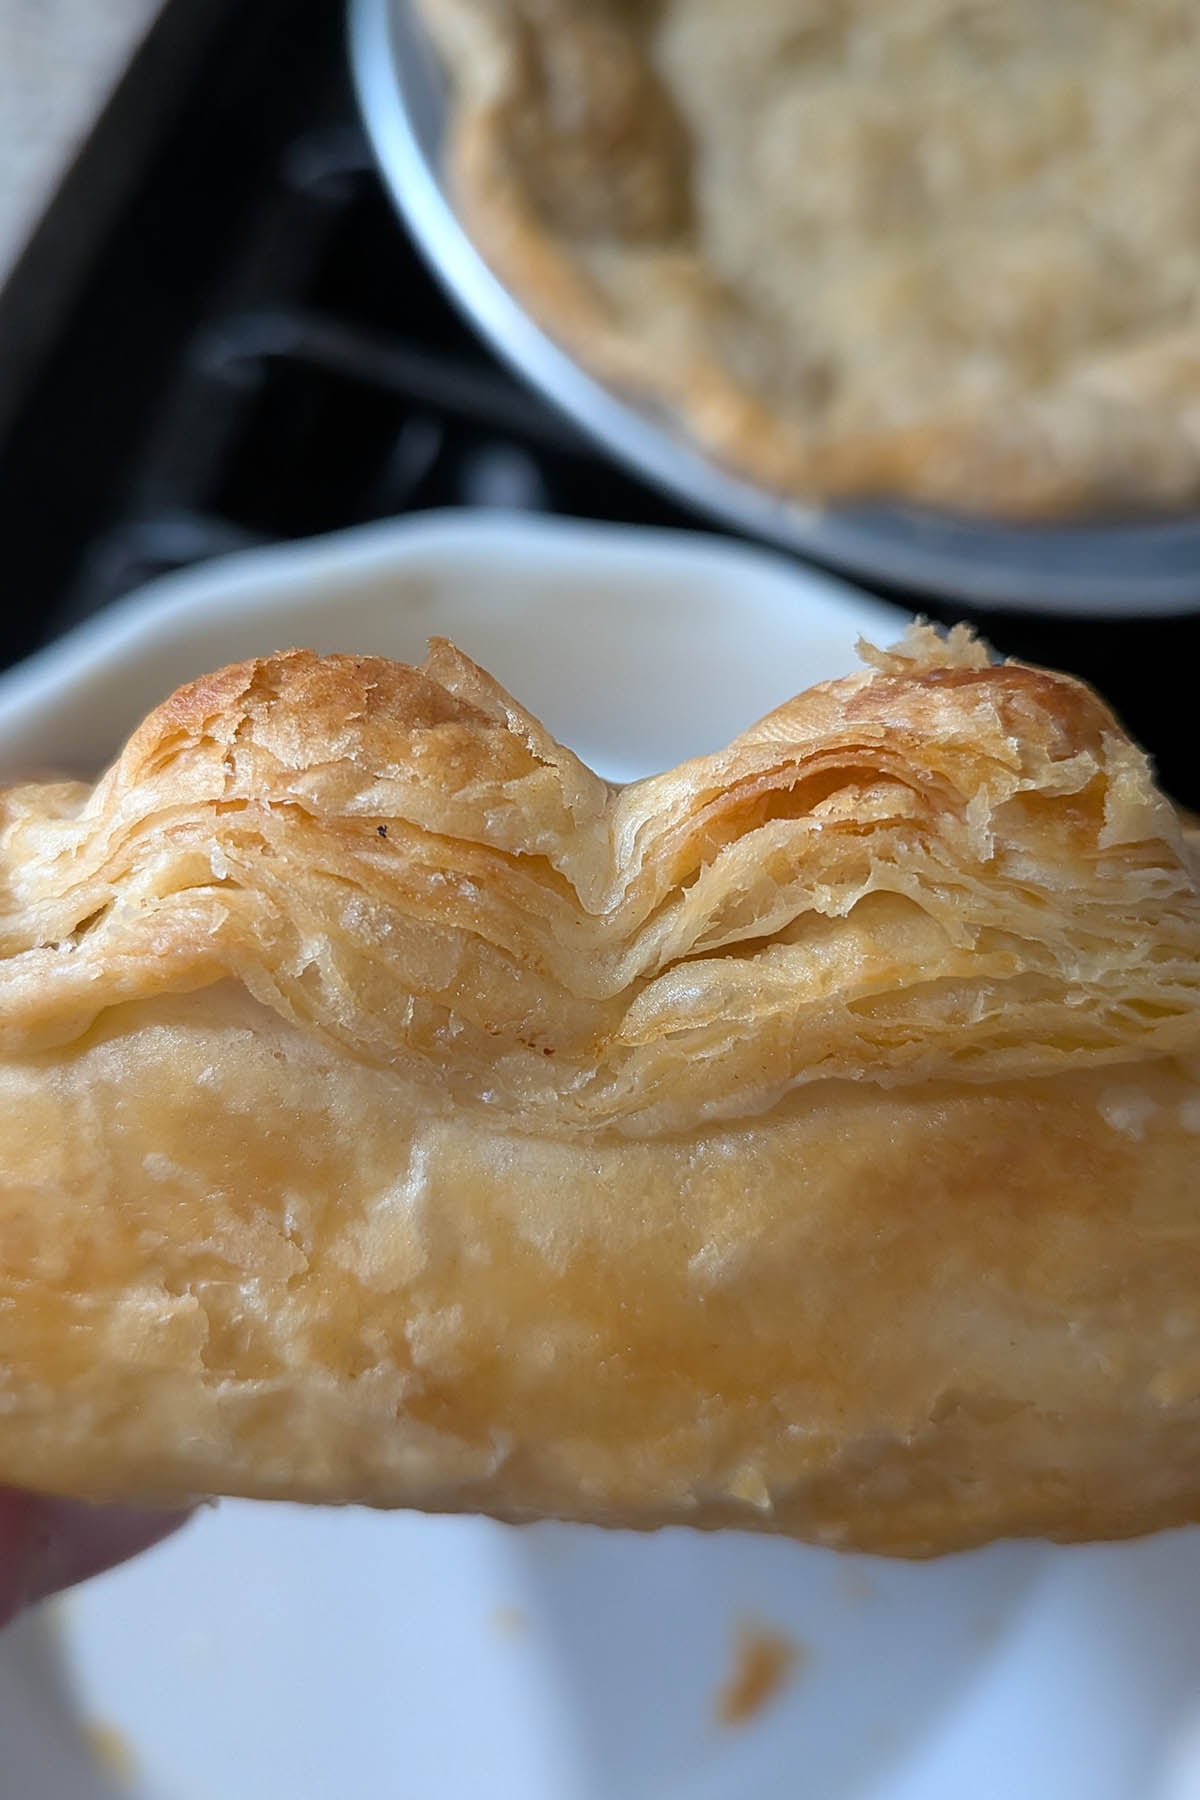
- The key to a good pie crust is always keeping the dough cold. You have to keep the butter super cold so it melts in the oven and creates steam that pushes up the layers of the dough to create the best flakes.
- Don't be tempted to over-knead/overwork the pie dough, or you can end up with a tough pie crust. The key is gently kneading, using the heel of your hand to push the dough together. This will help the water hydrate the flour without too much kneading.
- One of my favorite tools for making pie crust is a bench scraper. It's perfect for cutting the pie crust, cleaning excess flour off the counter, and transferring the rolled-out pie crust to the pan.
When is Par-Baking or Blind Baking Necessary
Par-Baking is a technique that partially bakes the pie crust before adding a filling and baking the entire pie again.
Par-baking is often used for single-crust pies, custard filling (like pumpkin pie), or even an egg quiche. The goal is to give your crust time to develop a flaky, crispy bottom.
This is because these types of pies or savory bakes often need a shorter cooking time. Without par-baking, you could end up with a soggy, undercooked pie crust.
Blind baking is a technique that fully cooks the pie crust. You do this without any added filling.
Blind baking is often used for fillings that don't need baking, like cream, pudding, chiffon, or no-bake pies. The goal is to fully cook the pie crust until it's golden brown, flaky, and crunchy.
Take a peek at the recipe card below for instructions on how to par-bake and blind bake your pie crust.
Pie Dough Troubleshooting
- My pie dough is too dry: If you notice your dough isn't holding together very well, you likely need to add more water because the dough is under-hydrated. Do this slowly, as you don't want to add too much water. I like to add just a tablespoon at a time to pockets where I still see flour.
- My pie dough is too wet: If you notice your dough is very wet or sticks to the counter when you roll it out, you have likely added too much water. You can fix this by heavily dusting the counter with flour and allowing the dough to absorb more flour as you roll it out.
- My butter is leaking when the pie bakes: This issue can happen if the butter is too large or hasn't been properly laminated. Once it starts leaking, there's not much you can do to fix this. That said, focus on your lamination technique next time.
- My pie dough is cracking: If the dough cracks a little, it's not that big of a deal. If you notice large cracks that won't allow the dough to smoothly roll out, you likely didn't add enough water. You can add a few more drops of water (dunk your hand in water, and flick tiny drops onto the pie dough), then fold the dough over on itself to cover the water and use the heel of your hand to help gently knead and hydrate the dough.
FAQs for Handmade Pie Crust
After testing metal, glass, and ceramic, my number one recommendation is a metal pie plate. I personally love the Nordic Ware 9 inch pie pan.
Both ceramic and glass pie plates can yield a soft, soggy bottom crust (this is especially common with glass) since they don't conduct heat as well as metal. You may need to increase baking times if you decide to use a ceramic or glass pie dish.
I've found that as long as you use good pie crust technique, as you'll learn in this post, the vodka and vinegar aren't really doing much to prevent gluten formation in the pie crust.
Rather, focus on your technique (not over-kneading), and you can pass on these extra ingredients!
Every brand of flour varies slightly in its protein content. Some flours (generally with higher protein contents) can absorb more water. That's why it's best to add the amount of water based on feel and visual cues rather than a specific amount listed in a recipe.
You can use a food processor, but generally you'll end up with a less flaky and more mealy crust with this method. That's because the food processor will break the butter into smaller pieces, resulting in a more crumbly pie crust. It's not my preferred technique, but it is an option!
More Pie Recipes
Love this recipe? Please leave a 5-star ⭐⭐⭐⭐⭐ rating in the recipe card below. Have questions as you're cooking? Leave a comment below, and I'll help!
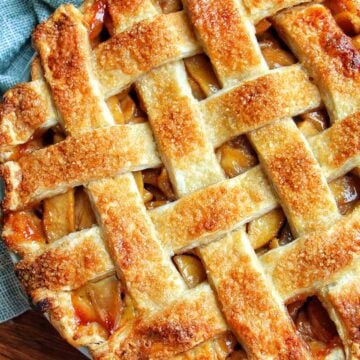
3 Ingredient Pie Crust By Hand
Equipment
- bench scraper
- Rolling Pin
- 9 inch (23 cm) aluminum metal pie plate
- kitchen scissors or a sharp paring knife
- fork
- pie weights (or dried beans/rice)
Ingredients
- 3 ¼ cups all purpose flour
- ½ teaspoon fine sea salt
- 1 cup (2 sticks) cold unsalted butter cut into ½ inch (1 cm) pieces
- ½ cup cold water plus more as needed (add a few ice cubes to keep the water cold)
Instructions
- Add flour and salt to a large mixing bowl and whisk to combine. Add cold, cubed butter and toss to coat each piece in flour.
- Using clean hands, work the butter and flour together by flattening the butter with your fingers. Once all the butter is flattened, ensure all pieces are coated in flour.
- Add ½ cup (114 grams) of water (no ice) to the flour and butter mixture and toss to combine. Push the dough together to check the hydration level. The dough should easily hold together, but not feel too wet or sticky. You'll need to add more water if the dough isn't holding together or you notice dry patches of flour. Add an additional 1 tablespoon (14 grams) of water at a time until no dry spots remain.
- Pour the dough onto a clean work surface. Pat any excess flour into the dough, then shape into a rectangle and tightly wrap with plastic wrap. Rest in the refrigerator for 30 minutes - 1 hour, until the dough has fully chilled.
- Lightly flour a clean work surface. Roll the dough out into a large rectangle, about ¼ inch (6 mm) thick. Fold the dough in thirds, bringing the right side of the dough to the middle then overlapping the left side of the dough on top. Cut the dough in half with a bench scraper or knife (so you have two smaller rectangles) and stack them on top of each other. Repeat this process one additional time, at which point the butter should be evenly laminated within the pie dough (no large chunks remaining). If at any point during this process you notice the crust sticking to the counter or the rolling pin, add a light dusting of flour. Cut the dough in half and shape each piece into a circle and tightly wrap with plastic wrap. Rest in the refrigerator for at least 1 hour or overnight, until the butter has fully solidified and chilled.
- Lightly flour a clean work surface. Grab one piece of dough at a time and roll into a circle that's slightly larger than a 9 inch (23 cm) aluminum metal pie plate and ¼ inch (6mm) - ⅛ inch (3mm) thick. Place the dough inside the pie plate. Use kitchen scissors or a sharp paring knife to trim any excess dough, leaving a ½ inch (1- 2 cm) of overhang. Tuck the end of the pie crust underneath itself and press together to make a uniform crust that's flush with the edge of pie plate. Lightly cover with plastic wrap and rest in the refrigerator for 30 - 45 minutes until the dough has fully chilled.
- To Par-Bake (Often used for single crust pies, custard fillings, quiche, etc.): Heat oven to 425°F (220°C). Dock the bottom of the pie crust with a fork to add holes for steam to vent. Line the chilled pie crust with parchment paper and fill to the rim with pie weights (or dried beans/rice). Bake for 17 - 20 minutes, until the edges are lightly browned. Remove the pie weights and parchment paper. Return to the oven to cook for an additional 2 - 4 minutes, until the bottom of the crust looks less wet.
- To Blind Bake (Often used with cream or cold pies when filling doesn't need to be baked): Heat oven to 425°F (220°C). Dock the bottom of the pie crust with a fork to add holes for steam to vent. Line the chilled pie crust with parchment paper and fill to the rim with pie weights (or dried beans/rice). Bake for 17 - 20 minutes, until the edges are lightly browned. Remove the pie weights and parchment paper. Return to the oven to cook for an additional 7 - 12 minutes, until the bottom of the crust is golden brown.
- For Double Crust Pies: Bake according to the recipe's instructions.



Pat
I can't believe how light and flaky this crust is. It has all the layers when it's baked. I think the sea salt adds something special. This is replacing my momma's crust, but she wouldn't mind