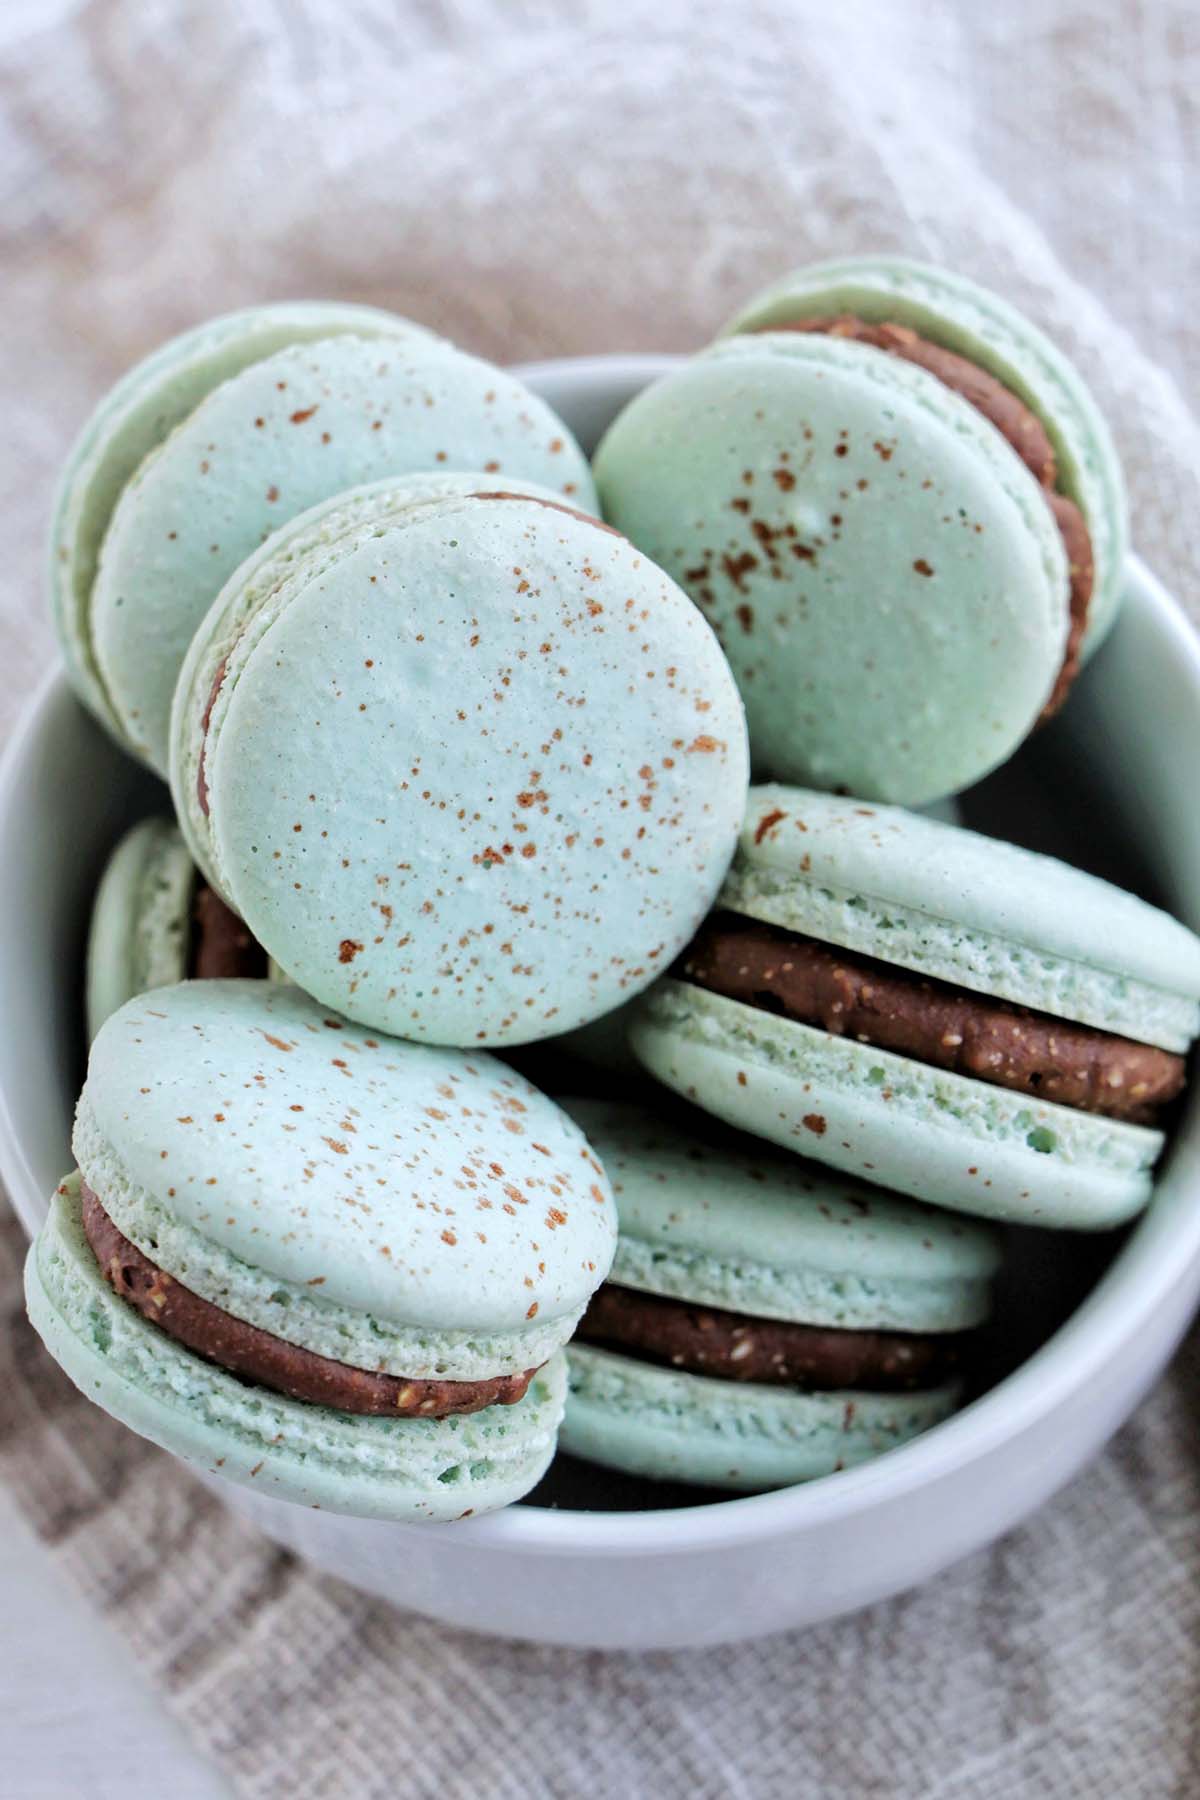
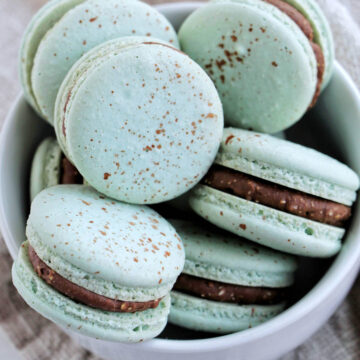
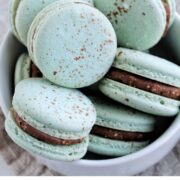
Bake a batch of Easter macarons filled with Cadbury mini eggs ganache. These light blue macarons are perfect for spring since they're decorated to look like a robin's egg.
Want To Save This Article?
Enter your email below and we'll send it straight to your inbox. Plus, you'll receive new weekly recipe inspiration.
With all of the fun Easter candy that pops up in the spring, I knew I had to make a Cadbury mini egg inspired macaron. These beautifully decorated macarons are filled with the most decadent Cadbury egg chocolate ganache filling.
Plus, the light blue macaron shells get an easy decoration (don't worry, I'll show you exactly what to do) that makes them look like robin's eggs.
These macarons are perfect for the spring season, an Easter party, or as a way to use up leftover Easter candy.
If at any point you struggle with the macaron shells, be sure to check out my macaron baking course with step-by-step instructions for how to make perfect macaron shells. I'll teach you everything you need to know in just a couple of hours!
Jump to:
What You'll Learn In This Recipe
- How to make a Cadbury egg ganache and robin's egg macaron shells.
- The most important steps to get correct in order to bake perfect macarons.
- Troubleshooting steps to try if your macarons aren't turning out correctly.
Enjoy learning tips about making macaron shells? Sign up for my free macaron template and email series. You'll learn my favorite tricks for achieving perfect macarons.
Ingredients You Need
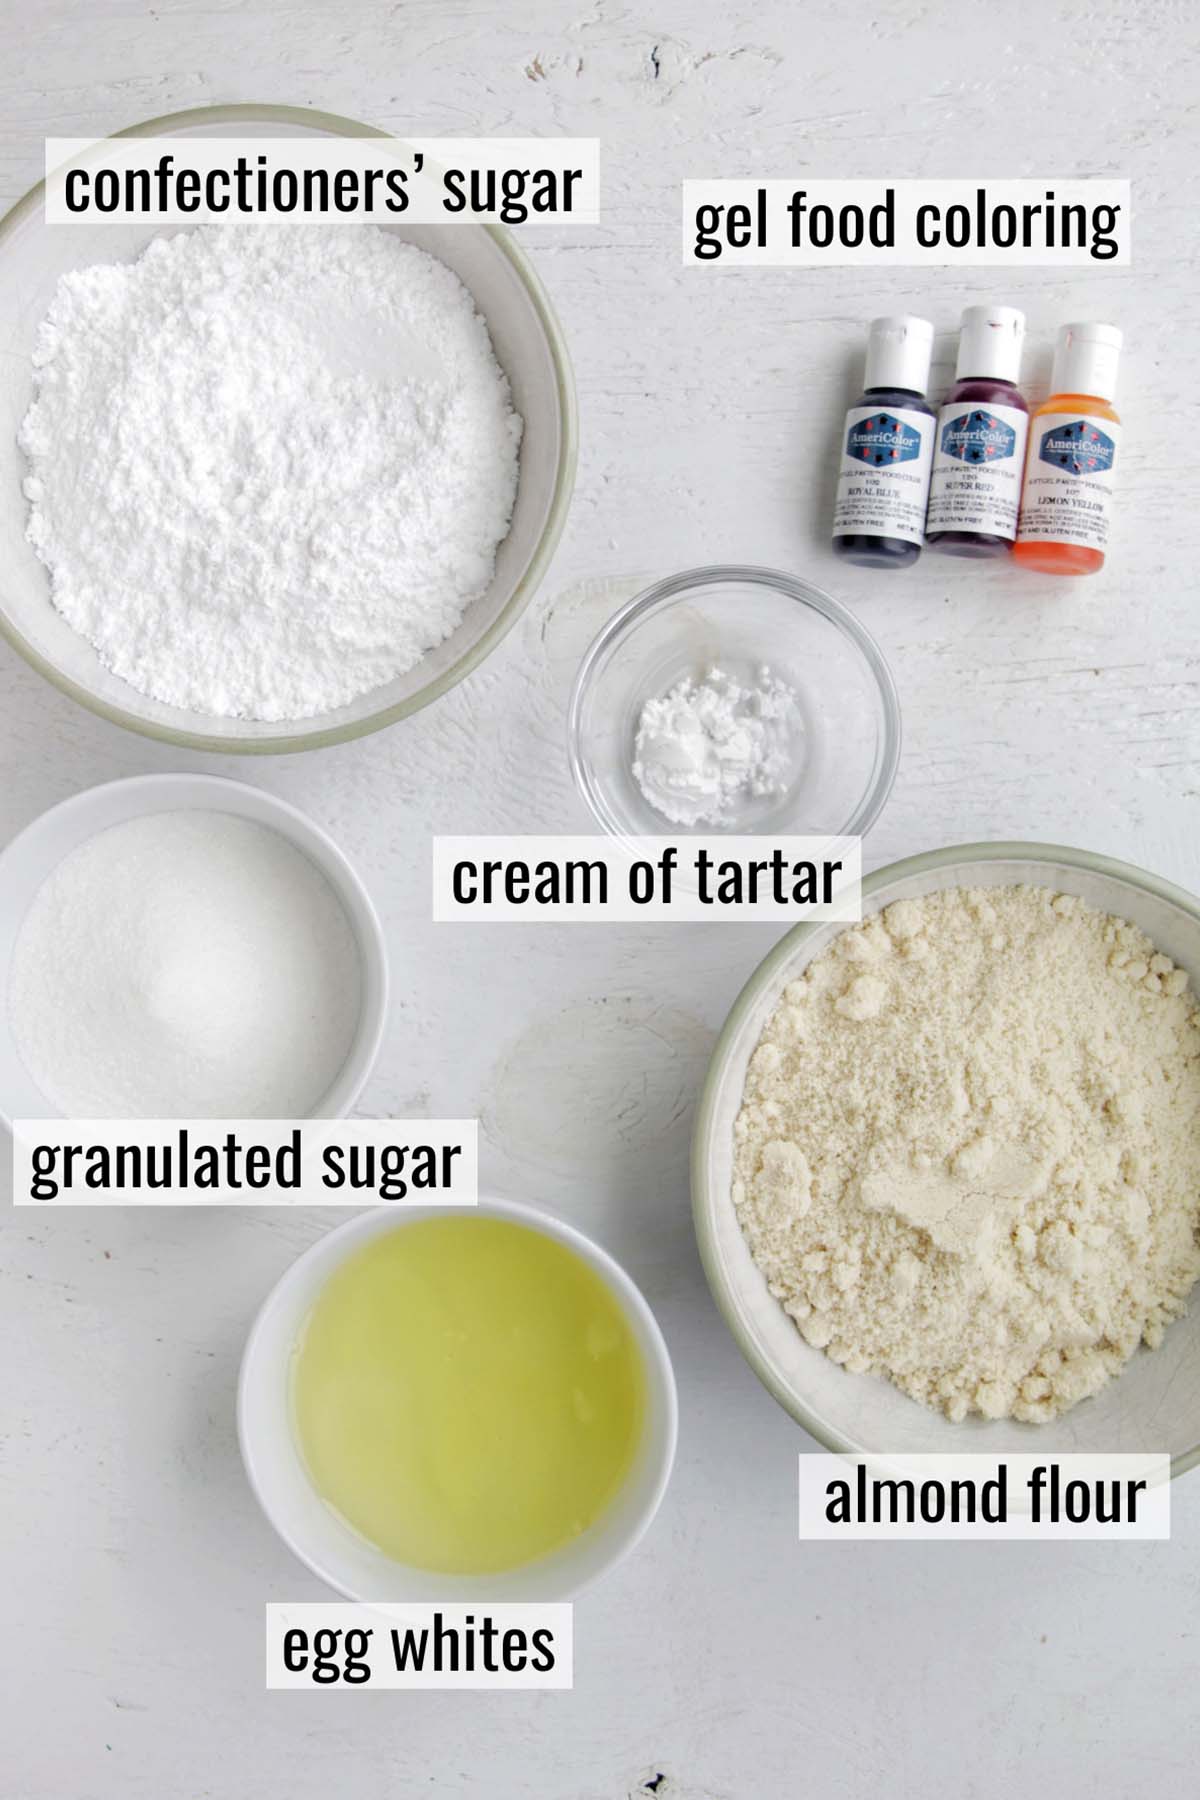

- Egg whites: Egg whites are essential for making meringue. This recipe uses a French meringue, which means the egg whites should come to room temperature. I always recommend using fresh egg whites (not carton egg whites).
- Almond flour: Classic French macarons are made with almond flour. You'll want to use blanched almond flour that's finely ground. I prefer Blue Diamond almond flour, but any brand should work as long as you sift the flour.
- Confectioners' sugar: Be sure to sift the confectioners' sugar with the almond flour. You may also hear this ingredient referred to as powdered sugar or icing sugar.
- Cream of tartar: This ingredient is optional, but highly recommended. It helps the meringue whip up more stable.
- Granulated sugar: Don't be tempted to use less sugar than is called for in the recipe. The sugar helps to provide a sturdy meringue base for the macarons.
- Gel food coloring: You'll want a light blue color for this recipe. Always use gel or powdered food coloring (not liquid).
Check out the recipe card below for a full list of ingredients and exact measurements.
How To Make This Recipe
Here's a step-by-step photo guide for making Cadbury egg macarons. How the macaron batter looks and feels is very important. Be sure to pay attention to this as you're baking!

1. Let's first do some prep work so you can stay organized while baking macarons. Start by separating the egg whites from the yolks, sifting the dry ingredients, and printing off macaron templates for the baking sheets.
Next, it's time to make the French meringue by adding the room temperature egg whites and cream of tartar to the mixer and whipping on medium-low speed until the eggs are very foamy.
2. Add a third of the granulated sugar at a time, allowing the mixer to beat in each batch of sugar for about 45 seconds before adding another batch.
3. Once all the granulated sugar is incorporated, turn the mixer speed to medium-high and allow the egg whites to continue to whip until stiff peaks form, about 10–11 minutes. You can add light blue gel food coloring once the egg whites reach soft peaks stage.
4. Be sure to check the meringue once it has reached stiff peaks. Here are some visual and textural cues to know the meringue is properly whipped:
- You'll notice the meringue starts to ball up inside the whisk and is glossy.
- Pull the whisk out of the mixer. A stiff peak should stand straight up (no curl at the tip).
- Hand whisk the meringue. You should feel some resistance (not too flimsy).

5. Pour the sifted almond flour and confectioners' sugar into the meringue mixture, and gently fold them together using a silicone spatula.
6. Next it's time to macaronage (mix) the batter into a pipeable consistency. Slowly, spread the mixture along the side of the bowl, then wipe it back down. Be sure to do this gently. Repeat until the mixture has reached a smooth, shiny, flowing consistency.
You can test this by lifting your spatula and seeing if the batter drops almost like lava. Once the batter drops back into the bowl, it should take about 10–15 seconds for the ribbon that formed to "disappear" back into the rest of the batter.
7. Pour the batter into the prepared piping bag. Hold the bag vertically, and pipe 1.5 inch (3.8 cm) circles. Once you have reached the desired size, release the pressure on the bag, and twist your wrist without lifting up.
8. Tap the sheet pan down the counter a few times to release any air bubbles. Then pop the large air bubbles that rise to the surface with a toothpick.
Allow the batter to sit on the counter and dry for 60+ minutes until a thin "skin" develops, and you can touch the tops without ruining the macaron. It's important to allow the shells to fully rest, or they could crack.

9. Bake one sheet at a time on the center rack of the oven for 19–23 minutes. If you notice the macarons are browning or dulling in the oven, once the macarons have formed feet and a solid top (this usually takes at least 10 minutes) place a piece of aluminum foil over the macarons for the remaining cooking time.
You can test that the macarons are done by gently touching the edge and the feet of the macarons. If the shell wiggles, is sticky, or wet, the macarons need to bake longer. Remove macarons from the oven, and allow them to cool on a baking sheet until completely cooled.
10. Optionally, to decorate the shells, mix water and brown food coloring in a small bowl. Using a food-safe paint brush, dip the brush into the food coloring mixture and flick it over the macaron shells to create small dots on top. Allow the food dye to fully dry before moving the shells.
11. To make the Cadbury egg ganache add heavy cream that has been heated along with chocolate morsels and butter to a heat-safe bowl. Allow the mixture to sit, without stirring, for 3 minutes.
12. Add Cadbury eggs, vanilla extract, and fine sea salt to the chocolate, and whisk until the mixture is smooth and fully blended.

13. Transfer the ganache to a shallow container, and press plastic wrap against the surface of the ganache (to prevent a skin from forming on top). Place the ganache in the fridge, and allow the mixture to cool until it’s firm enough to pipe, about 30 minutes - 1 hour.
14. Match up macaron shells so they are paired with a similar size/shaped shell. Pipe the filling on one side of the macaron shell using a ½ inch (1.3 cm) round piping tip. Gently, place the matching shell on top of the filling.
Expert Tips
Here are a few helpful tips for making ganache macaron filling:
- The ganache filling can be made up to 7 days ahead of when you need to pipe it onto the macaron shells (just make sure your heavy cream is fresh). Before piping it on the macarons, allow the ganache to sit at room temperature until it reaches a pliable consistency.
- If you choose to use salted butter instead of unsalted butter, be sure to adjust the amount of added salt to taste.
- If you prefer, you can warm the heavy cream on the stove in a saucepan over medium low heat until it begins to steam and bubble.
- Try using an immersion blender instead of a whisk if you wish to achieve a silky smooth ganache without any chunks of Cadbury eggs.
Macaron FAQs
Are you having trouble with your macaron shells turning out correctly? Don't worry! Use this troubleshooting guide or check out the frequently asked questions below.
Store the Cadbury egg macarons in an airtight container in the refrigerator for up to 7 days. Before eating, allow the macarons to come to room temperature.
Here are a few common causes of flat macarons:
1. The oven is too hot or too cold: If your oven is too low, you'll notice that the macarons won't properly rise. Not only will they be flatter than a normal macaron, but the feet will be short (under 2 millimeters), and the tops will likely be wrinkly or indented.
On the other hand, if your oven is too hot, the shells will be flat because proper feet will not form. The macarons will bake too quickly on the outside, leaving a moist interior that doesn't properly rise.
2. You under whipped the meringue: You didn't whip your meringue to stiff peaks. Under whipped meringue won't be strong enough to properly rise in the oven. It can lead to flat, wrinkled, or weak macaron tops.
3. You over macaronaged your batter: Another common issue that results in flat macarons is over macaronaged batter. Macaronage is a term that refers to folding the dry macaron ingredients (almond flour and confectioners' sugar) into the meringue. This process smooths the mixture and helps the macarons bake with proper structure.
When you over macaronage, you'll notice the batter is very thin and easily falls off the spatula. You'll also notice that the batter spreads really easily when piped. It might even fall out of your piping bag when transferring from one circle to the next on your piping template.
If you're still having trouble, check out my troubleshooting guide for flat macarons.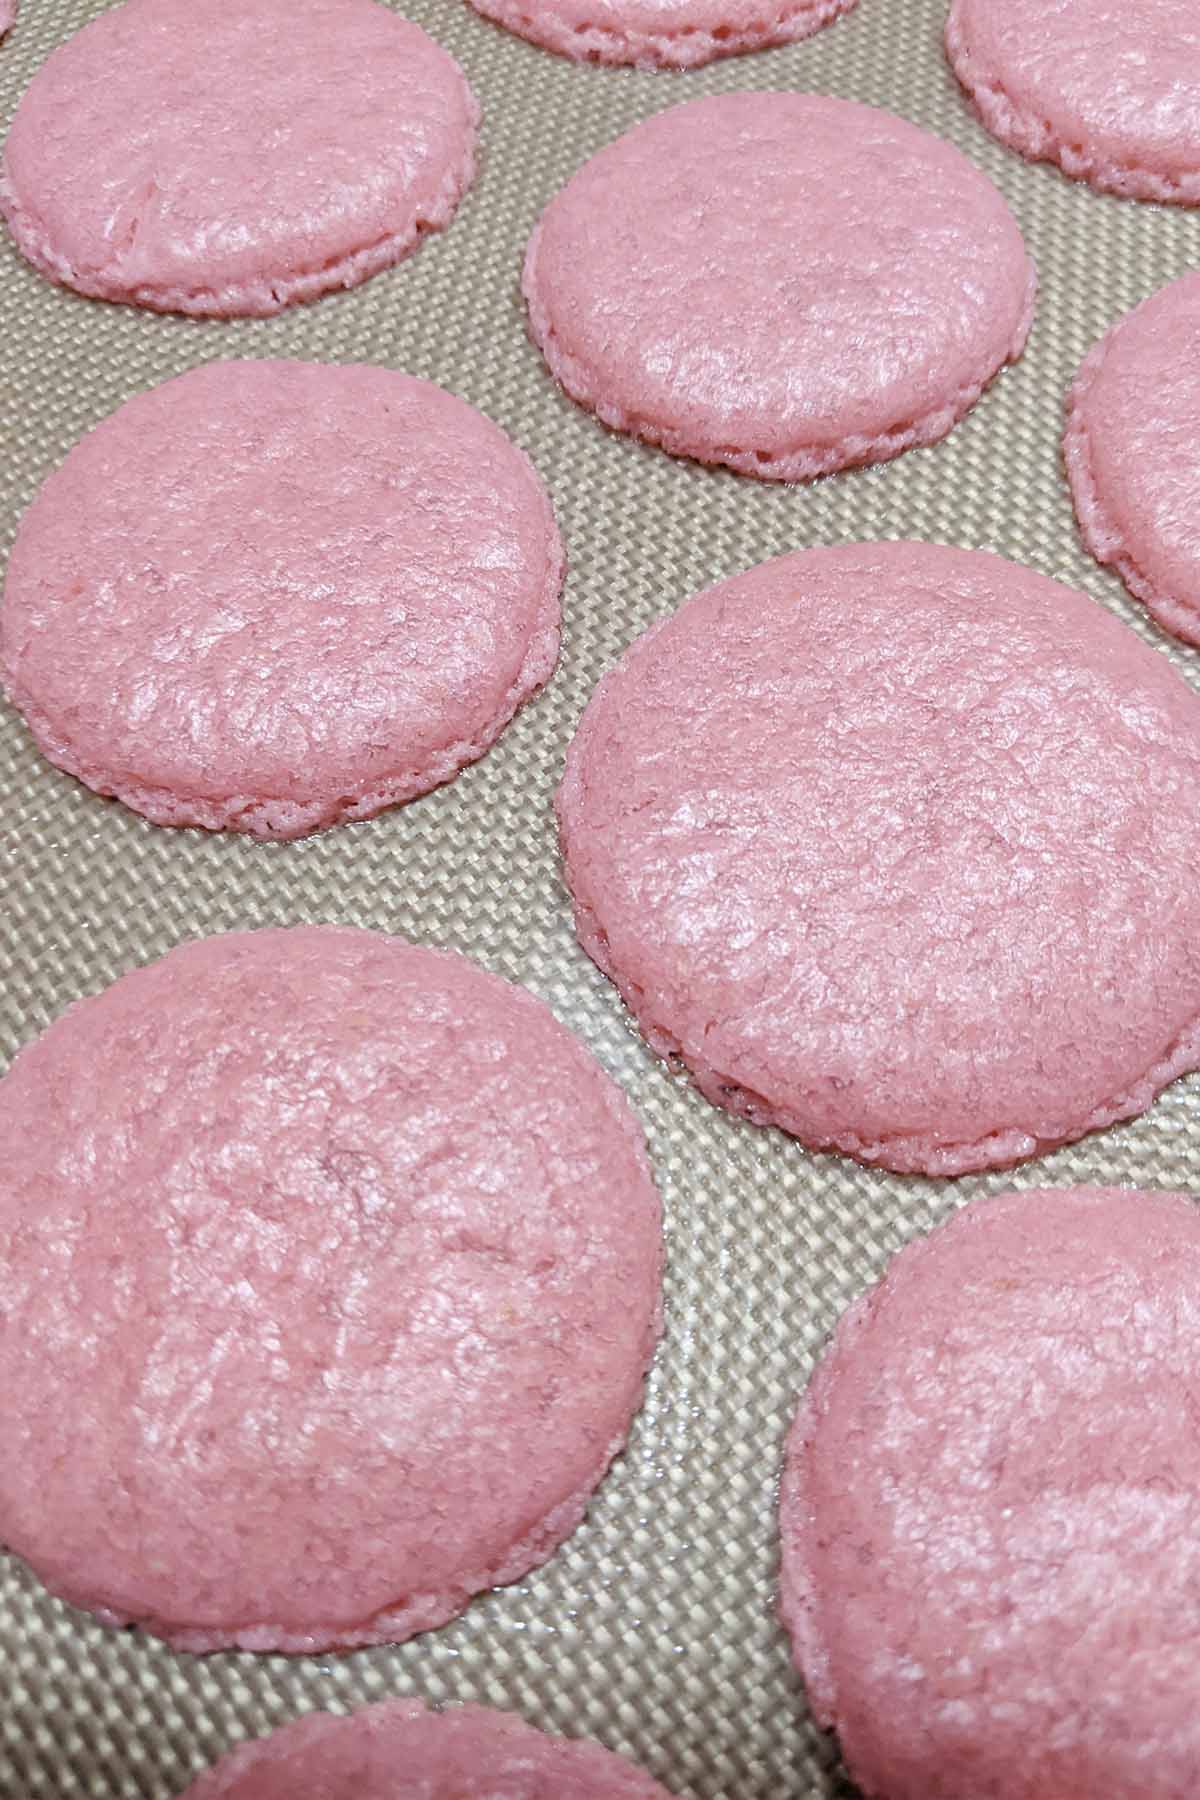
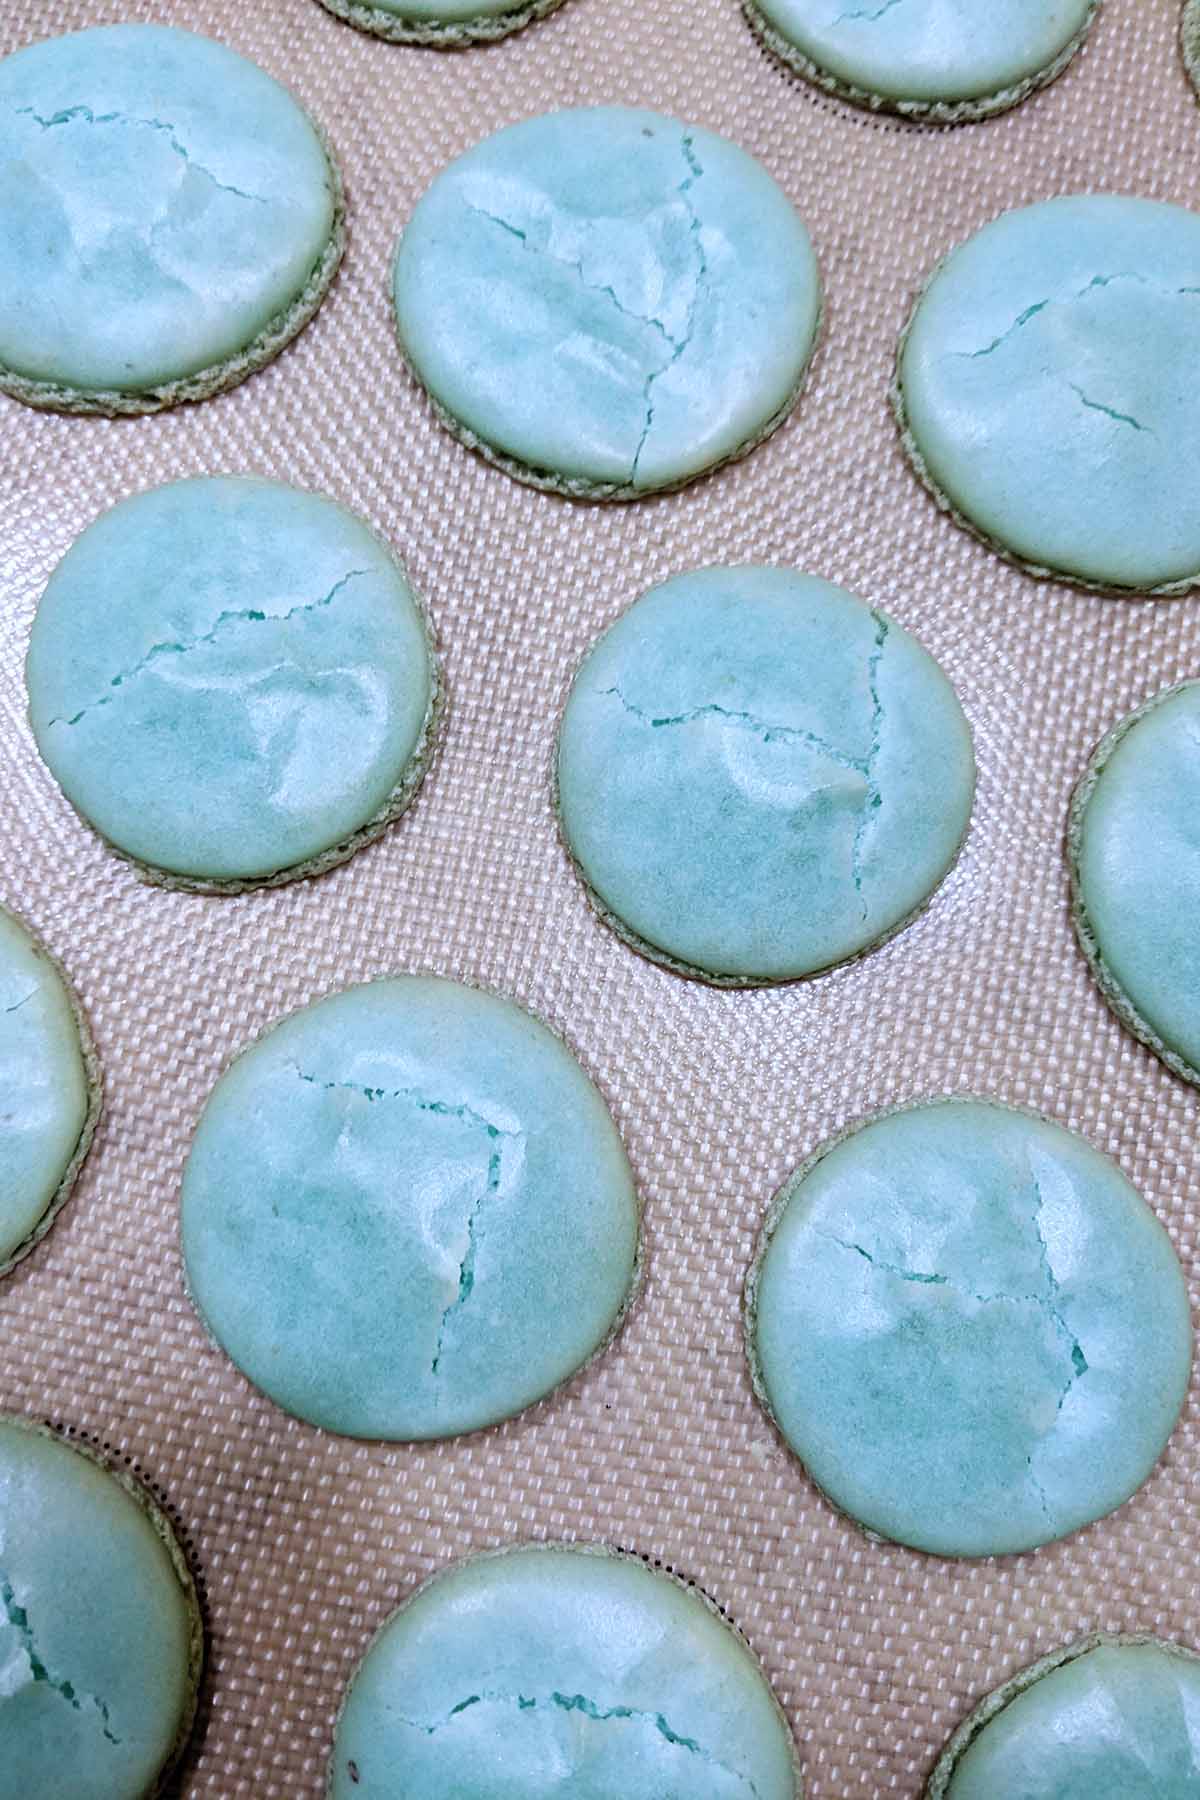
Here are a few common causes of cracked macarons:
1. Your oven is too hot: Most likely, cracked macarons are related to oven temperatures that are too hot. To fix this issue, you'll first want to purchase an oven thermometer.
This inexpensive cooking tool will allow you to see if your oven is heating to the temperature you're setting it to. Oftentimes, home ovens are known for heating hotter or colder than you set the temperature to.
2. Your meringue is under or over whipped: Both under-whipped and over-whipped meringue can result in cracked shells. This is because the meringue needs to have the proper structure in order to rise in the oven.
Weak meringue will not be strong enough to withstand the heat of the oven when baked, causing a cracked top. Alternatively, meringue that has been over-whipped won't have enough air incorporated to properly expand in the oven.
3. You didn't rest your macarons long enough: It's important to allow your macarons to rest on the counter until they've formed a skin.
Typically, you'll need to allow the shells to rest for about 45–60+ minutes on the counter until a skin has formed on top. If you live in a humid climate, this may take up to 90+ minutes.
4. You have air bubbles in the macarons: Did you put your macarons in the oven without banging them on the counter? Oftentimes, air bubbles are trapped in the macaron batter. Air bubbles occur naturally in the batter during the macaronage and piping process.
In order to avoid cracked macaron shells, you need to release and pop these air bubbles, otherwise, they will burst in the oven and ruin the shells.
If you're still having trouble, check out my troubleshooting guide for cracked macarons.
Here are a few common causes of wrinkled macaron shells:
1. You used too much cocoa powder: Using too much cocoa powder can cause your macarons to bake up wrinkled. Even 10 grams more can have a huge impact on the macaron shells. Be sure to follow the specific measurements listed in the recipe card below.
2. Your oven temperature is too low: To remedy this, you'll first need to purchase an oven thermometer, and place it in the center rack of your oven to double-check the temperature reading before baking the macarons.
Next, you'll need to play around with your temperature settings. I usually recommend heating your oven to 300°F (150°C) and adjusting from there. Pipe a set of 4–6 macarons on a baking sheet and test just a few macarons at a time (so you don't ruin a whole batch).
3. You over or under whipped the meringue: One of the most important techniques to learn, especially when making macarons, is how to whip egg whites to stiff peaks.
Egg whites that are under whipped or over whipped can result in wrinkled shells, weak tops, and macarons that will not properly rise.
4. You over macaronaged the batter: Another common issue related to wrinkly macaron shells is over macaronaging.
Macaronage is a term that refers to folding the dry macaron ingredients (almond flour and confectioners' sugar) into the meringue. This process smooths the mixture and helps the macarons bake with proper structure.
To properly macaronage, you should fold the batter until it reaches a lava-like consistency. You can test this by lifting your spatula and seeing if the batter drops almost like lava. Once it drops off the spatula, the batter that was dripped should fade back into the batter within 10–15 seconds.
If you're still having trouble, check out my troubleshooting guide for wrinkly macarons.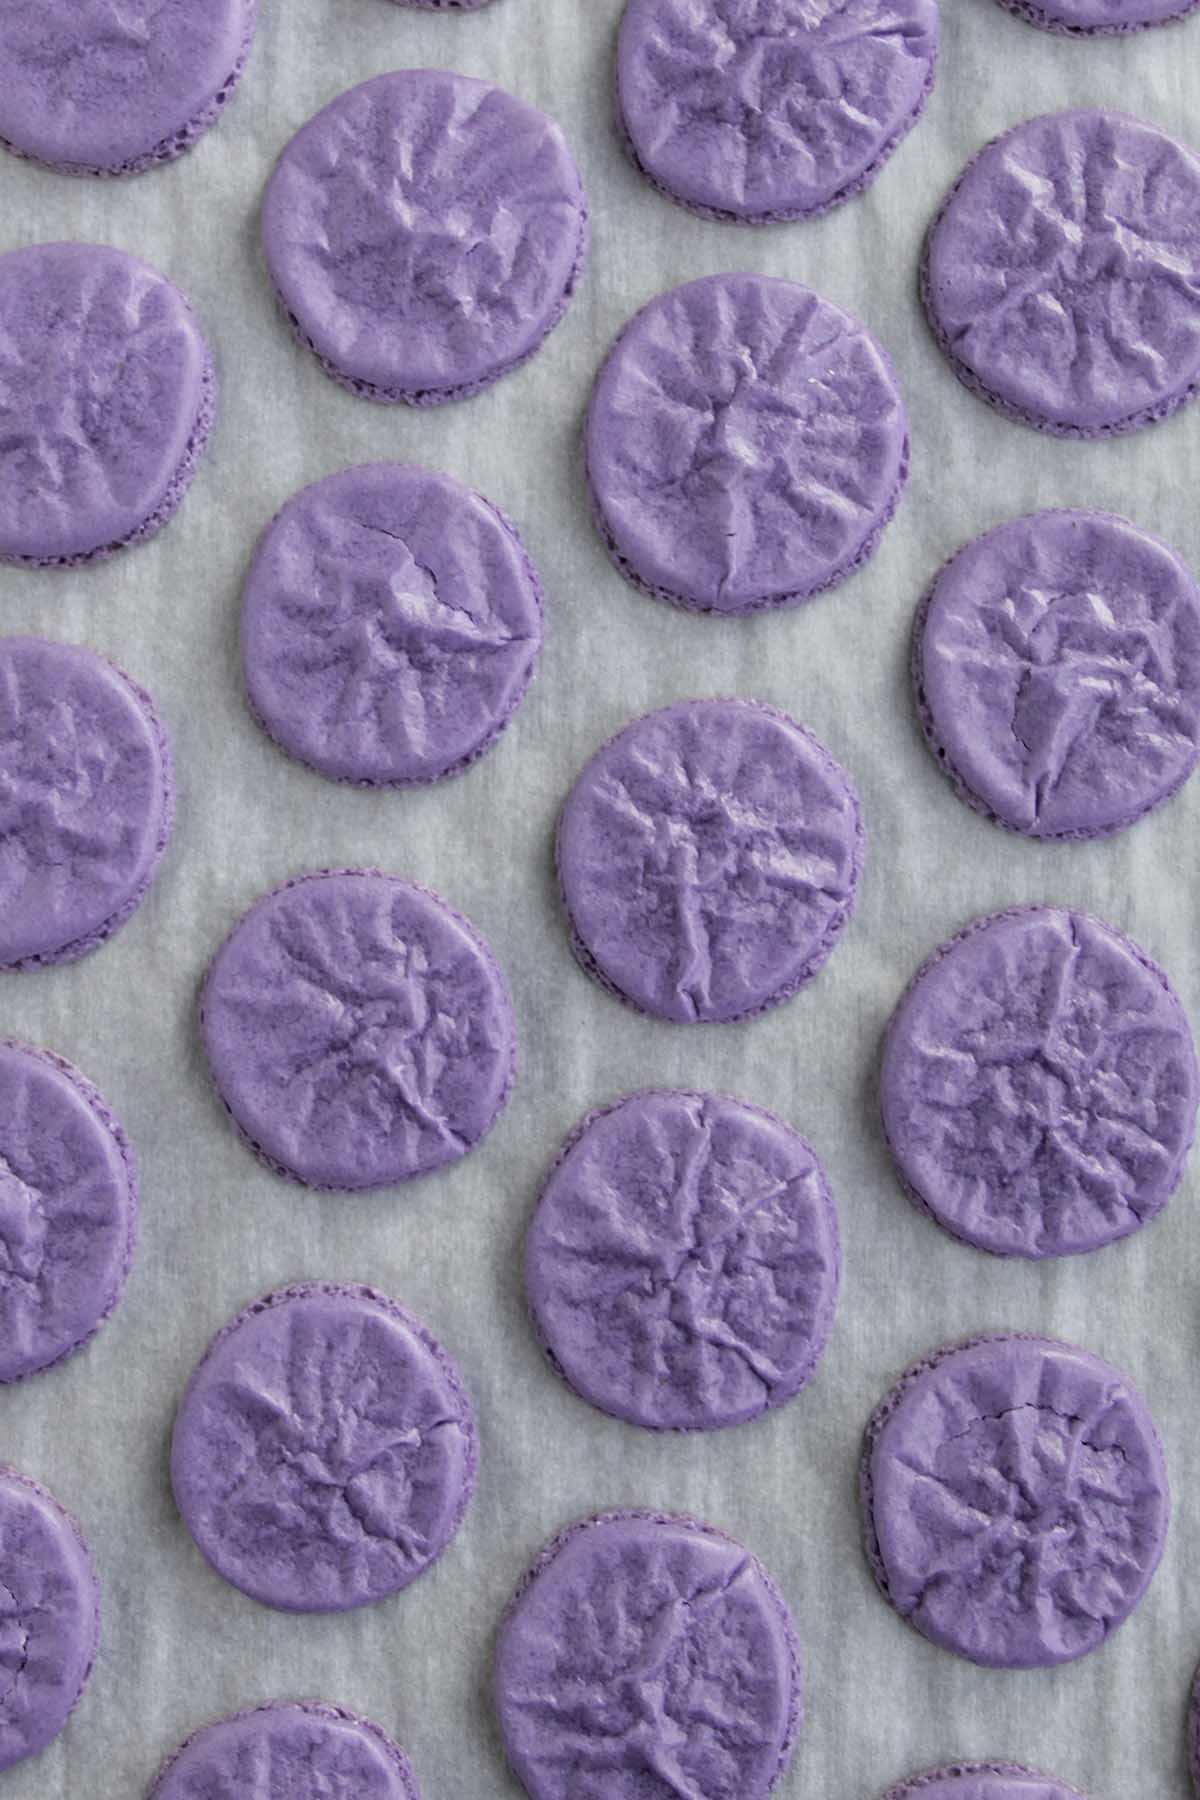
Here are a few common causes of weak/soft macaron shells:
1. Your meringue is under whipped. French meringue needs to be properly beaten in order to form a strong macaron. Make sure that you're beating the meringue to stiff peaks.
To test the meringue stiffness, pull the whisk out. A stiff peak should stand straight up (no curl at the tip). Signs that you're ready to test the stiffness include seeing lines left from the beaters in your eggs. In addition, the meringue starts to almost ball up inside the whisk attachment. You'll also know it's ready because you can fully flip the bowl over and nothing moves or falls out.
2. The macaron shells are underbaked. If you don't give your macaron shells enough time to bake in the oven, a sturdy outside will never develop. Make sure to check that the macarons are done before pulling them out of the oven. If you touch the shell and it wiggles or is still sticky/wet, you know they need to bake longer.
Chocolate macarons in particular need to be baked for a longer time in the oven compared to regular macarons. If you notice your chocolate macarons are fragile or have speckled tops after they cool, you likely need to bake them longer.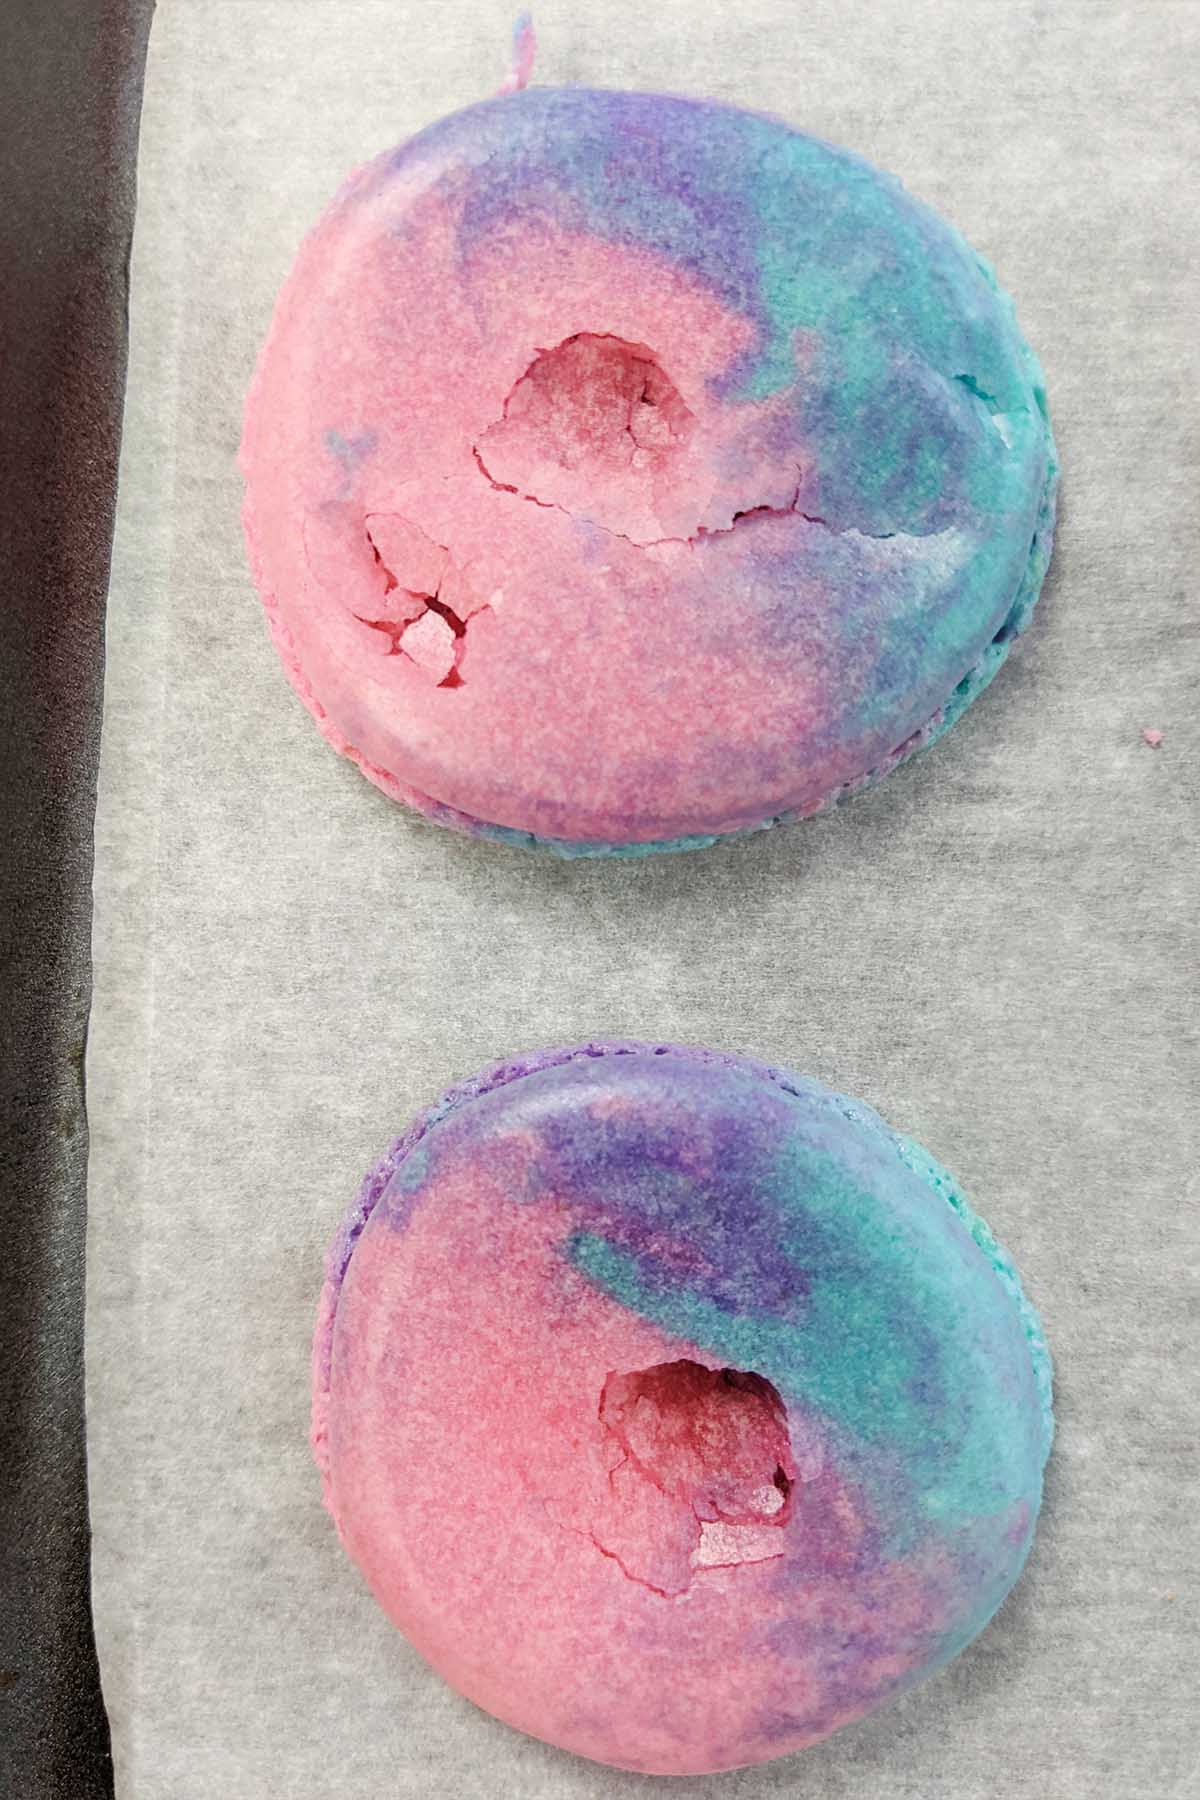
Here are a few common causes of small feet, no feet, or feet that have ruffled/spread too far:
1. Your oven temperature is too high or too low: Work on dialing in your oven temperature. You may have to try a few different oven temperatures in order to find the perfect temperature for your home oven. You can read more about my experiments with oven temperature if you're curious to learn more.
2. You didn't rest the macarons long enough: Typically, you'll need to allow the shells to rest for about 45–60+ minutes on the counter until a skin has formed on top. If you live in a humid climate, this may take up to 90+ minutes.
3. You over or under macaronaged the batter: If you've over macaronaged your batter, it will be too thin and runny. This will cause your macarons to fall flat with small feet or even no feet. An overworked batter can also cause the macarons to spread out horizontally, rather than rising up vertically.
If you're still having trouble, check out my troubleshooting guide for macaron feet.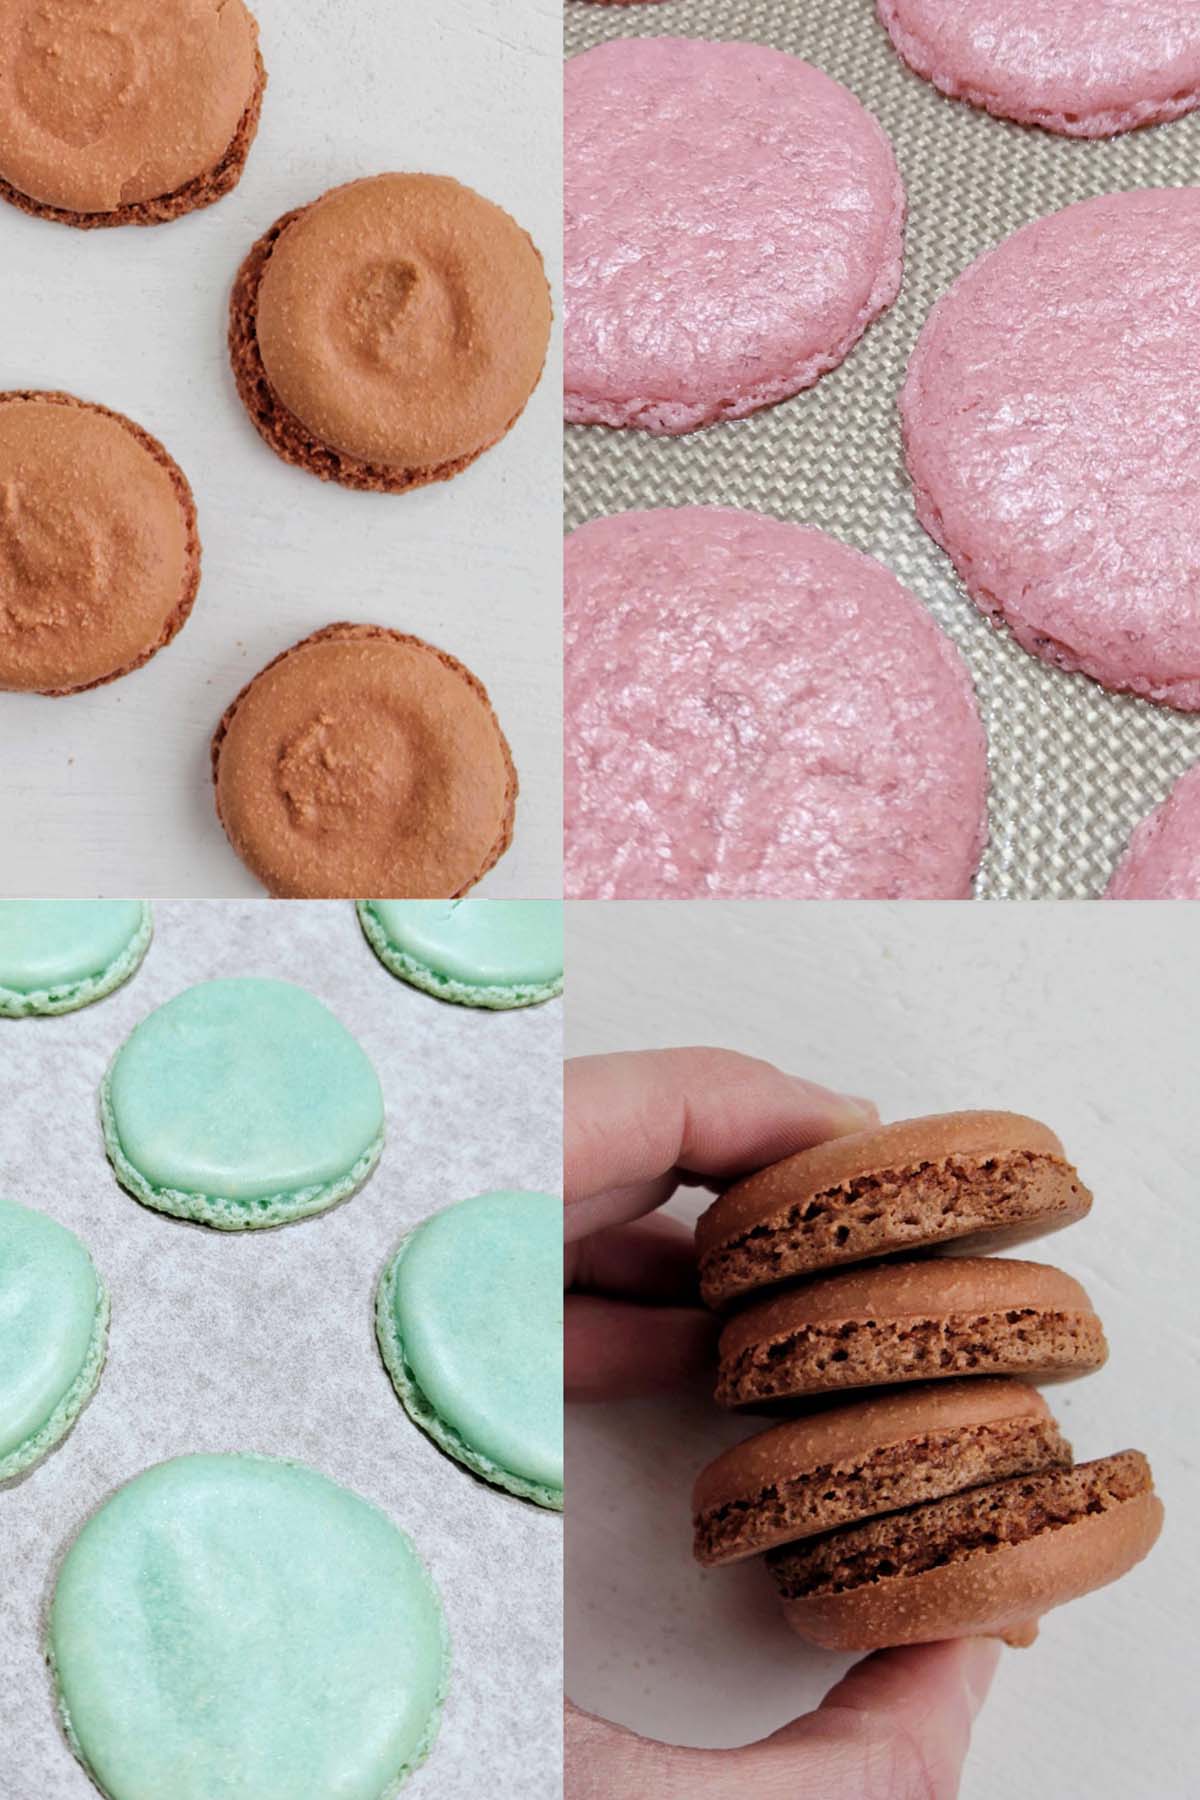
Here are a few common causes of hollow macaron shells:
This is the last troubleshooting problem you should worry about. Before perfecting your macarons so they don't have hollows, make sure all the other properties are correct:
1. The meringue is over and under whipped: In order to prevent hollows, you need the perfect consistency of meringue before starting the macaronage process. Oftentimes, adding in acid, like cream of tartar, can help stabilize your meringue and allow more time for the air to get incorporated.
2. The batter was over or under macaronaged: The macaronage stage, which refers to working your batter to the proper consistency, is a technique that takes a while to master. If you've worked the batter to a lava-like consistency and you're still getting hollow shells, try working it a tad less.
3. Your oven temperature is too high or low: Oven temperature plays a big role in hollow macarons. Unfortunately, due to the capabilities of home conventional ovens, you have to test and play around with the temperature to get your macaron shells perfect. Most recipes suggest baking macarons anywhere from 275°F (135°C)–325°F (163°C). Test these temperature ranges out with your home oven and an oven thermometer to see what works best.
If you're still having trouble, check out my troubleshooting guide for hollow macarons.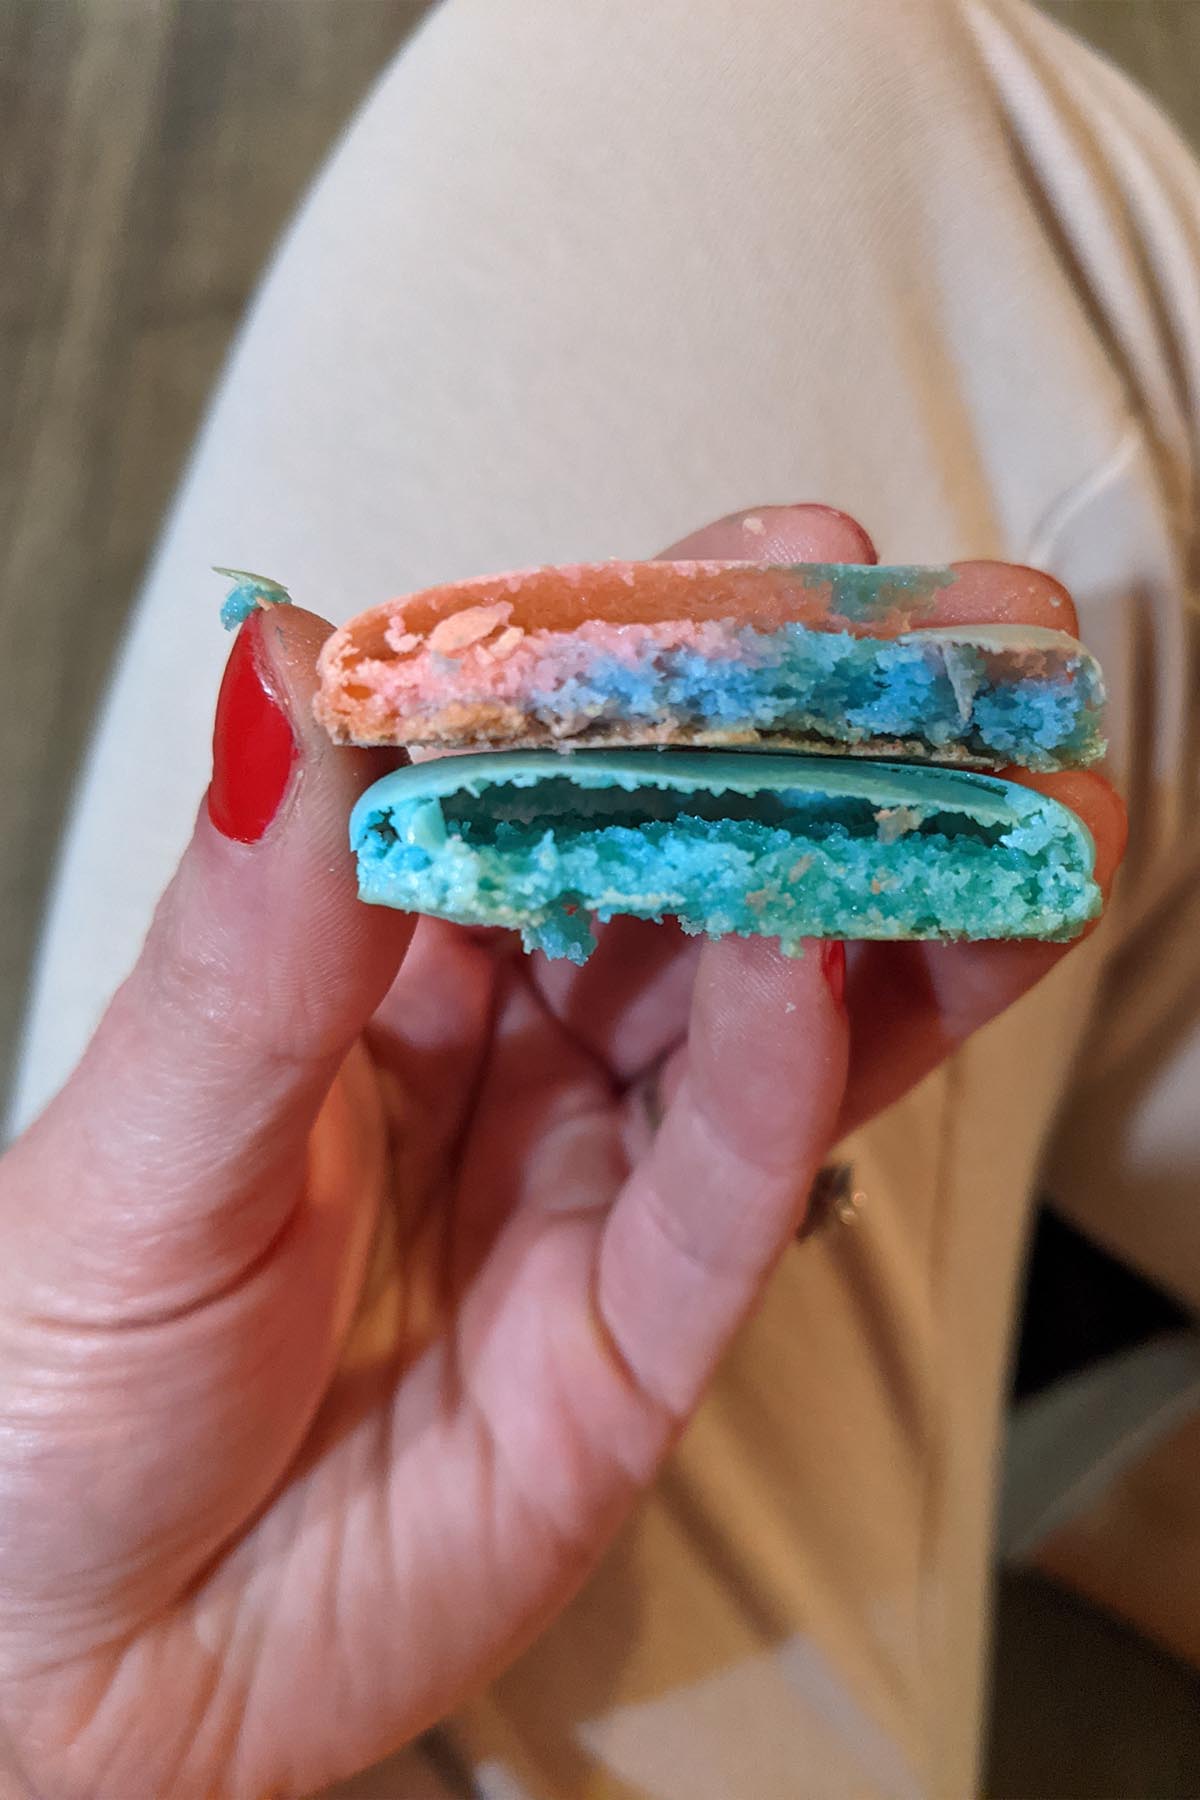
More Easter Macaron Recipes

Love this recipe? Please leave a 5-star ⭐⭐⭐⭐⭐ rating in the recipe card below. Have questions as you're cooking? Leave a comment below, and I'll help!
Cadbury Egg Macarons
Equipment
- stand mixer with whisk attachment
- light colored baking sheets
- silicone mat or parchment paper
- pastry bag with ½ inch (1.3 cm) round tip
- food safe paint brush
Ingredients
Macarons
- 112 grams egg whites
- 140 grams super fine almond flour
- 140 grams confectioners' sugar
- ½ teaspoon cream of tartar
- 126 grams granulated sugar
- 2 drops light blue gel food coloring
- ½ teaspoon cool water for garnish (optional)
- 1 drop brown gel food coloring for garnish (optional)
Cadbury Egg Ganache
- ½ cup semi sweet chocolate morsels
- 2 tablespoons unsalted butter softened to room temperature and cut into 1 tablespoon (14 grams) pieces
- 6 tablespoons heavy cream
- 1 cup Cadbury milk chocolate mini eggs finely pulsed in a food processor
- 1 teaspoon vanilla extract
- ¼ teaspoon fine sea salt
Instructions
For the Macarons
- Separate egg whites from yolks, and allow egg whites to come to room temperature.
- Measure dry ingredients using a kitchen scale. Double-sift the almond flour and confectioners' sugar together in a large mixing bowl.
- Wipe down the mixing bowl and whisk attachment with a little white vinegar on a paper towel to remove any leftover oils.
- Prepare your piping bag with a ½ inch (1.3 cm) round tip. Push part of the side of the piping bag into the piping tip to ensure nothing leaks out. Set the bag inside a tall glass, and pull the remaining top of the piping bag out over the outside of the glass to make pouring the batter easy and clean.
- Add room temperature egg whites and cream of tartar to a stand mixer bowl fitted with a whisk attachment. Whip on medium-low speed until the eggs are very foamy, about 3 minutes. Add a third of the granulated sugar at a time, allowing the mixer to beat in each batch of sugar for about 45 seconds before adding in another batch.
- Once all the granulated sugar is incorporated, turn the mixer speed to medium-high and allow the egg whites to continue to whip until stiff peaks form, about 10–11 minutes. Add light blue gel food coloring once the egg whites reach soft peaks stage. Once at stiff peaks, you'll notice the meringue starts to ball up inside the whisk and is glossy. To test the meringue stiffness, pull the whisk out. A stiff peak should stand straight up (no curl at the tip). You'll also know it's ready because you can fully flip the bowl over, and nothing moves or falls out. Make sure not to overbeat the meringue at this stage (this is when the egg whites look dull or curdled).
- Pour the sifted almond flour and confectioners' sugar into the meringue mixture, and gently fold them together using a silicone spatula. Continue until all the meringue is fully incorporated and no dry bits of almond flour remain on the bottom of the bowl.
- Begin working the batter until everything is fully incorporated (this is called the macaronage process). Slowly spread the mixture along the side of the bowl, then wipe it back down. Be sure to do this gently. Repeat until the mixture has reached a smooth, shiny, flowing consistency. You can test this by lifting your spatula and seeing if the batter drops almost like lava. Once the batter drops back into the bowl, it should take about 10–15 seconds for the ribbon that formed to "disappear" back into the rest of the batter. Don't over macaronage the batter or the macarons will not properly bake in the oven.
- Pour the batter into the prepared piping bag. Hold the bag vertically, and pipe 1.5 inch (3.8 cm) circles. Once you have reached the desired size, release the pressure on the bag, and twist your wrist without lifting up. Continue until no batter remains.
- Tap the sheet pan down the counter a few times to release any air bubbles. Pop the air bubbles with a toothpick. Allow the batter to sit on the counter and dry for 60+ minutes until a thin "skin" develops, and you can touch the tops without ruining the macaron. This resting time will vary depending on the humidity (they may take up to 90+ minutes to dry if you live in a humid or rainy environment). While the macarons are drying, heat oven to 300°F (150°C).
- Bake one sheet at a time on the center rack of the oven for 19–23 minutes. If you notice the macarons are browning or dulling in the oven, once the macarons have formed feet and a solid top (this usually takes at least 10 minutes) place a piece of aluminum foil over the macarons for the remaining cooking time. You can test that the macarons are done by gently touching the edge and the feet of the macarons. If the shell wiggles, is sticky, or wet, the macarons need to bake longer. Remove macarons from the oven, and allow to cool on baking sheet until completely cooled.
- Optionally, to decorate the shells, mix water and brown food coloring in a small bowl. Using a food safe paint brush, dip the brush into the food coloring mixture, and flick it over the macaron shells to create small dots on top. Allow the food dye to fully dry before moving the shells.
For Cadbury Egg Ganache
- Place chocolate morsels and butter in a medium-sized heat-safe bowl.
- Heat heavy cream in the microwave on 100 percent power (high) for 1–2 minutes, until the heavy cream begins to steam and bubble but doesn’t boil over. Immediately, pour the heavy cream over the chocolate. Make sure all of the chocolate is submerged under the cream. Allow the mixture to sit, without stirring, for 3 minutes.
- Add Cadbury eggs, vanilla extract, and fine sea salt to the chocolate, and whisk until the mixture is smooth and fully blended.
- Transfer ganache to a shallow container, and press plastic wrap against the surface of the ganache (to prevent a skin from forming on top). Place the ganache in the fridge, and allow the mixture to cool until it’s firm enough to pipe, about 30 minutes–1 hour.
- Match up macaron shells so they are paired with a similar size/shaped shell. Pipe the filling on one side of the macaron shell using a ½ inch (1.3 cm) round piping tip. Gently place the matching shell on top of the filling.
- Mature the macarons with the filling in an airtight container in the refrigerator overnight. This will allow the macarons to slightly soften and develop a deeper flavor.
- Store the macarons in an airtight container in the refrigerator for up to 7 days. To serve, allow the macarons to come to room temperature.
Notes
- You'll notice the meringue starts to ball up inside the whisk while it's mixing.
- Pull the whisk out of the mixer. A stiff peak should stand straight up (no curl at the tip).
- You can fully flip the bowl over, and nothing moves or falls out.
- The meringue feels sturdy (not flimsy).


Nichole
My first ever attempt at making macarons and I was successful! Sure they aren’t all perfectly sized, and I used too big of a piping tip but that’s ok. They still turned out great and the instructions were so helpful. Now that I’ve made my first batch, I can’t wait to to try other recipes!